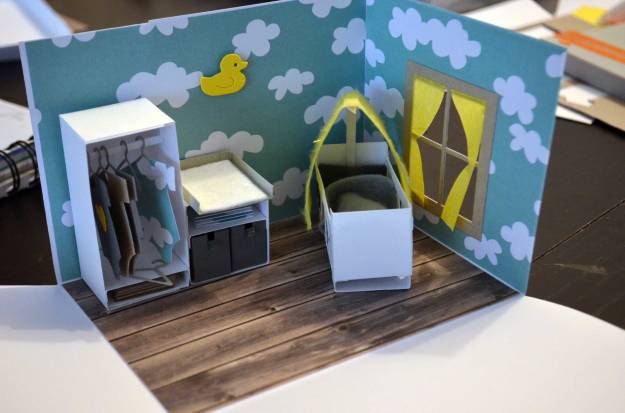
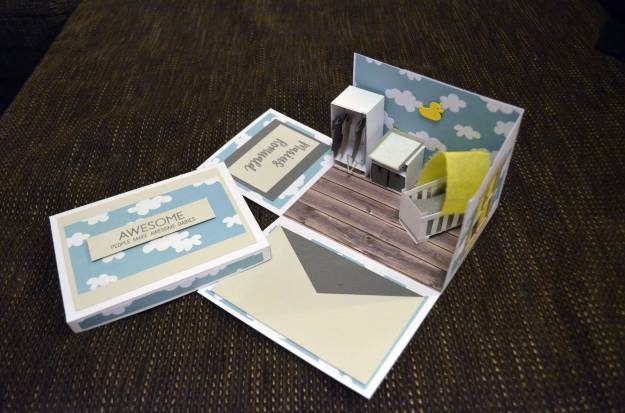
Diese hübsche Explosionsbox habe ich vor längerer Zeit für den neugeborenen Cousin meiner Kinder gebastelt.
A while ago I made this pretty exploding box for my kid’s newborn cousin.

How To
Am liebsten würde ich ja jedes Mal, wenn ein Baby in meinem Umfeld zur Welt kommt, eine solche Explosionsbox basteln – aber leider sind die Dinger sehr empfindlich und kaum mit der Post zu verschicken, ohne dabei Schaden zu nehmen. Außerdem muss man wirklich viel Zeit (an die acht bis zehn Stunden brauche ich etwa für eine – meist verteilt auf mehrere Tage) in Explosionsboxen investieren, und die habe ich neben meinen Kindern und meinem Beruf oft nicht (man will ja auch noch irgendwann schlafen …). Der kleine Marius, für den ich diese Box gemacht habe, lebt glücklicherweise in meiner Nähe – und die Zeit fand sich auch.
I wish I could make explosive boxes every time friends or family members have a baby but unfortunately, these creations are pretty delicate. Mailing them is a great risk – they could easily be damaged. And it takes a lot of time making these boxes (I need around eight to ten hours, over the course of several days), time I often just don’t have because besides caring for my kids and working on my job I do also want to sleep a few hours … Luckily, little Marius, for whom I made this exploding box, lives just around the corner – and I even found the time for crafting.
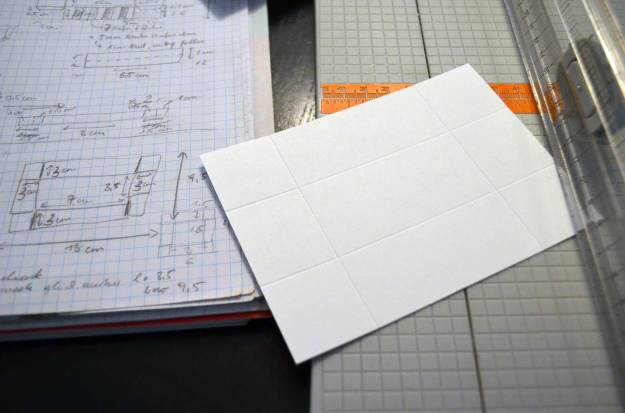
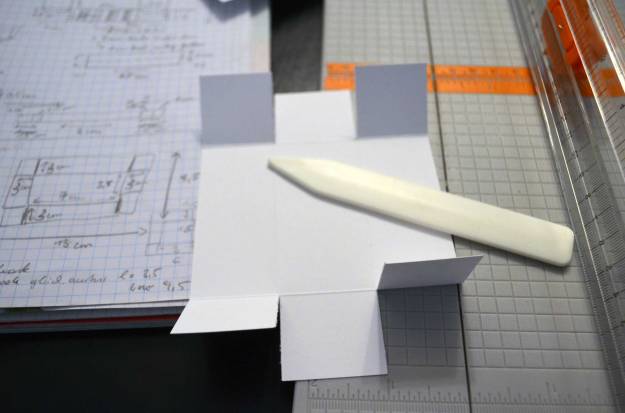
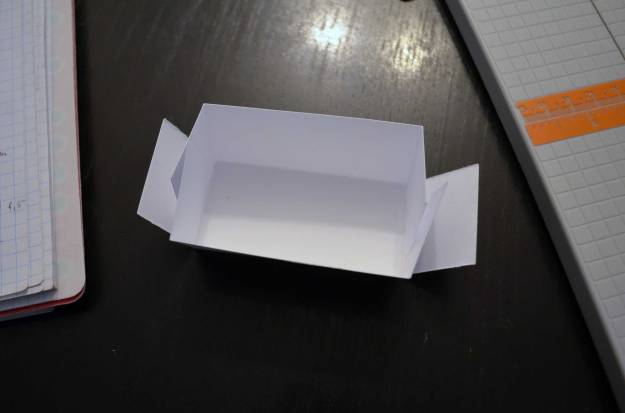
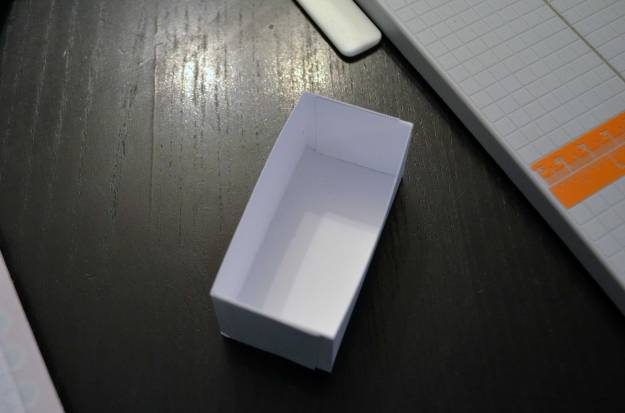
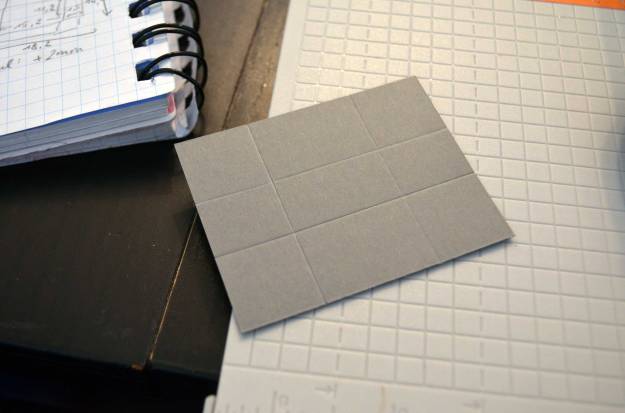
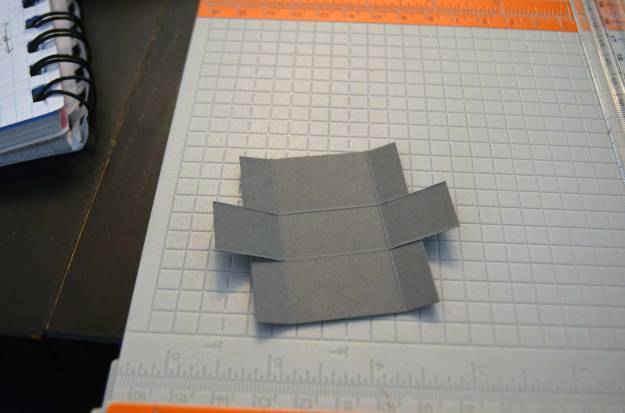
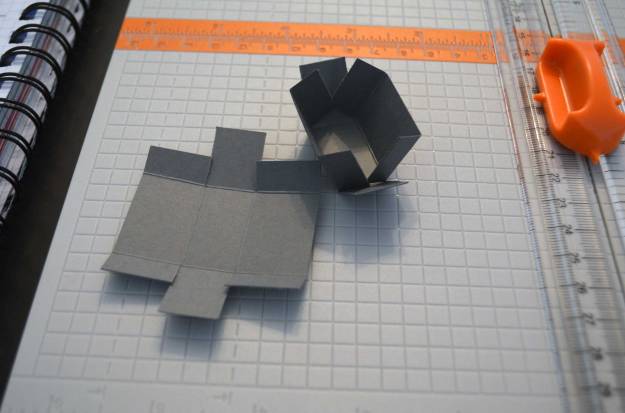
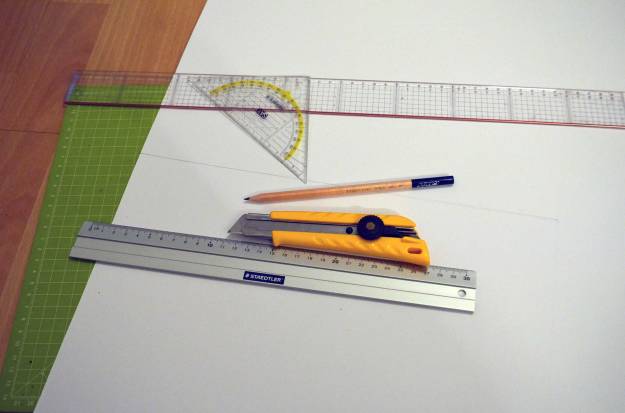
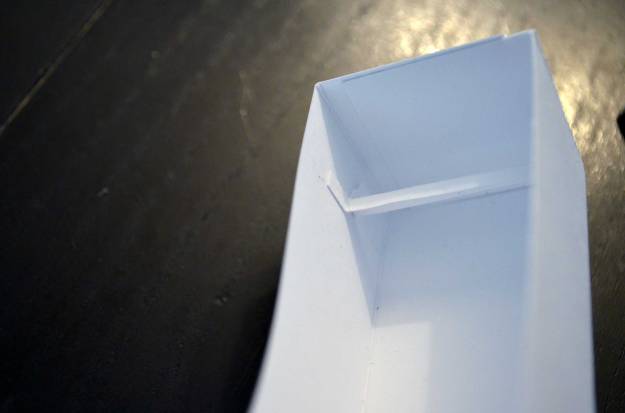
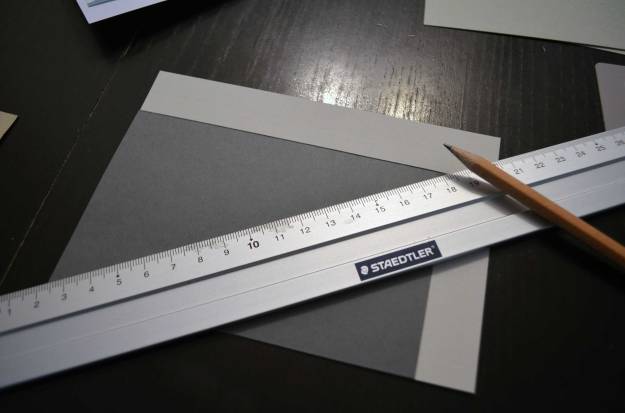
Ich habe mit dem Zeitaufwendigsten begonnen: den Möbelstücken. Zuerst habe ich einen simplen Kleiderschrank gemacht (und zwar ungefähr so, wie ich eine Schachtel mache – eine Anleitung zum Download gibt es hier). Ich habe mir einen Plan gezeichnet und danach gearbeitet. Die Falzlinien habe ich mit der Falzklinge meines Papiertrimmers gemacht, die Schnitte mit der Schneideklinge. Mit starkem Flüssigkleber habe ich die Laschen festgeklebt.
I started with the most time-consuming part: the furniture. First I made a simple wardrobe (which works similar to making a simple box. You can download instructions how do make a box here). Beforehand, I drew a plan (you can see the sketch on the image below). I used my papertrimmer for scoring and cutting and a strong liquid adhesive for glueing everything together.
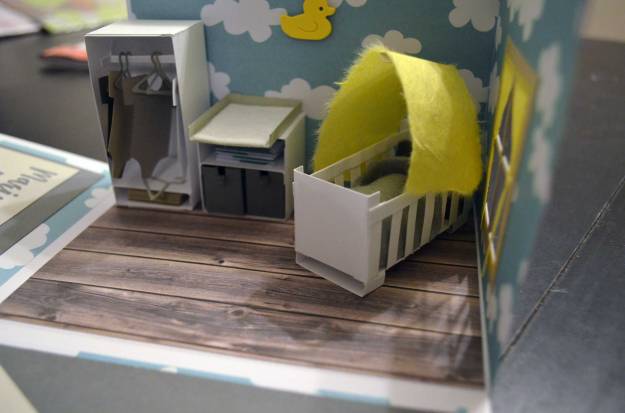
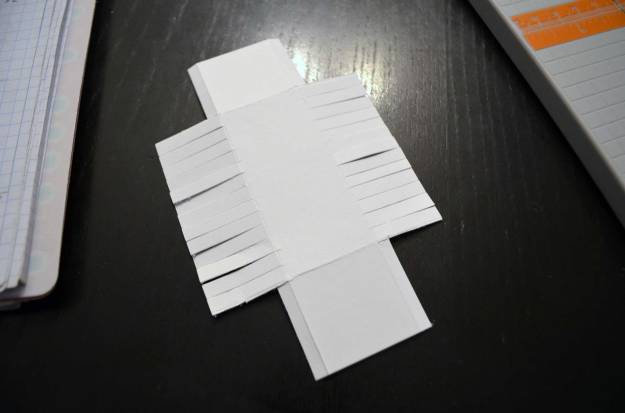
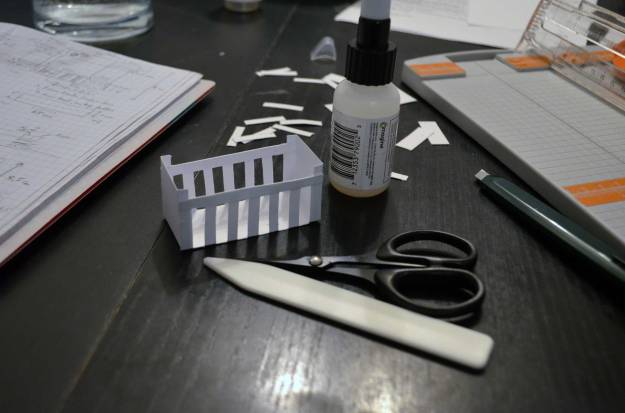
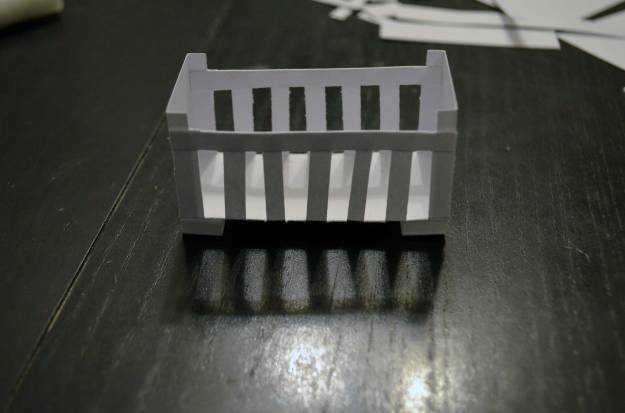
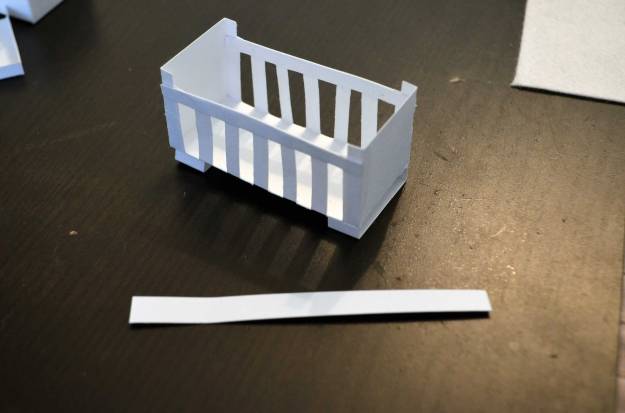
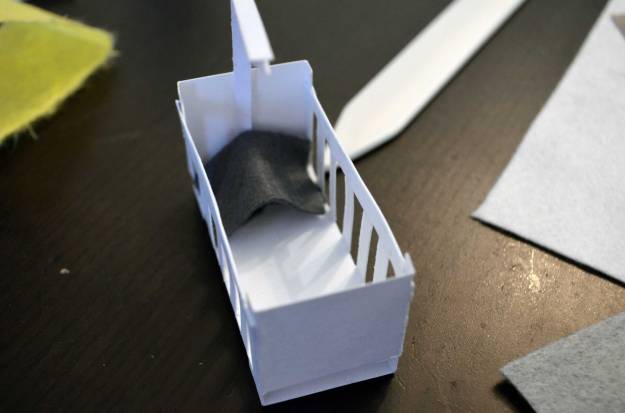
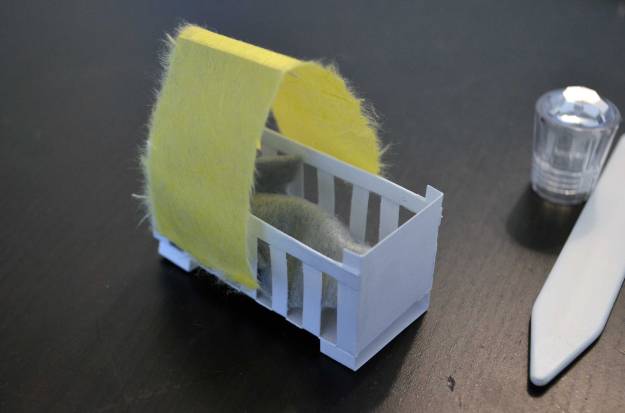
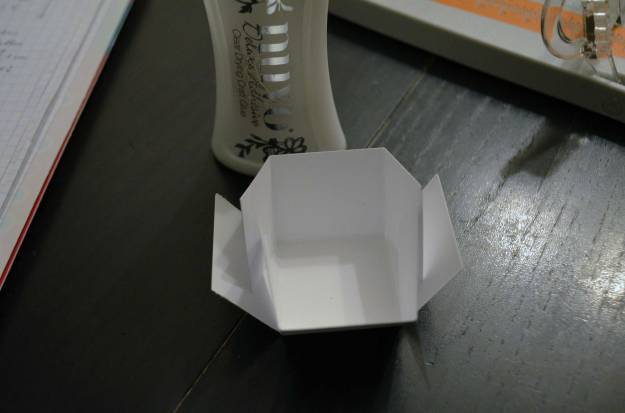
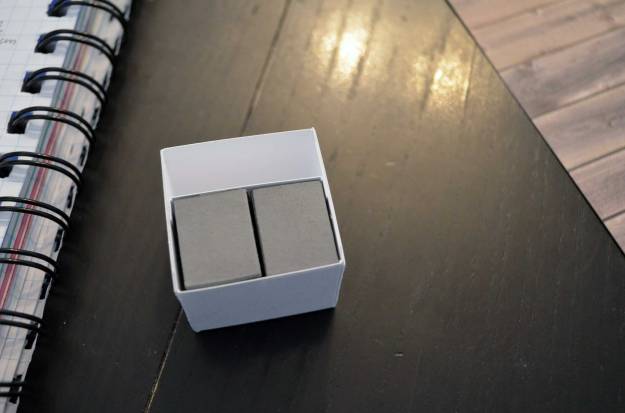
Dieses lustige Ding hier ist das Gitterbettchen.
This funny thing is the crib.
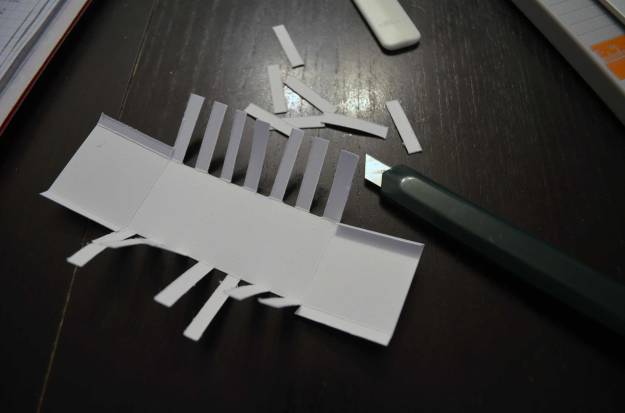
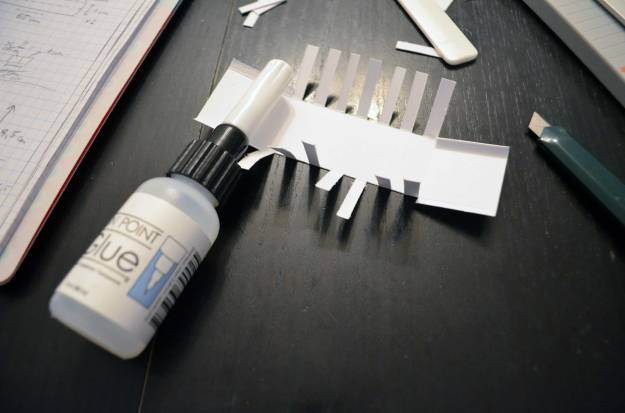
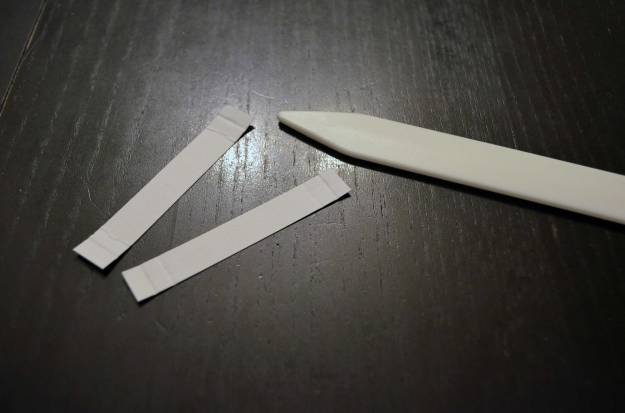
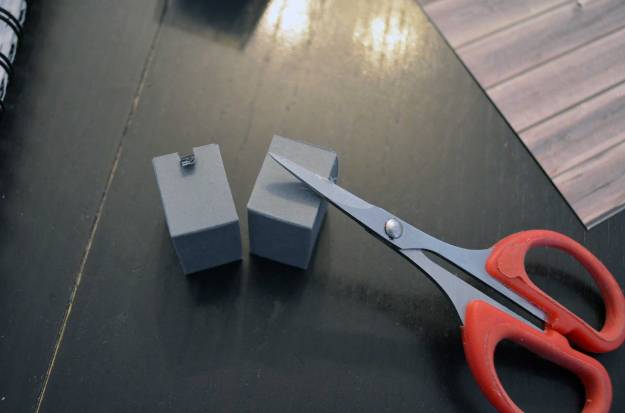
Die Seitenwände des Gitterbetts sollten tatsächliche Gitterstäbe werden. Beim Planen habe ich also ausgerechnet, wie lang eine Seitenwand sein muss, um eine ungerade Anzahl an Stäben (in meinem Fall sieben) unterzubringen. Ungerade deshalb, weil nur dann gewährleistet ist, dass das Kopf- und Fußteil mit einem der Stäbe verklebt werden kann. Die Wände habe ich also in dreizehn, je fünf Millimeter schmale Streifen geschnitten, von denen ich dann jeden zweiten weggeschnitten habe. Zum Schneiden habe ich einen Cutter benutzt.
To create posts for the cot’s sides, I worked out how long a side has to be in order to provide enough space for an uneven number of posts. Why uneven? Because only then it’s possible to link the head and foot boards to one of the posts. I cut the sides into thirteen strips (each five millimetres in width) and removed every other strip. I used a cardboard cutter to do so.
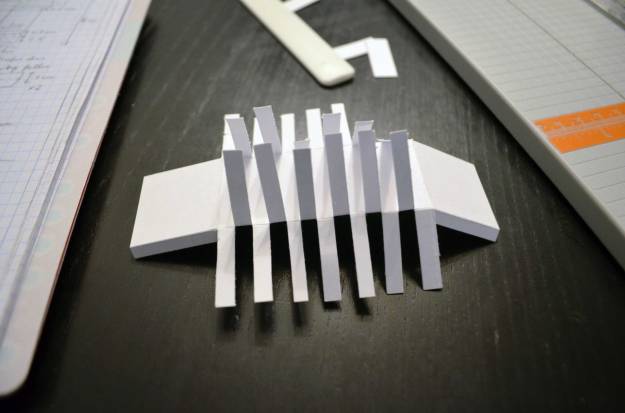
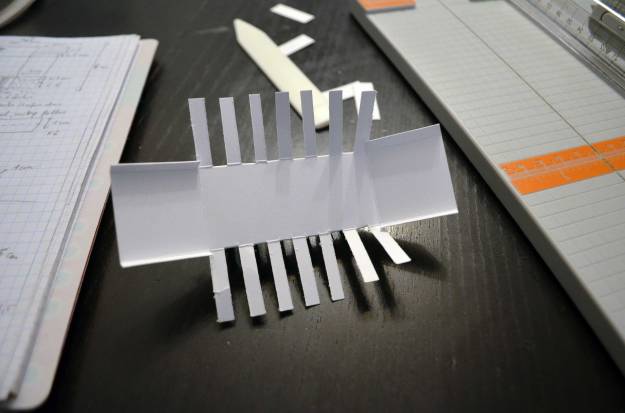
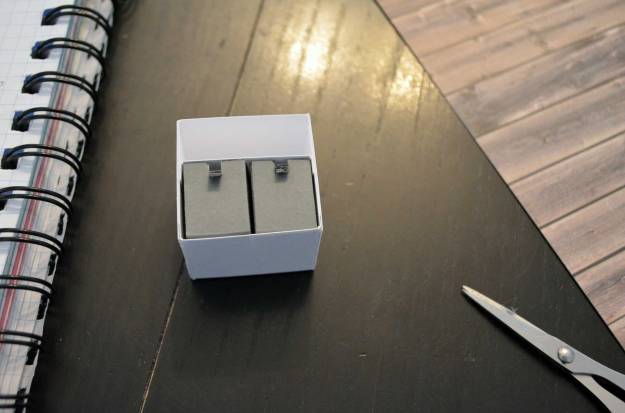
Anschließend habe ich den jeweils äußersten Streifen mit dem Kopf- bzw. Fußteil verklebt.
Next, I adhered head and footboard to those strips nearest to them.
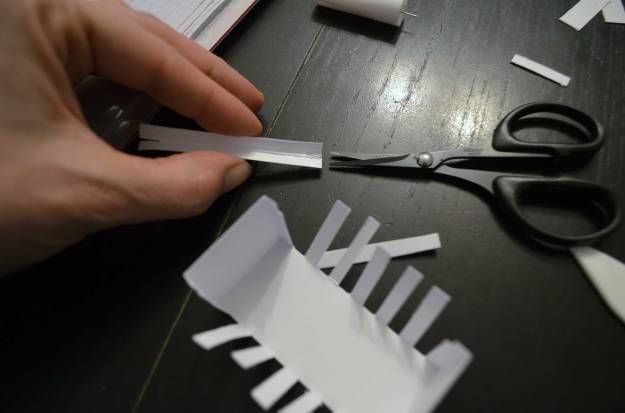
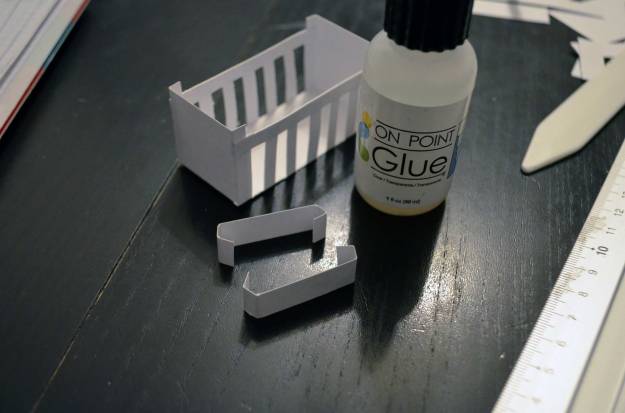
Um die restlichen Streifen zu fixieren, habe ich einen Streifen Cardstock (in derselben Länge wie das komplette Bett) der Länge nach mittig gefaltet, mit einer Schere an beiden Enden etwas eingeschnitten und innen mit Flüssigklebstoff bestrichen. Das Ganze habe ich dann auf die Streifen aufgesetzt.
To secure the remaining strips, I folded a strip of cardstock (in the same length as the bed itself) lengthwise, used scissors to make a small slit at both ends, and put some liquid glue on the inside. I then put everything on top of the strips.

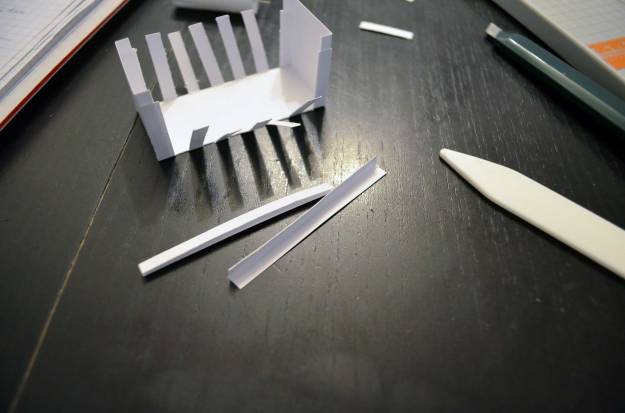
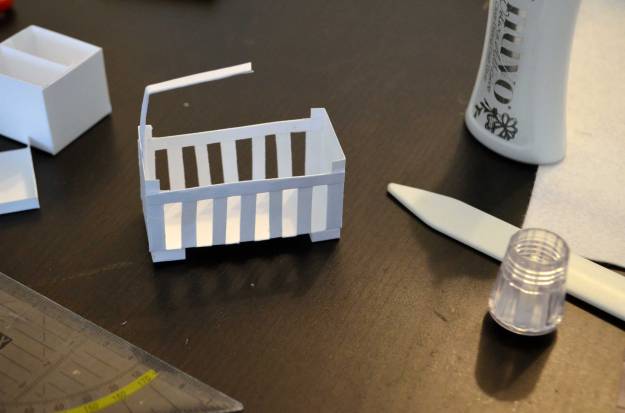
Die Füße des Bettchens habe ich aus zwei Cardstockstreifen gemacht, die zwei Zentimeter länger sind als das Bettchen breit ist. Links und rechts habe ich bei fünf bzw. zehn Millimetern einen Falz gemacht, diesen jeweils im rechten Winkel umgeknickt und alles dann mit Flüssigkleber auf der Unterseite des Bettchens festgeklebt.
For the cot’s stand, I used two strips of cardstock, each two centimetres longer than the width of the cot. I scored the strips on each side at five and ten millimetres, folded in a right angle, and used liquid adhesive to stick everything to the bottom of the cot.
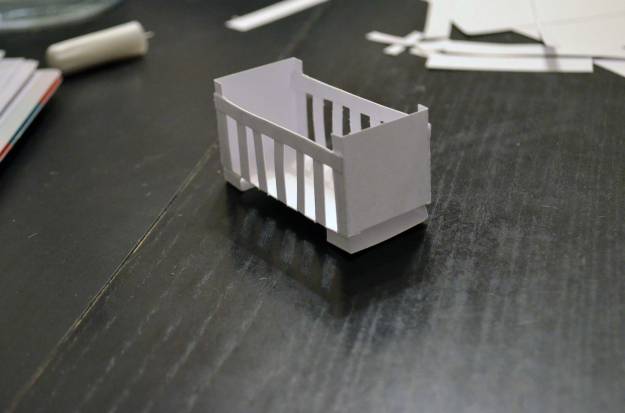
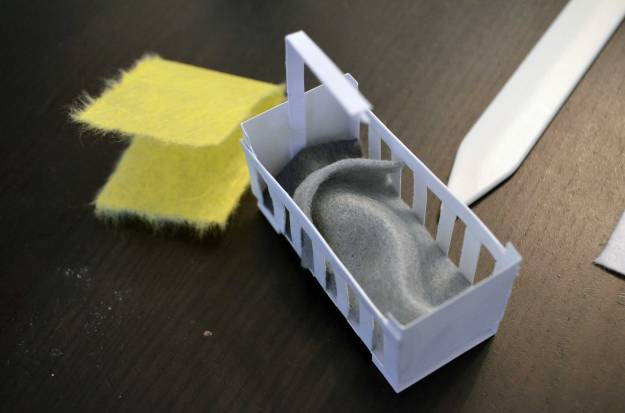
Mit noch einem Cardstockstreifen habe ich eine Vorrichtung gebastelt, an der ich einen kleinen Betthimmel angebracht habe. Ich habe ihn der Länge nach einmal mittig gefaltet (sorgt für Stabilität) und dann nach Augenmaß an einer Stelle geknickt. Den unteren Teil habe ich mit Flüssigklebstoff an der Innenseite des Kopfteils befestigt.
I used another strip of cardstock to make kind of a holder for the bed canopy. I folded it lenghtwise for stability and folded it (I followed my gut feeling when it came to decide where to fold). I adhered the lower part of the holder with some liquid glue to the inside of the head board.
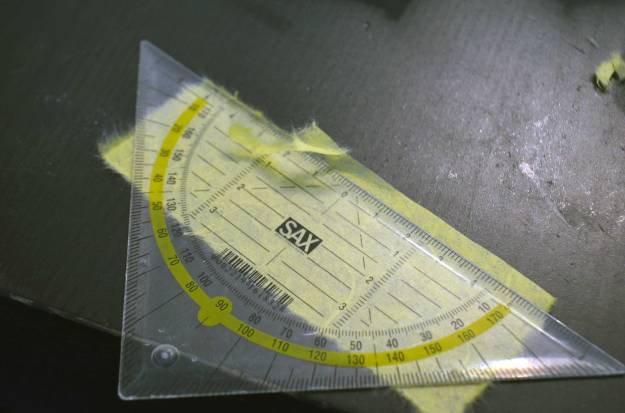
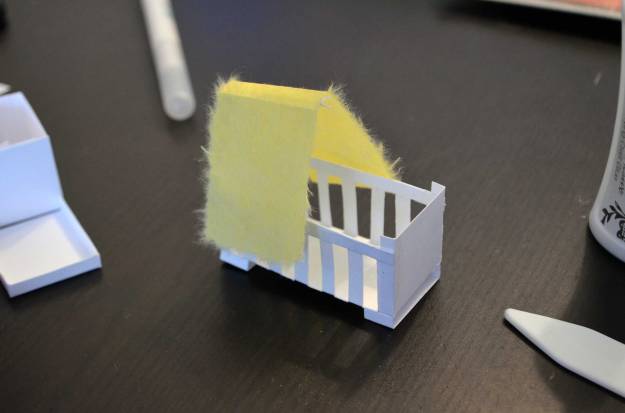
Der Betthimmel ist aus einem Stück Faserseide gemacht. Ich habe mit Hilfe eines Lineals die Kanten gerissen, um weiche, faserige Ränder zu erhalten – das funktioniert bei Faserseide wunderbar.
The bed canopy is made from a very fibrous paper. In German it’s called „Faserseide“; I couldn’t find a translation for it. The closest thing to it is mulberry paper, but mulberry paper is much more expensive than Faserseide (and I don’t think Faserseide is handmade – as mulberry paper is). What’s important is the fibrous quality of the paper. When ripped instead of cut the edges will get soft and fuzzy – the look I was going for. For ripping, I used a ruler.
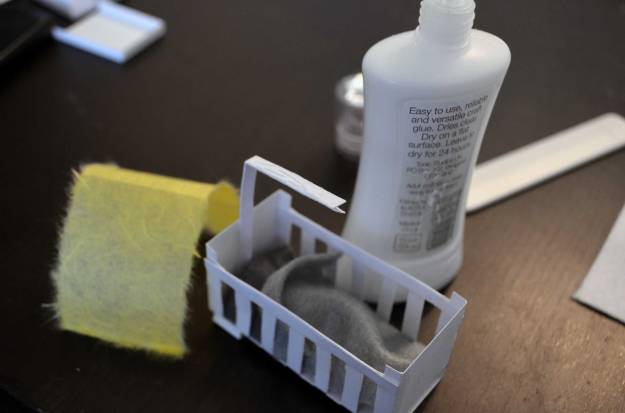
Mit etwas Flüssigkleber habe ich den Betthimmel auf der Vorrichtung angebracht.
I used a bit of liquid adhesive to stick the canopy to the holder.
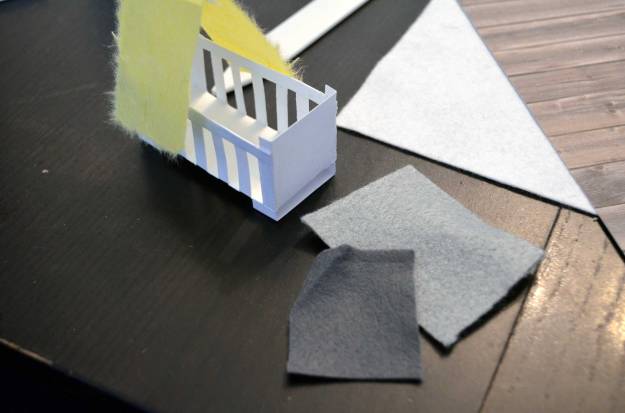
Für Kissen und Bettdecke habe ich zwei kleine Stücke Bastelfilz verwendet.
The pillow and the blanket are made from two small pieces of felt.
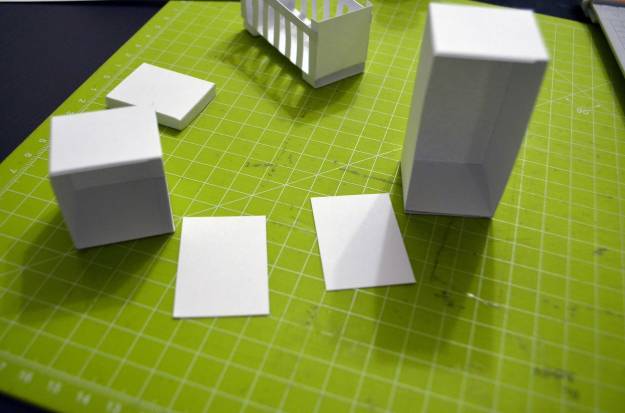
Neben Kleiderschrank und Gitterbett habe ich noch eine Wickelkommode gebastelt.
Besides the wardrobe and the cot, I also made a baby changing table.
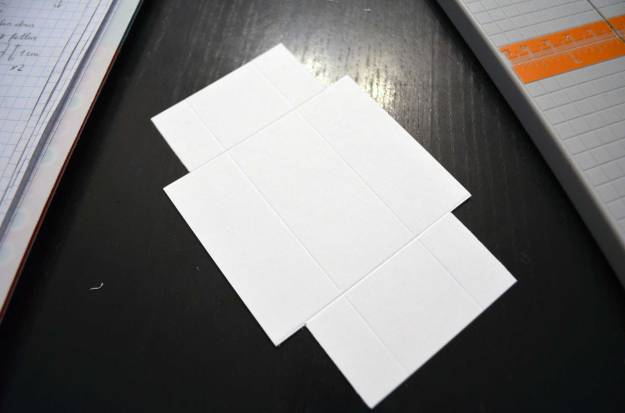
Kleiderschrank und Wickelkommode haben jeweils noch ein Fach bekommen.
I also made a shelf for the wardrobe and the changing table.

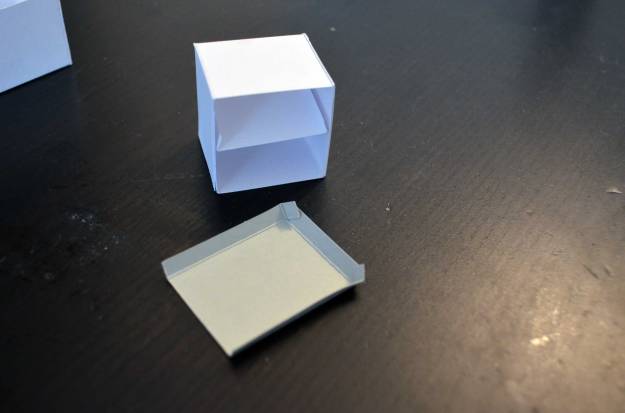
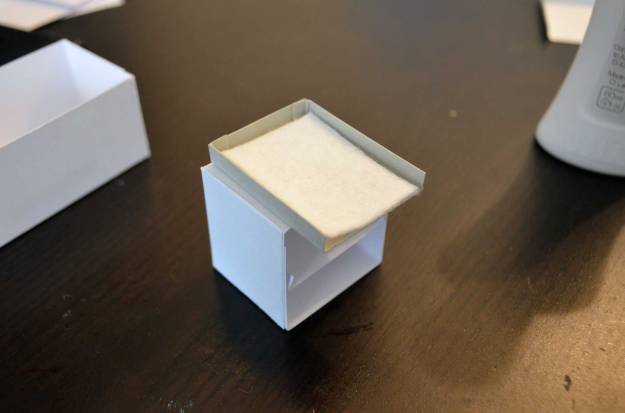
Damit aus der kleinen Kommode auch tatsächlich ein Wickeltisch wird, braucht es natürlich eine Wickelauflage – wiederum habe ich eine Art Minischachtel mit sehr niedrigen Wänden – nur drei! – gemacht. Ein Stück Filz habe ich auch noch eingeklebt.
To create a real baby changing table and not just a dresser, I needed to make a table’s leaf. For that, I made a tiny box with three low sides. I glued a piece of felt into it.
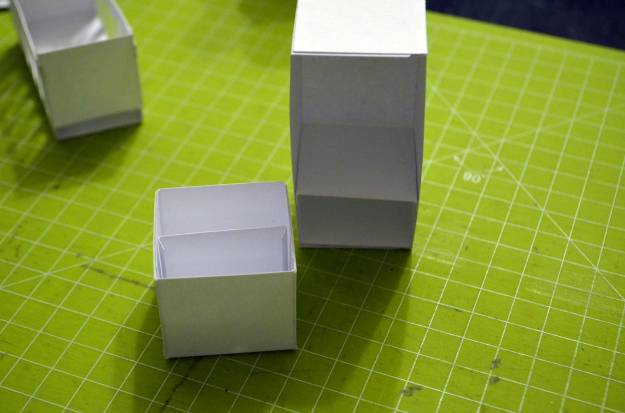
Die Wickelkommode hat sogar kleine Schubladen – die man auch noch bewegen kann.
I made little drawers (that are movable!) for the changing table.
Für die Griffe habe ich einfach kurz einmal geschnippelt.
The handles are made with a little snip.

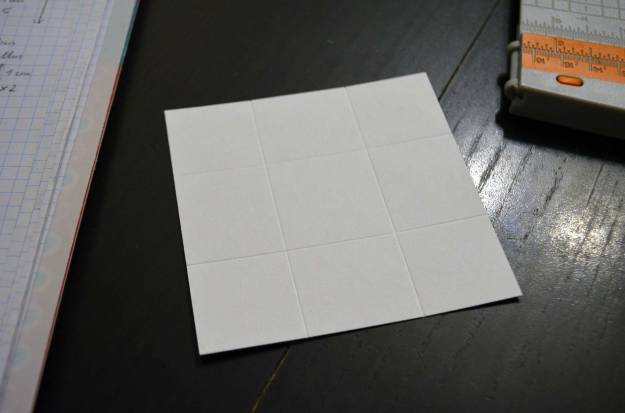
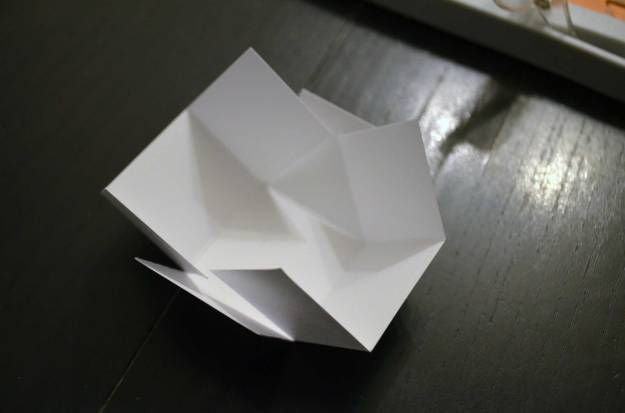
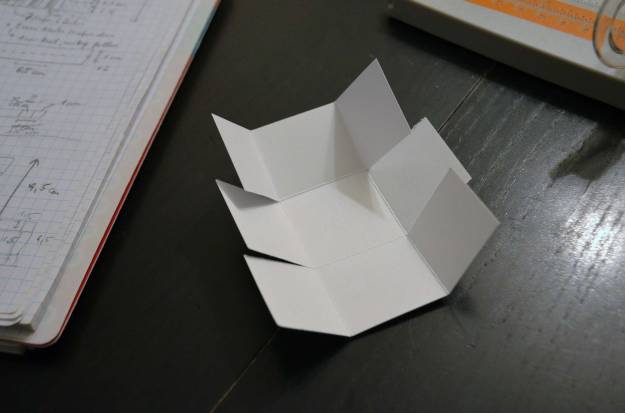
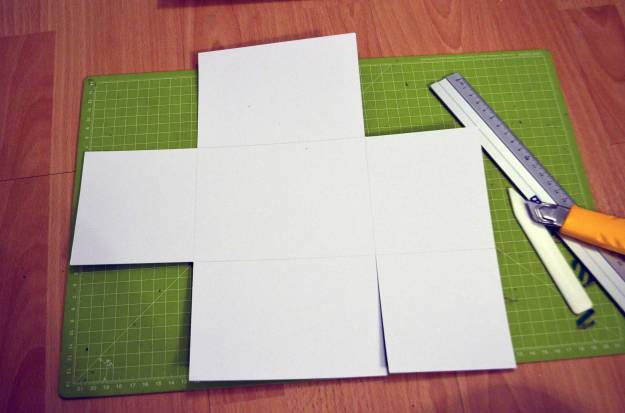
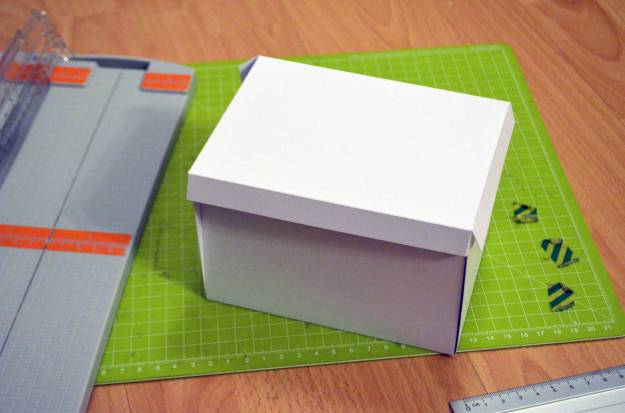
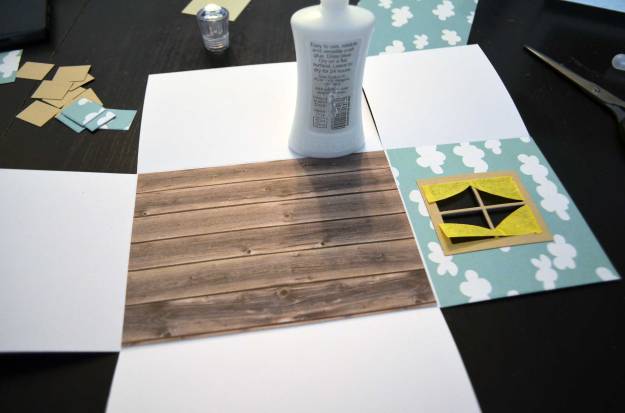
Nachdem die Möbel so gut wie fertig waren (Kleinigkeiten haben zu diesem Zeitpunkt noch gefehlt), habe ich mich an die Box selbst gemacht. Eine ausführliche Anleitung zum Download gibt’s übrigens hier, weshalb ich an dieser Stelle nur Bilder sprechen lasse.
After I almost finished the furniture (some details were added later on), I made the box itself. You can download a detailed tutorial here, so at this point I just show you some images – after all, pictures speak louder than words.
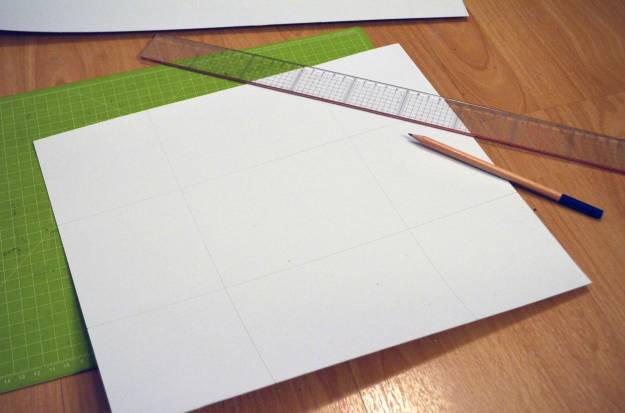
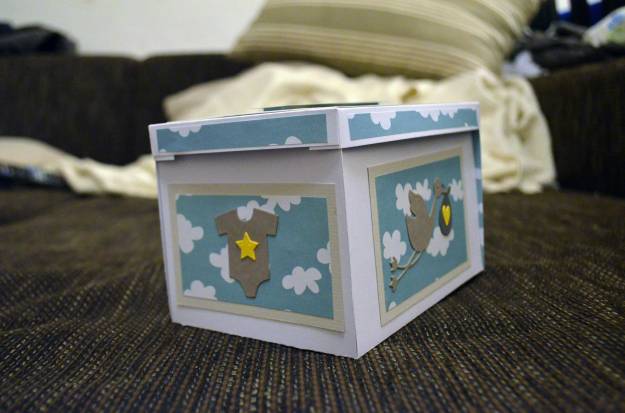
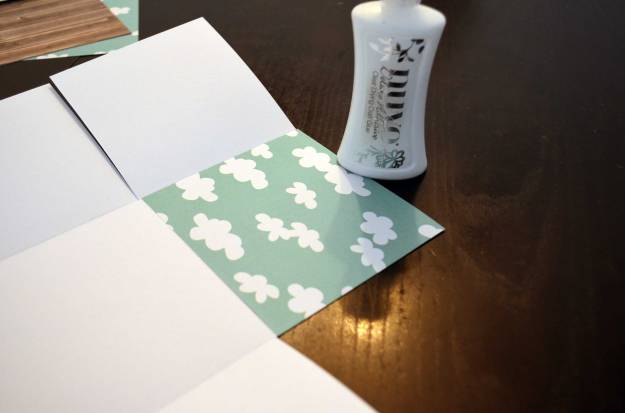
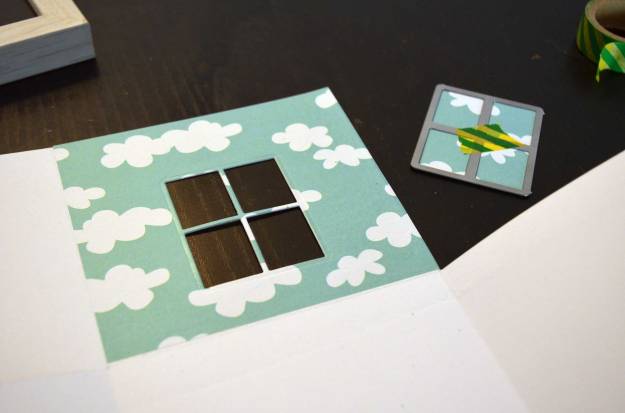
Den fertigen Rohling habe ich mit Designpapieren verziert.
I decorated the finished box with patterned paper.

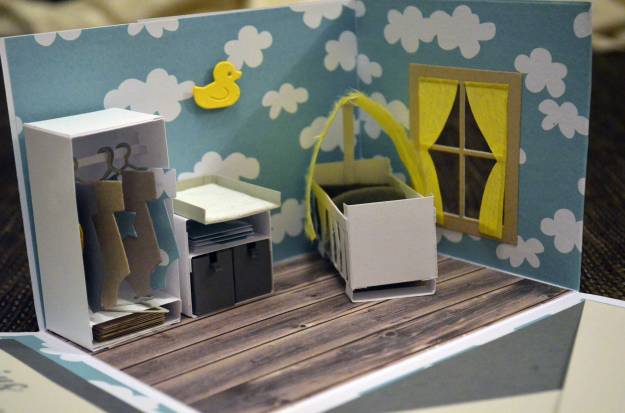
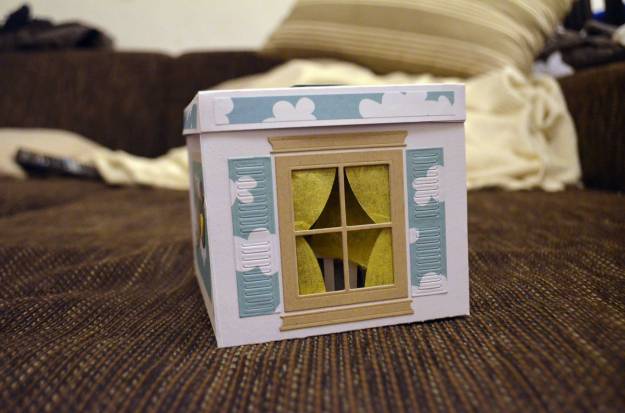
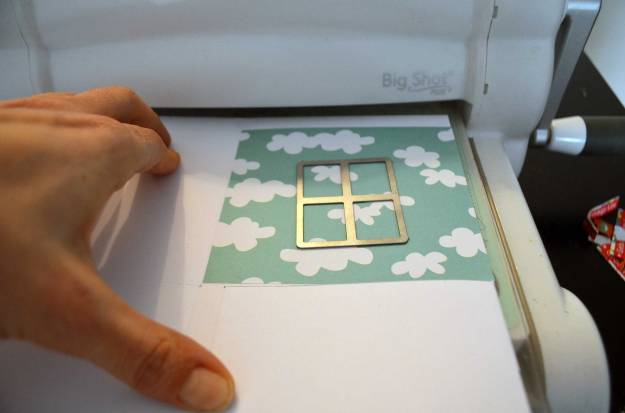
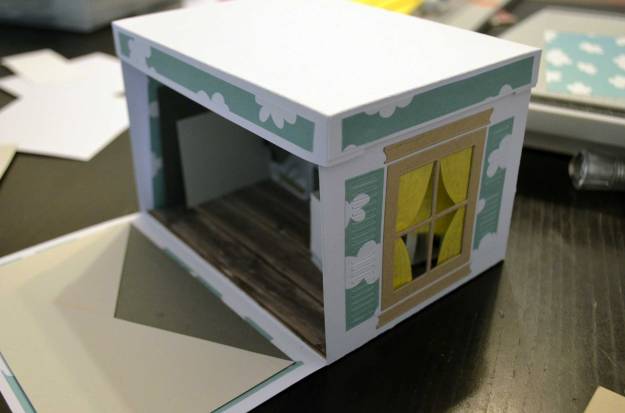
Aus einer Seite der Box habe ich ein Fenster gestanzt.
I used some dies to cut out a window from one side of the box.

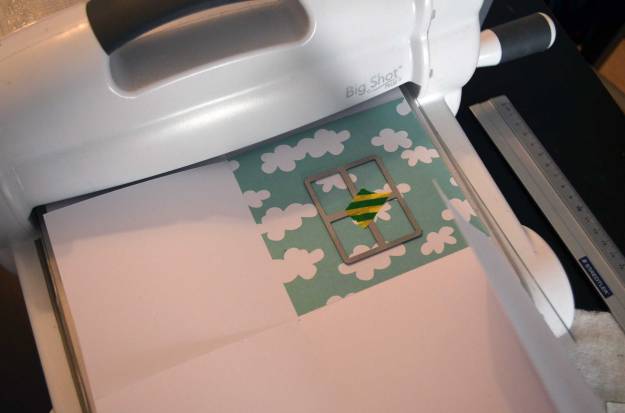
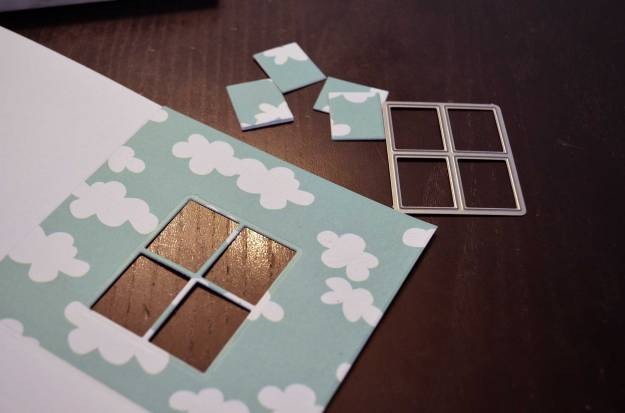
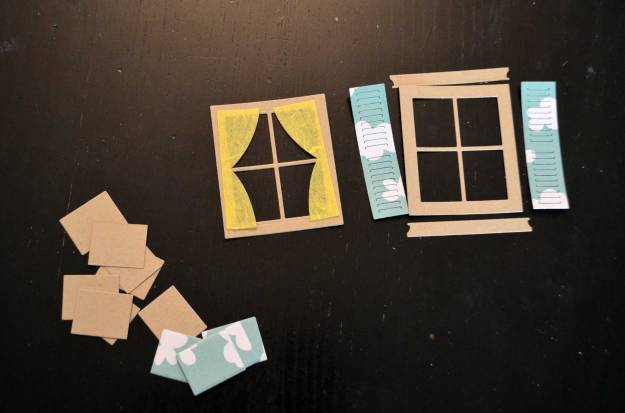
Aus Cardstock-, Designpapier- und Faserseideresten habe ich noch weitere Fensterteile ausgestanzt. Außerdem habe ich die Reste, die beim Stanzen entstanden sind, aufbewahrt – sie habe ich verwendet, um Schrank und Kommode zu füllen.
I die-cut several parts of the window from scraps of cardstock, patterned paper, and this fibrous paper I used for the bed canopy. I kept the leftovers from the die-cutting as I used them to fill the little wardrobe and changing table.
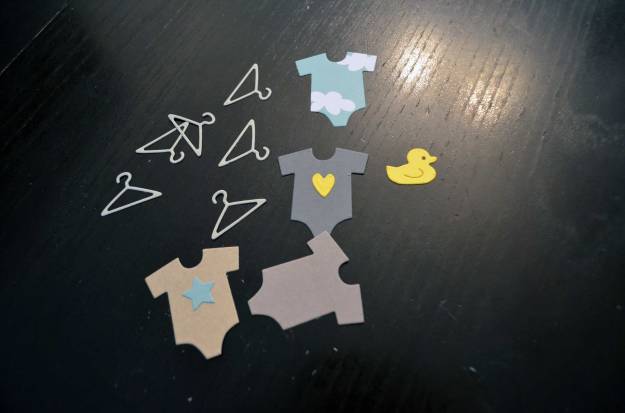
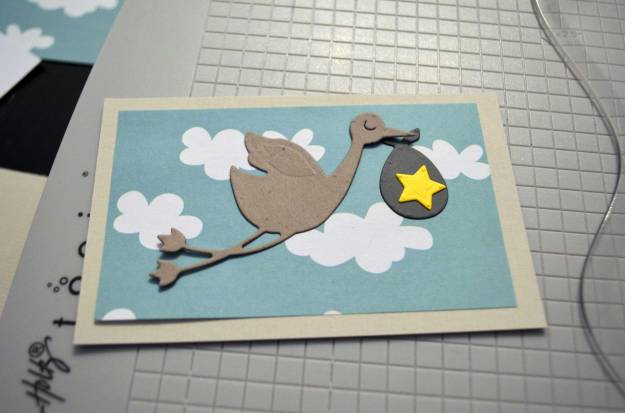
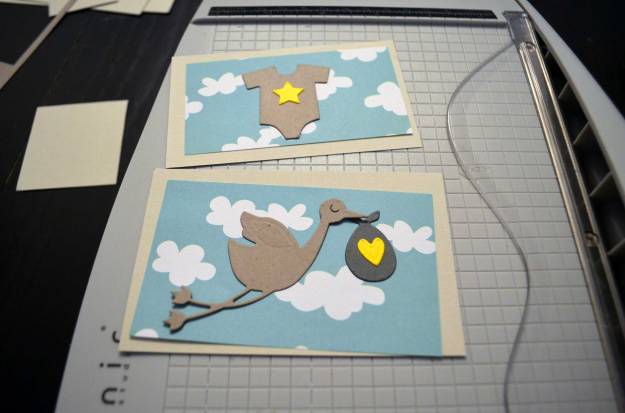
Aus weiteren Papierresten habe ich Kleiderbügel, Bodys und kleine Dekoteile gestanzt.
I also die-cut hangers, onesies, and little decorations from scraps.
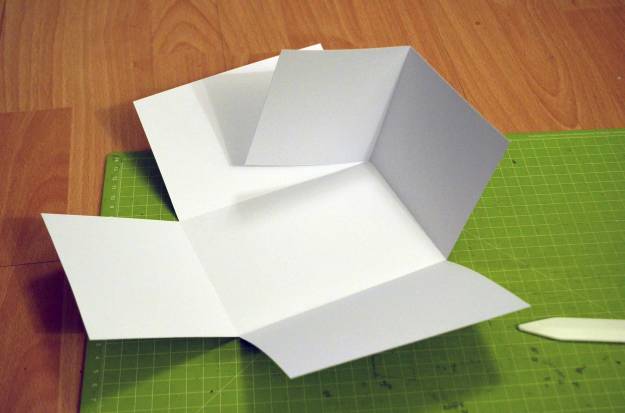
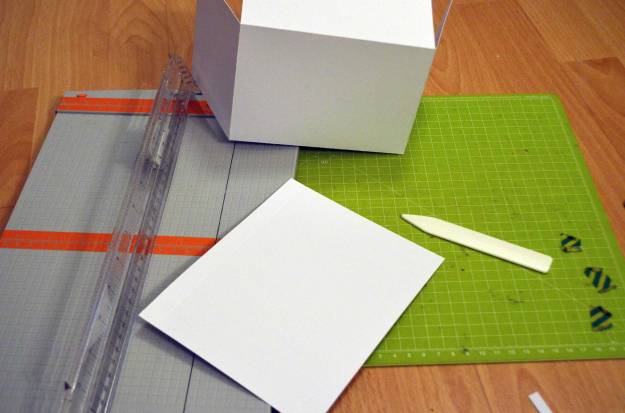
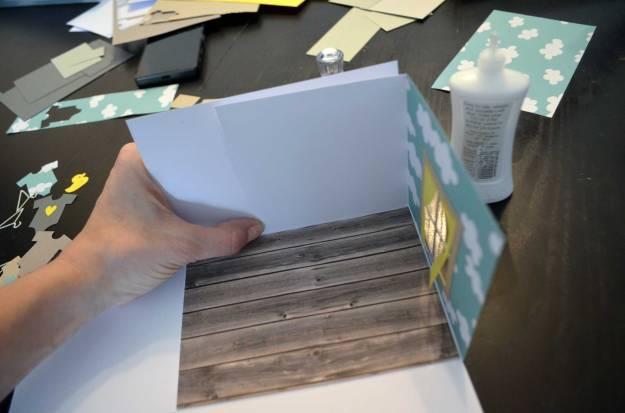
Dann habe ich die Box zusammengeklebt.
Next, I finished glueing the box.

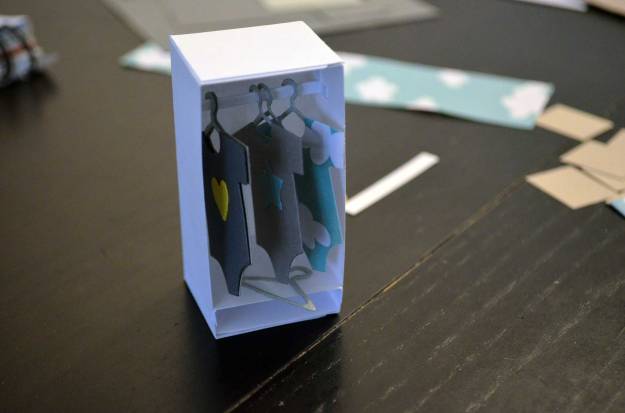
Zeit, den Möbeln den letzten Schliff zu verpassen. Aus einem Stück Cardstock habe ich eine Kleiderstange gemacht (einfach ein wenig falten und drücken). Sie hält im Kleiderschrank ganz ohne Klebstoff.
Time to finish the furniture: I made a clothes rail from a scrap of cardstock (no really exact work was involved here, just a lot of fiddling). I just squeezed it into the wardrobe (no need for glueing).
Dann habe ich Kleiderschrank und Kommode befüllt. Die Kleiderbügel samt Bodys sind beweglich, sie hängen einfach nur auf der Kleiderstange.
Next, I filled the wardrobe and the changing table. The hangers with the onsies are moveable, they just hang on the clothes rail.
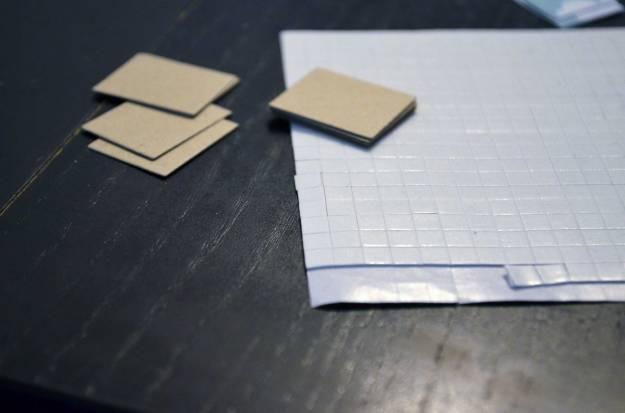
Die Stanzreste habe ich mit ganz niedrigen Klebepads aufeinandergeklebt. So sehen sie wie gefaltete Handtücher aus, die ich in die Fächer von Kommode und Kleiderschrank gelegt habe.
I used flat foam squares to stack the leftovers from the die-cutting. This way, they look like towels. I put them on the shelves of the wardrobe and the changing table.
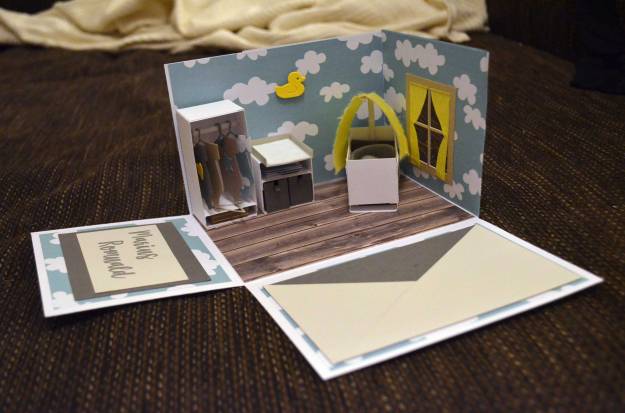
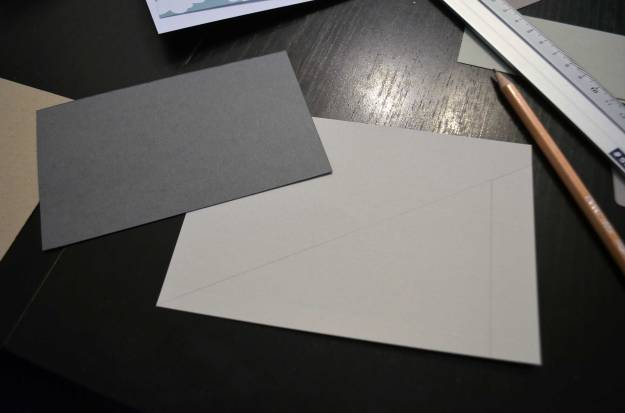
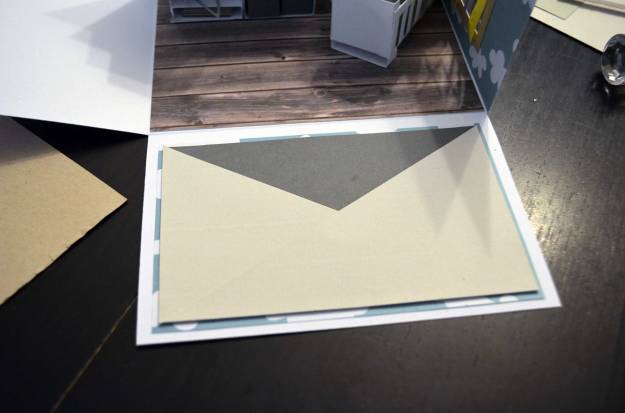
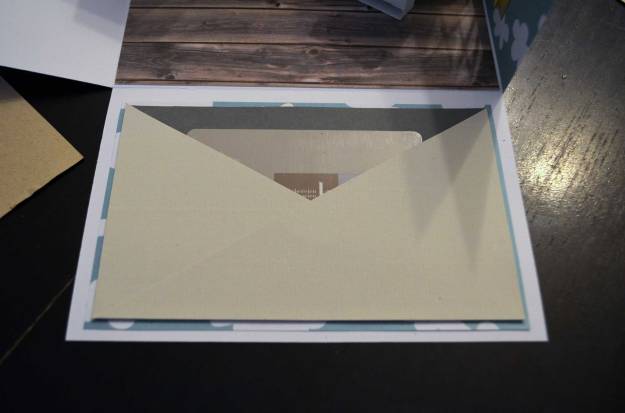
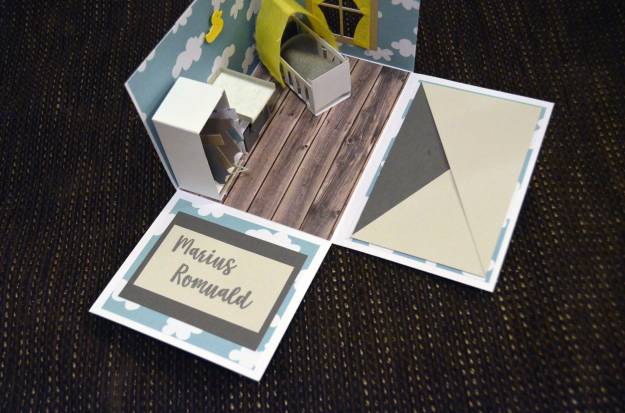
Zu diesem Zeitpunkt waren zwei Seiten der Explosionsbox noch leer. Ich habe eine Art Möchtegern-Umschlag gebastelt, in den ich eine Gutscheinkarte und eine persönliche Nachricht gesteckt habe.
Two sides of the exploding box were still blank at this point. I created a faux envelope for one of them. Into this envelope, I put a gift card and a personal note.
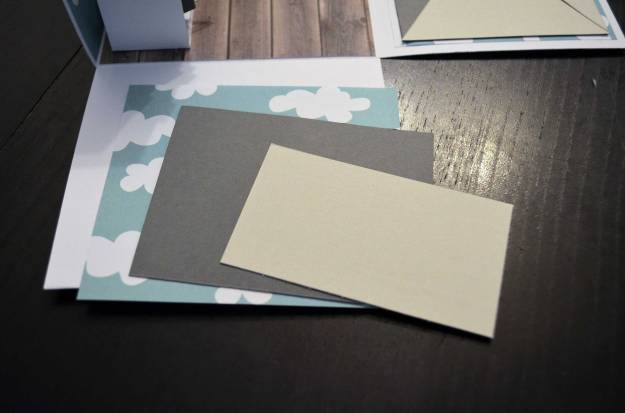
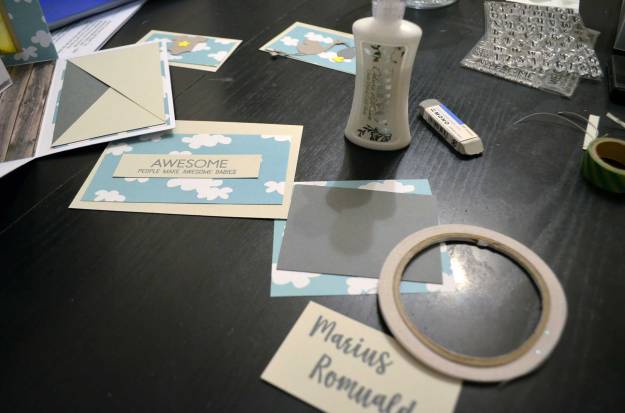
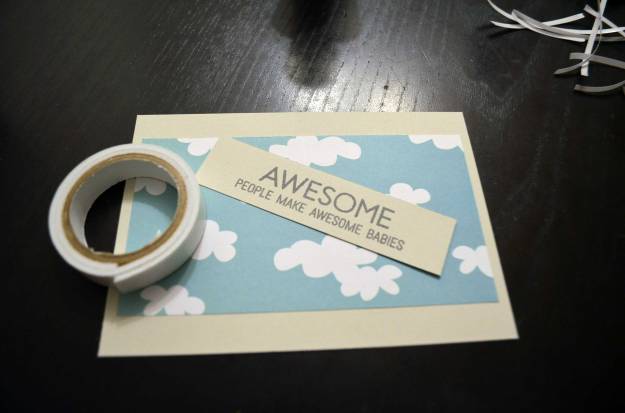
Die zweite leere Seite habe ich mit einem Stück Designpapier und zwei Stück Cardstock beklebt. Auf das oberste Stück Cardstock habe ich später den Namen des Babys gestempelt.
I adhered a piece of patterned paper and two pieces of cardstock onto the second blank side of the box. Later on, I stamped the baby’s name on top.
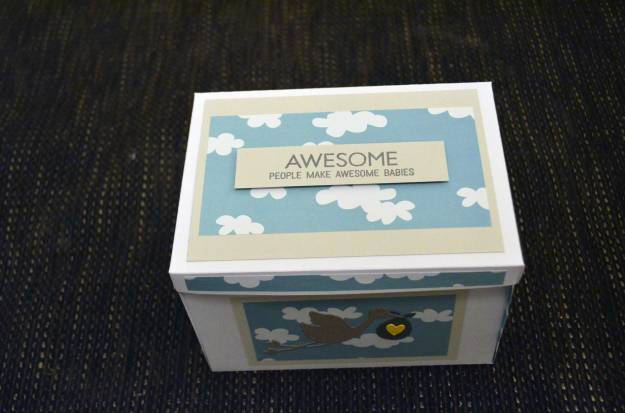
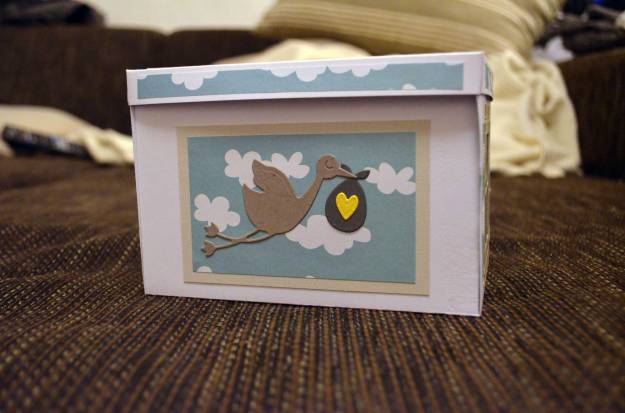
Natürlich habe ich auch die Außenseiten der Box verziert.
Of course I decorated the box on the outside as well.
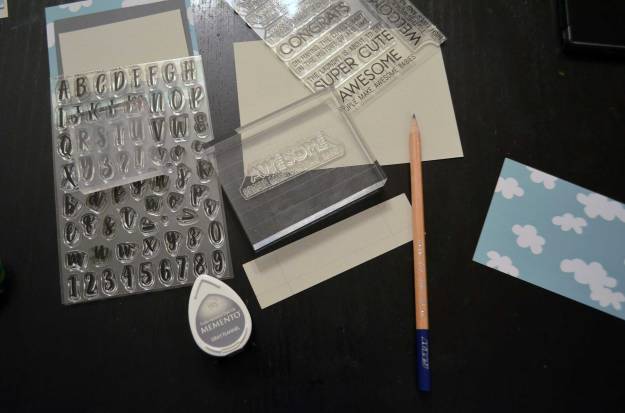
Um den Namen und meinen Spruch zu stempeln, habe ich Memento Gray Flannel und einem Acrylblock benutzt.
In order to stamp the name and the sentiment, I used Memento Gray Flannel and an acrylic block.
Dieser Teil befindet sich auf dem Deckel der Box. Den Spruch habe ich mit etwas Abstandsklebeband etwas erhöht angebracht.
This part went to the lid of the box. I used foam tape to raise the sentiment.
Die ganzen Zierteile habe ich zum Schluss mit doppelseitigem Klebeband auf der Box angebracht.
I used double-sided tape to adhere all decorating parts to the box.
Benutzte Materialien / Supplies I used
Papier / Paper
- Cardstock(reste) in Weiß, Kraftbraun, Gelb, Hell- und Dunkelgrau / cardstock (leftovers) in white, kraft brown, yellow, light and dark grey
- Designpapier (Wolken, Holzdielen) / patterned paper (clouds, wooden floor)
- Faserseide in Gelb / fiber paper in yellow
- Bastelfilz in Weiß, Hell- und Dunkelgrau / felt in white, light and dark grey
Stanzen / Dies
- Die-namics Classic Window (My Favorite Things) [Wird leider nicht mehr hergestellt, daher kein Link.]
- Thinlits Die Set New Baby (Sizzix)
Stempel / Stamps
- LLD Welcome Baby (My Favorite Things)
- Mini Well-Connected Alphabet & Numbers (My Favorite Things)
Stempelfarben / Inks
- Memento/Gray Flannel (Tsukineko)
Werkzeug & Klebstoffe / Tools & Adhesives
- Abstandsklebeband / foam tape
- Acrylblock / acrylic block
- Big Shot + Platten + magnetische Platte / Big Shot + cutting pads + magnetic platform
- Cutter / craft knife
- doppelseitiges Klebeband / double-sided tape
- dreidimensionale Klebepads (Foam Pads) / foam squares
- Falzbein / bone folder
- Lineale (Geodreieck, Schneidelineal, Metalllineal) / rulers
- Mono Sand & Rubber Eraser (Tombow)
- Nuvo Deluxe Adhesive (Tonic Studios)
- On Point Glue (Imagine Crafts/Tsukineko)
- Paper Trimmer 8,5″/22 cm 160e (Tonic Studios)
- Paper Trimmer Super Trimmer 604/153e (Tonic Studios)
- Schere / scissors
- Schneidematte / cutting mat

Woooow! When I was a kid I made doll houses just like that! (unfortunately mine had to be dismantled at the end of the day 😉 )
I love the sentiments, they’re from MFT aren’t they?
Awesome work!
LikeGefällt 1 Person
Thanks, Paula! Yes, the sentiments are from MFT – I love them as well 🙂
LikeLike