


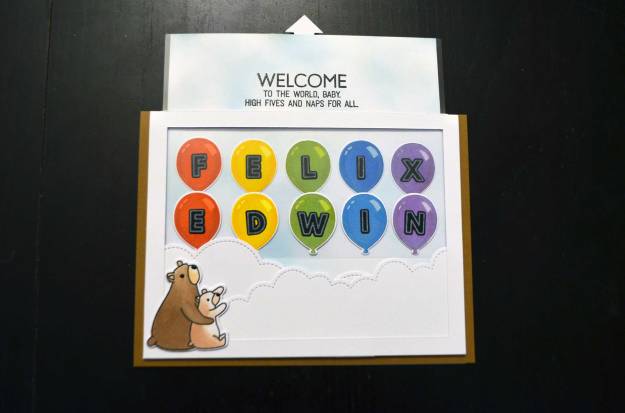
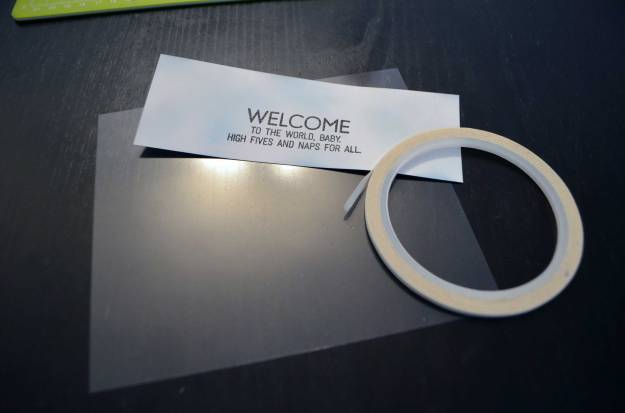
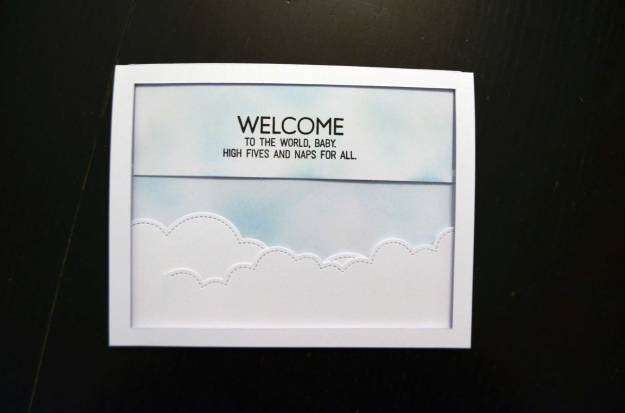
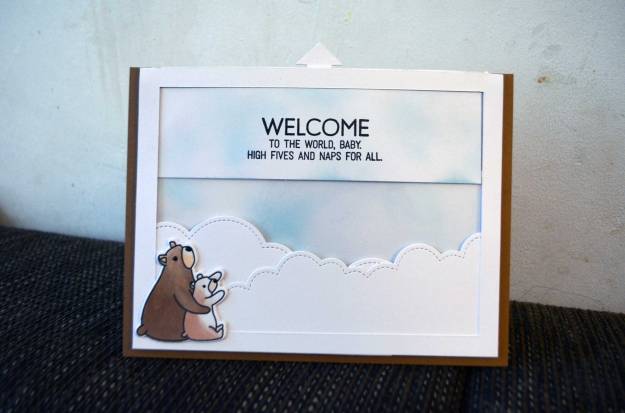
Zur Geburt des Sohnes eines befreundeten Paares habe ich diese Sliderkarte entworfen. Auf meinem Instagram-Account findet sich ein Video, die die Karte in Action zeigt.
On the occassion of the birth of my friends’ son, I created this slider card. You can see a video of it on my Instagram account.
Wer wissen möchte, wie ich die Karte gemacht habe, lese einfach weiter.
In case you want to know how I made the card, just keep on reading.
How to
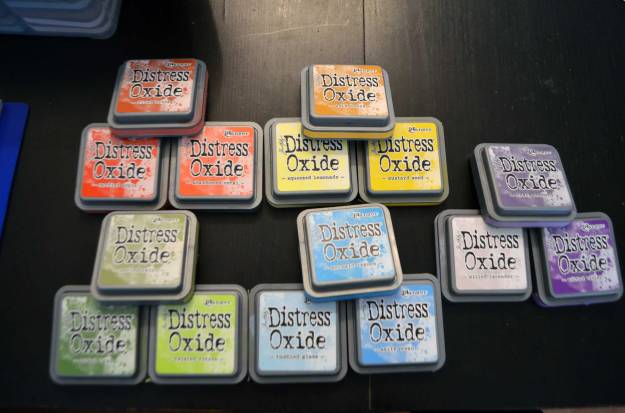
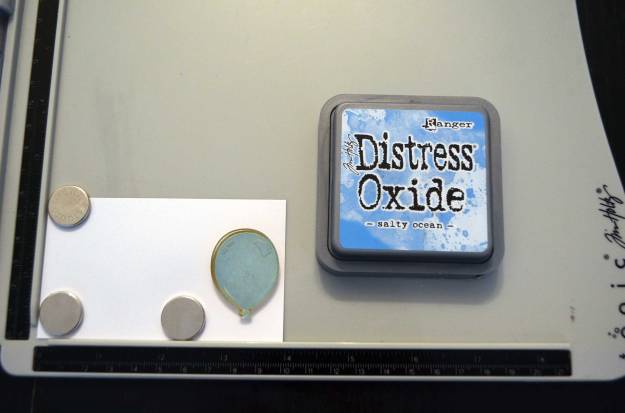
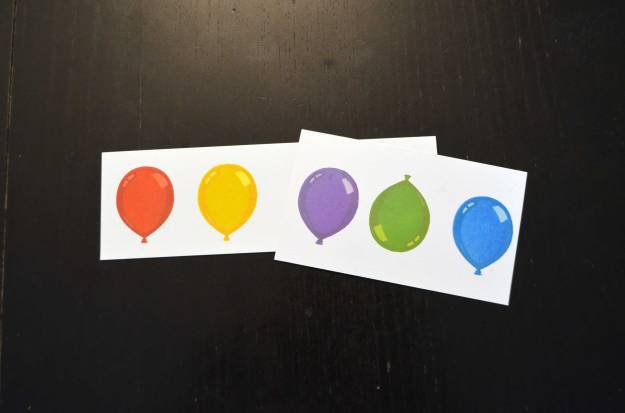
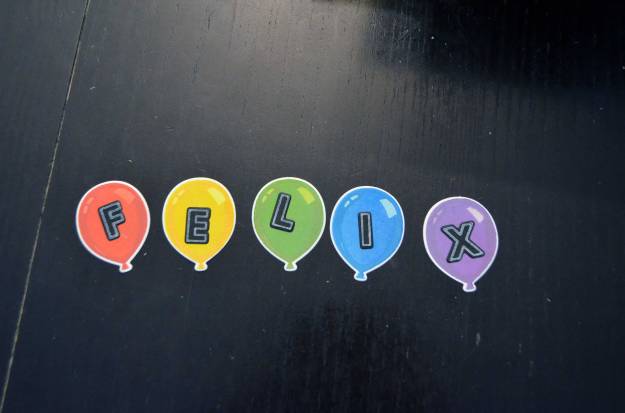
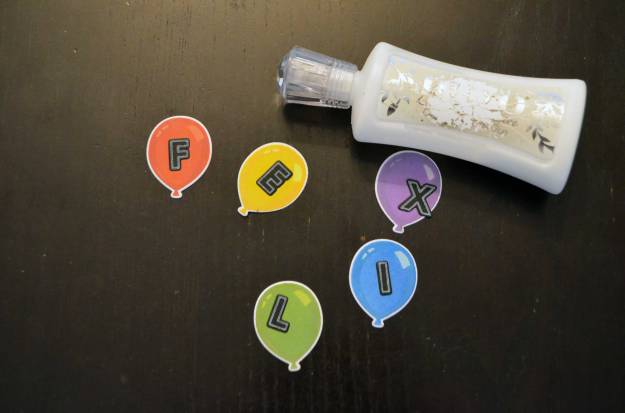
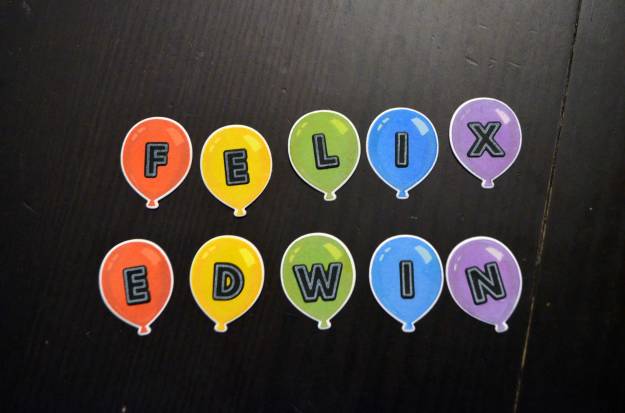
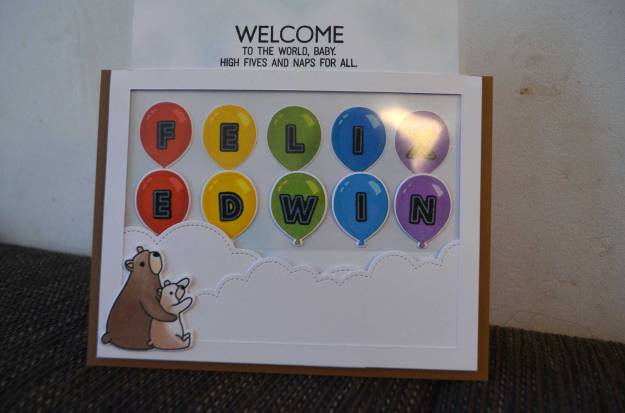
Mein Plan war, die beiden Vornamen des Babys auf Luftballons in die Luft steigen zu lassen. Zunächst habe ich daher pro Name fünf Ballons gestempelt. Das Stempelset, das ich dafür benutzt habe, besteht aus drei Ebenen – also waren pro Ballon drei Töne derselben Farbe nötig. Ich habe zu meinen Distress Oxide Inks gegriffen.
I wanted to let the baby’s names rise into the air, sitting on balloons. So, I stamped five balloons for each name. The stamp set it used consists of three layers, so I neededthree shades of the same colour for each balloon. I reached for my Distress Oxide inks.

Zum Thema gelayertes Stempeln gibt es an dieser Stelle mehr zu lesen. Einen kleinen Schnelldurchlauf habe ich aber auch hier erstellt: Mit dem hellsten Farbton habe ich die erste Schicht gestempelt. Bevor ich die zweite Schicht gestempelt habe, kam zum Schnelltrocknen mein Heat Tool zum Einsatz.
If you are interested in more information about layered stamping, click here. Following, I wrote a quick rundown on the technique: I used the lightest shade to stamp the first layer. Before turning to the second layer, I used my heat tool to speed up the drying of the ink.
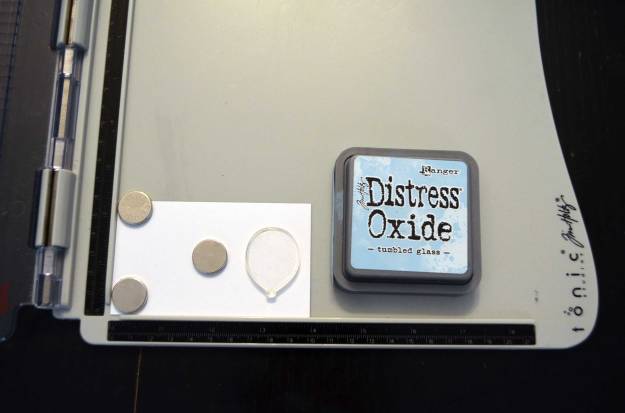
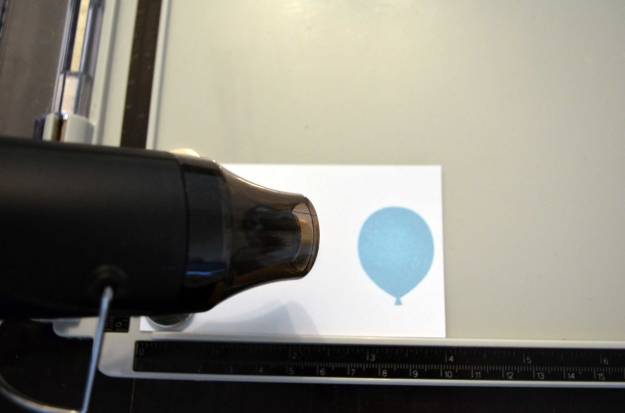
Mit dem nächstdunkleren Farbton habe ich die zweite Schicht gestempelt, nochmals per Heat Tool getrocknet und die dritte und letzte Schicht mit dem dunkelsten Farbton aufgetragen.
I used the next darker shade for the second layer, dried the ink with my heat tool and applied the third and last layer in the darkest shade.


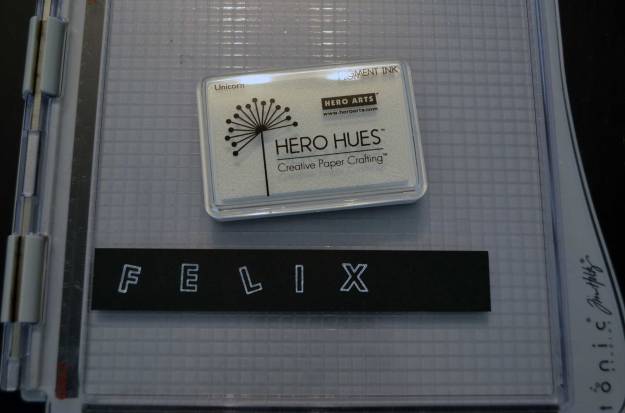
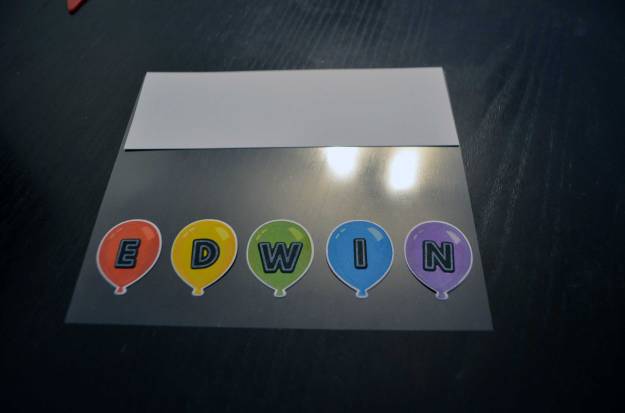
Die Buchstaben der Namen habe ich mit weißer Pigmenttinte auf schwarzen Cardstock gestempelt und alles dann mit den dazugehörigen Stanzen ausgeschnitten.
I used white pigment ink to stamp all the letters of the names onto black cardstock. With the coordinating dies, I die-cut the letters.

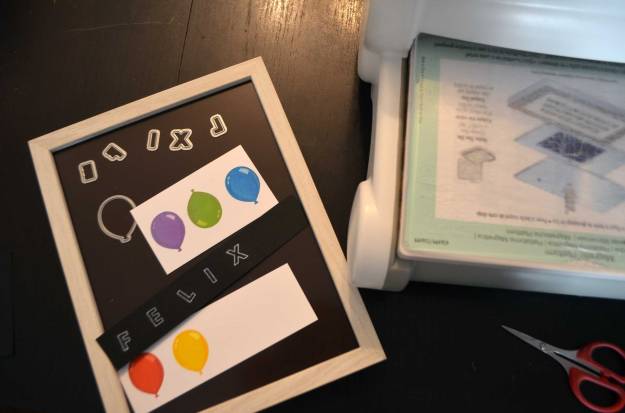
Die Buchstaben habe ich dann auf die Ballons geklebt.
I stuck down the letters onto the balloons.

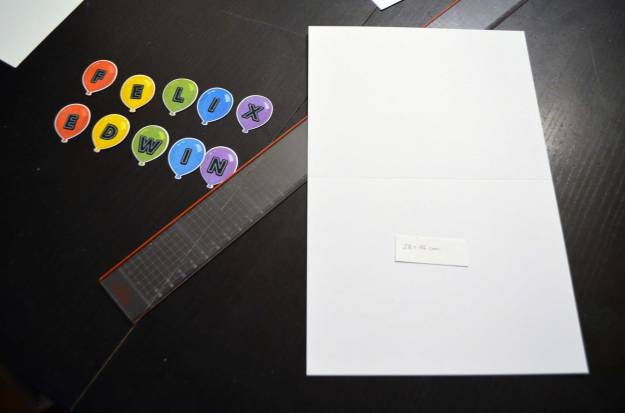
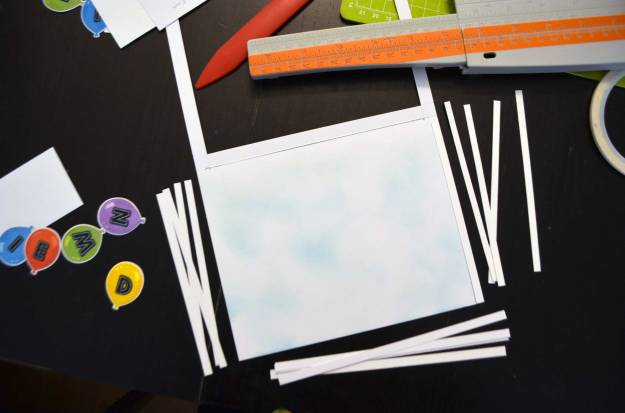
Das Sliderelement ist im Wesentlichen eine Art Tasche, die ich aus einem Stück Cardstock mit den Maßen 28 x 18 cm gemacht habe (bitte die Maße auf dem Bild ignorieren, da habe ich was Falsches notiert). In der Hälfte habe ich eine Falzlinie gesetzt.
The slider element is a kind of pouch I made from a piece of cardstock (28 x 18 cm – please ignore the measurements visible in the picture, these are wrong). I made a scoring line right in the middle.
Genau auf der Falzlinie habe ich mit einem Cutter und einem Schneidelineal einen Schlitz geschnitten. Der Schlitz ist 16 cm lang und rechts und links jeweils 1 cm vom Rand entfernt.
Using a craft knife and a cutting ruler, I made a slit. The slit is sitting exactly on the scoring line and 16 cm long. That leaves 1 cm to the right and 1 cm to the left edge.
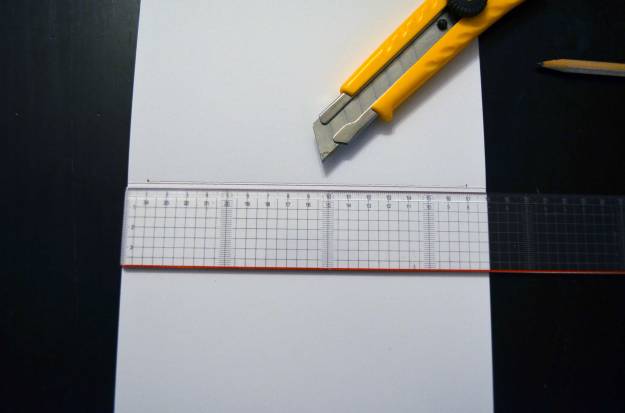

Danach habe ich das Fenster für die Front ausgeschnitten. Es misst 16 cm in der Breite und 12 cm in der Höhe. Sprich: Es bleibt nach dem Ausschneiden rundherum ein Rahmen mit 1 cm Breite stehen.
Next, I cut a window for the front. The window is 16 cm wide and 12 cm high. After cutting, you are left with a frame that’s 1 cm wide on each side.


Als nächstes habe ich ein Stück fester Folie auf die Maße 14,5 cm (hoch) und 16 cm (breit) zurechtgeschnitten.
Next, I trimmed a piece of sturdy accetate to 14,5 cm height and 16 cm width.

Das Folienstück habe ich mental gedrittelt. Die Ballons mit dem zweiten Vornamen sollten ins unterste Drittel kommen. Das oberste Drittel war für ein Stück Cardstock reserviert – auf dieses Stück habe ich einen lustigen Spruch gestempelt, außerdem dient er als temporäres Versteck für den ersten Vornamen.
In my mind, I divided the acetate into thirds. The balloons carrying the second name of the baby should go to the third on the bottom, and the third on the top was reserved for a piece of cardstock. Onto this cardstock, I stamped a funny sentiment – and it is a temporary camouflage for the first name.
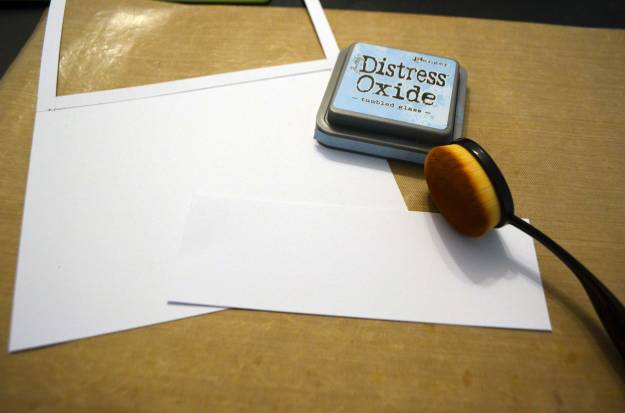
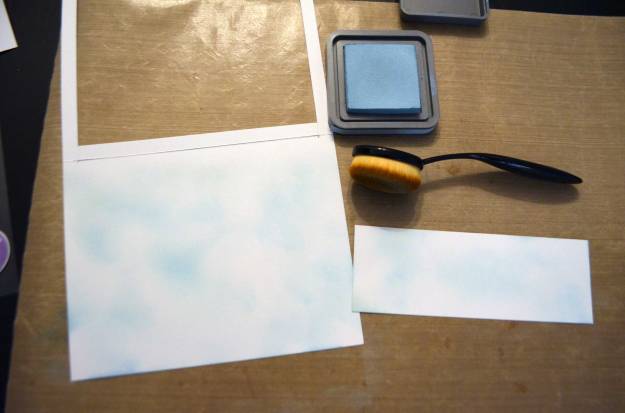
Das besagte Cardstockstück habe ich mit etwas Distress Oxide Tumbled Glass und einer Blending Brush bearbeitet, ebenso den Hintergrund der Slidertasche. Ich hatte dabei einen wolkigen Himmel im Sinn.
I worked on said cardstock with Distress Oxide Tumbled Glass and a blending brush, and I did the same for the background of the slider pouch. I aimed for a cloudy sky.
Danach habe ich den Spruch aufgestempelt. Dazu habe ich VersaFine Onyx Black benutzt und das Ganze transparent embosst.
Afterwards, I used VersaFine Onyx Black to stamp the sentiment. I heat-embossed it with clear embossing powder.

Das Cardstockstück habe ich mit doppelseitigem Klebeband auf der Folie angebracht.
I used double-sided tape to adhere the cardstock on the acetate.
Mit mehreren schmalen Cardstockstreifen habe ich Abstandshalter gemacht (vier Streifen pro Seite). Die Streifen links uns rechts messen jeweils 5 mm in der Breite und 14 cm in der Höhe. Die Streifen unten sind 17 cm lang und 5 mm hoch.
I made spacers with a bunch of cardstock strips. I cut four strips per side. The strips for the left and right side are 5 mm wide and 14 cm high. The strips for the bottom are 17 cm long and 5 mm high.
Die Streifen habe ich mit Flüssigkleber aufeinandergestapelt – und auf der Slidertasche angebracht.
I stacked the strips with layers of glue and adhered them onto the slider pouch.
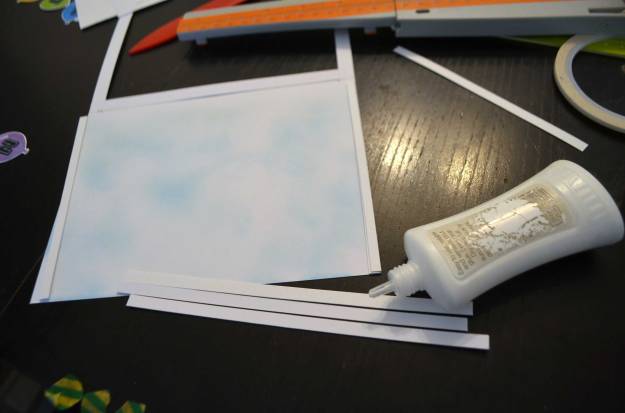
Ein weiterer Cardstockstreifen (5 mm x 17 cm) dient als Stopper und verhindert, dass die Folie (einmal durch den Schlitz gezogen) weiter als bis zum Ende des Cardstocks mit dem Spruch herausgezogen werden kann. Ihn habe ich mit doppelseitigem Klebeband auf der Rückseite der Folie angebracht.
Another strip of cardstock (5 mm x 17 cm) functions as stopper and prevents the acetate (once it’s threaded through the slit) from being pulled out completely. I adhered it with double-sided tape on the back of the acetate, right at where the cardstock ends.

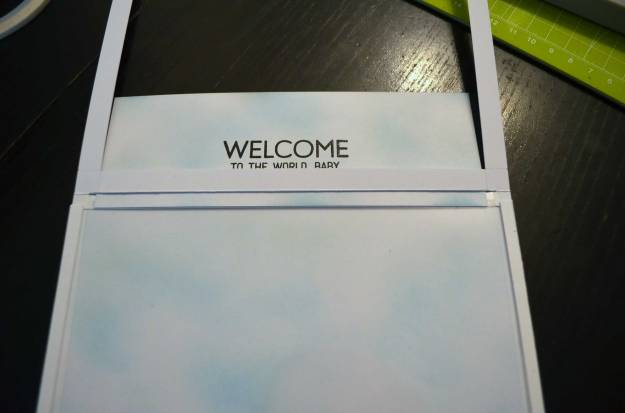
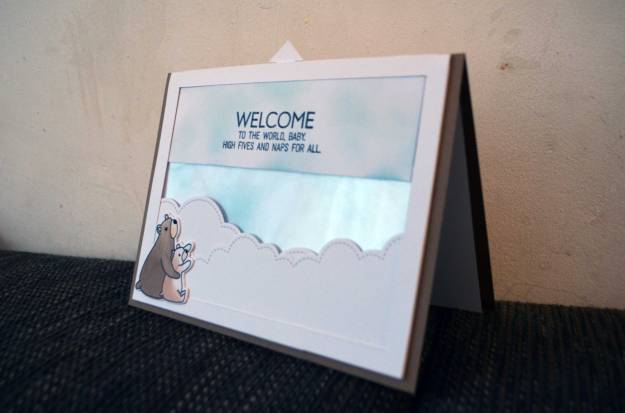
So sieht das Ganze von vorne aus, bevor die Tasche geschlossen ist: Der Stopper bremst das Herausziehen der Folie genau an der Stelle, an der der Cardstockstreifen mit dem Spruch endet.
This is how the front looks (when the pouch is open). The stopper stops the acetate right at where the cardstock with the sentiment ends.
Wohin ich die Ballons genau kleben musste, damit sie einerseits versteckt und andererseits beim Herausziehen der Folie genau untereinander sind, habe ich mittels Trial and Error herausgefunden. Ich habe sie mit Washi Tape temporär befestigt und einfach probiert, bis ich zufrieden war. Danach habe ich die oberere Reihe, die unter dem Cardstock mit dem Spruch verschwindet, wenn der Slider in Startposition ist, festgeklebt.
To find out where I had to glue down the balloons – the top row should completely disappear under the cardstock with the sentiment when the slider is inside the pouch, and when pulled out, the bottom row should be exactly under the top row –, I used the trial-and-error method. I adhered them temporarily with washi tape and tried till I was happy. Next, I stuck down the upper row with liquid adhesive.

Die untere Ballonreihe habe ich unter ein paar Wolken versteckt. Die Wolken habe ich mit Randstanzen aus weißem Cardstock geschnitten und mit etwas Flüssigkleber im Inneren der Tasche angeklebt – und zwar nur auf den Abstandshaltern, damit sie den Slidingmechanismus nicht beeinträchtigen.
I hid the bottom row of balloons under clouds which I die-cut with border dies from white cardstock. I adhered them inside the pouch by using liquid glue – and I made sure to put glue only onto the spacers so nothing would interfere with the sliding mechanism.


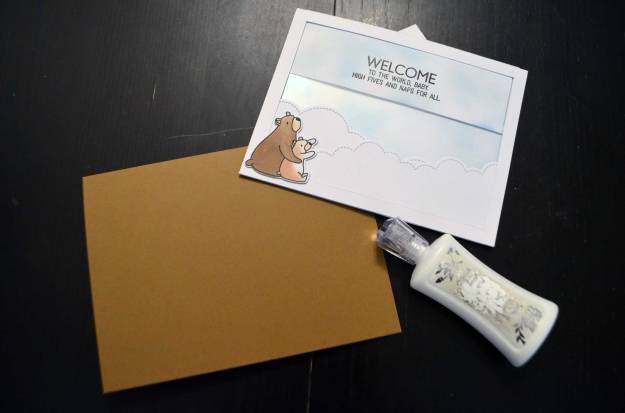
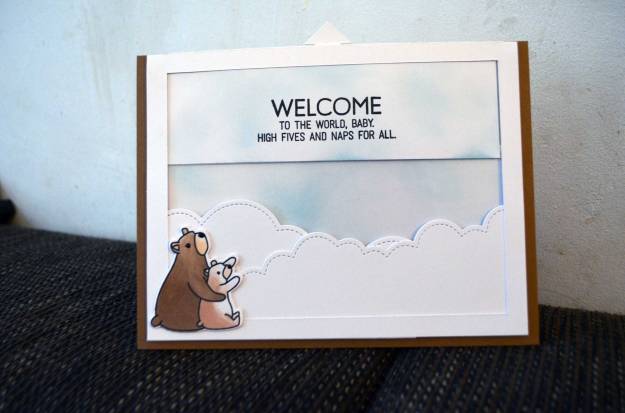
Anschließend habe ich mithilfe meines Stamp Tools und Memento Tuxedo Black die Bären gestempelt, sie mit den dazugehörigen Stanzen ausgeschnitten (insgesamt dreimal für mehr Dimension) und mit Chameleon Pens koloriert. Zuerst wollte ich die kleine Lasche mit dem Wort „Pull“ darauf ausstanzen, habe den Plan aber wieder verworfen und stattdessen einen Pfeil ausgestanzt. An ihm kann die Folie herausgezogen werden.
Afterwards, I stamped the bears with my stamp tool and Memento Tuxedo Black, coloured them with Chameleon Pens, and die-cut them with the coordinating dies (three times for more dimension). I wanted to die-cut a little tab but changed my mind and die-cut an arrow which serves as the tab in „pull the tab“.


Die Bären habe ich dann auf den Rahmen und die Wolken geklebt.
I glued down the bears onto the frame and the clouds.

Nachdem ich mich überzeugt hatte, dass der Slidermechanismus gut funktioniert, habe ich die Slidertasche and den Rändern zugeklebt. Ist die Tasche einmal zu, kann der Slider – in meinem Fall die Folie – nicht mehr entfernt werden, ohne das Ganze zu zerstören.
After I assured myself the the slider mechanism worked properly, I put glue on the spacers to close the pouch. Once the pouch is closed, you can’t remove the slider (in my case the acetate) without destroying the whole thing.

Das Sliderelement habe ich dann auf eine A5-Karte gklebt. Ich habe sie aus einem Stück Craftcardstock (A4, in der Mitte gefaltet) gemacht.
I adhered the slider element onto a A5 card I made from a piece of craft cardstock (A4, folded in the middle).
Zu guter Letzt habe ich die Nasen und Augen der Bären mit Nuvo Drops in Schwarz betont.
In the end, I used black Nuvo Drops to highlight the noses and eyes of the bears.


Benutzte Materialien / Supplies I used
Papier & Folie / Paper & Acetate
- Cardstock in Weiß und Kraft / cardstock in white and craft brown
- feste Folie / sturdy acetate
Stanzen / Dies
- Birthday Balloon Die (Sunny Studio Stamps)
- Creative Cuts Bear Hugs (Mama Elephant)
- Elle-Ments Modern Alpha (Avery Elle) [Wird leider nicht mehr hergestellt, daher kein Link.] / [Sadly retired, so no link this time.]
- Lawn Cuts Puffy Cloud Borders (Lawn Fawn)
- Xcut Mini Die Arrows (docrafts) [Wird leider nicht mehr hergestellt, daher kein Link.] / [Sadly retired, so no link this time.]
Stempel / Stamps
- Bear Hugs (Mama Elephant)
- Birthday Balloon Stamps (Sunny Studio Stamps)
- LLD Welcome Baby (My Favorite Things)
- Modern Alpha (Avery Elle) [Wird leider nicht mehr hergestellt, daher kein Link.] / [Sadly retired, so no link this time.]
Stempelfarben / Inks
- Distress Oxide/Abandoned Coral, Candied Apple, Dusty Concord, Fired Brick, Mermaid Lagoon, Milled Lavender, Mowed Lawn, Mustard Seed, Peeled Paint, Salty Ocean, Squeezed Lemonade, Tumbled Glass, Twisted Citron, Wild Honey, Wilted Violet (Ranger)
- Memento/Tuxedo Black (Tsukineko)
- VersaFine/Onyx Black (Tsukineko)
Embossing / Heat-Embossing
- Clear Gloss Superfine (WOW!)
Werkzeug & Klebstoffe / Tools & Adhesives
- Big Shot + Platten + magnetische Platte / Big Shot + cutting pads + magentic platform
- Cutter / craft knife
- doppelseitiges Klebeband / double-sided tape
- Falzbein / bone folder
- Heat Tool (WOW!)
- Lineal / ruler
- Make-up-Bürsten (EMax Design) / make-up brushes (EMax Design)
- Nuvo Deluxe Adhesive (Tonic Studios)
- Paper Trimmer 8,5″/22 cm 160e (Tonic Studios)
- Schere / scissors
- Stamp Shammy (Lawn Fawn)
- Tim Holtz Stamp Platform (Tonic Studios)
- Washi Tape zum Befestigen / washi tape to secure
Embellishments
- Nuvo Crystal Drops/Ebony Black (Tonic Studios)
Farben / Paints & Pens
- Chameleon Color Tones Pens (Chameleon Art Products)

Eine tolle Karte. Vielen Dank für die ausführliche Anleitung und die erklärenden Bilder. Da habe ich wieder etwas gelernt.
Liebe Grüße
Dorothea
LikeLike
Danke, liebe Dorothea! Freut mich, wenn du was mitnehmen kannst 😊
LikeLike