Okay, es handelt sich nicht um Karten, die tatsächlich Musik abspielen – aber alle drei haben sie etwas mit Musik zu tun. Zum Beispiel dieses simple Design:
Granted, these aren’t cards that actually play music – but all three of them are related to musical topics. For example this simple design:

Oder diese immer noch simple, aber dazu auch noch interaktive Karte:
Or this still stimple but in addition interactive card:

Oder diese Schüttelkarte:
Or this shaker card:

Wie gewohnt führen die Links im Text oder Klicks auf die Bilder zu den ausführlichen Projektbeschreibungen.
As usual just click the links or the images to read more about how I made those cards.
Turn Up The Volume
Wenig Aufwand, große Wirkung: Diese schlichte Geburtstagskarte ist in kürzester Zeit gemacht und sieht dabei super aus.
Little effort, big impact: It takes no time to make this simple birthday card – and it looks awesome.
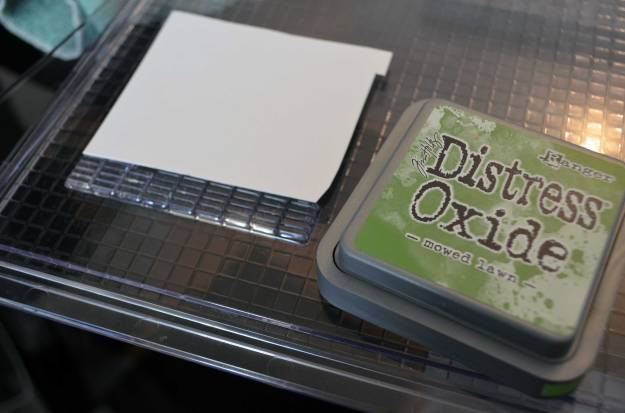
Ich habe – was ich sehr selten tue – direkt auf die Karte gestempelt. Dafür habe ich drei Distress Oxide Farbtöne und meine Stamping Platform verwendet.
I rarely do this, but this time I stamped directly onto the card. I used my stamping platform and three Distress Oxide inks to do so.

Ich habe den untersten Teil des Stempels in Grün, den mittleren in Gelb und nur die obersten Spitzen in Rot eingefärbt. Mit einem Stück Schmierpapier habe ich alles abgedeckt, was nicht grün sein sollte.
I wanted just the lower part of the stamp to be green, the middle part to be yellow and just the top to be red. I used a scrap of paper to cover what I didn’t want to be green.
Beim ersten Stempeln habe ich bemerkt, dass mir das Papier etwas verrutscht war. Dadurch wurden zwei Striche, die ich eigentlich schon in Gelb haben wollte, etwas eingefärbt. Daher habe ich danach zum Abdecken Klebeband benutzt, was besser funktioniert hat.
Then I stamped – but the paper shifted during inking up the stamp. As a result, two stripes I intended to be yellow were actually partially green. So I used tape to cover those parts of the stamps I didn’t want to be inked up. That worked way better.


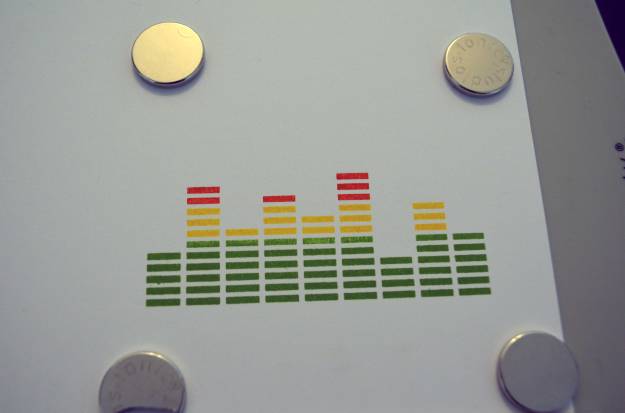
Danach musste ich nur noch den Spruch in Schwarz aufstempeln – und fertig!
Only thing left to do was to stamp the sentiment in black – and done!
Benutzte Materialien / Supplies I used
Papier / Paper
- Klappkarte in Weiß / pre-fold card in white
- Schmierpapier zum Abdecken / scrap paper for covering
Stempel / Stamps
- Greatest Hits (SugarPea Designs)
Stempelfarben / Inks
- Distress Oxide/Candied Apple, Mowed Lawn und Mustard Seed (Ranger)
- Memento/Tuxedo Black (Tsukineko)
Werkzeug & Klebstoffe / Tools & Adhesives
- Klebeband / tape
- Tim Holtz Stamp Platform (Tonic Studios)
[Ganz nach oben / Back to top]
For The Record
Eine interaktive Karte (die Platte lässt sich drehen, der Tonarm schwenken) ohne viel Schnickschnack für diverse Anlässe – schnell gemacht und doch was Besonderes.
An interactive card (you can spin the record and move the tone arm), simple and clean, for various occassions – quickly done, yet something special.
How To
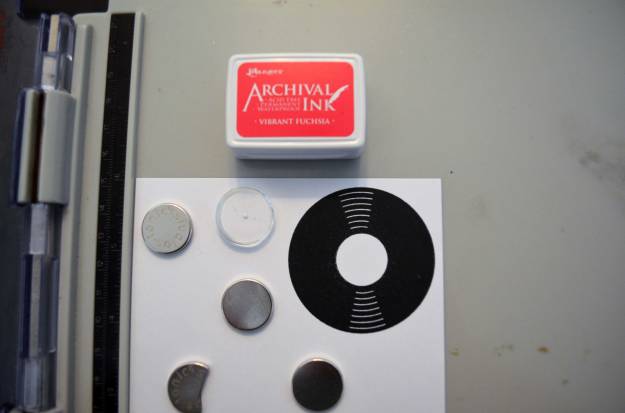
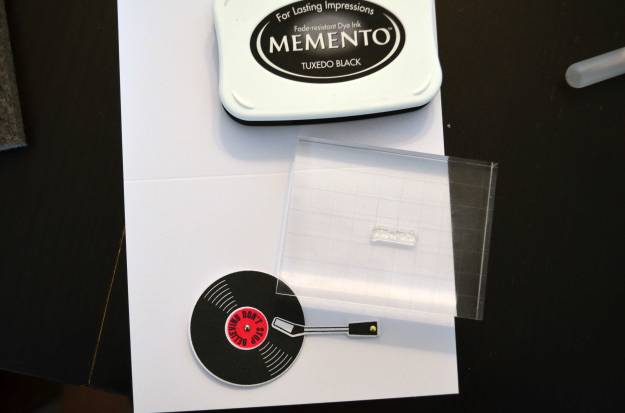
Als erstes habe ich die Schallplatte, den Tonarm und die Beschriftung der Platte gestempelt. Dafür habe ich meine Stamping Platform benutzt, weil großflächige Stempel – wie die Schallplatte – so gut wie nie einen perfekten Abdruck bei nur einem Mal Stempeln hinterlassen. Stempelhilfen wie die Stamping Platform von Tim Holtz oder das MISTI sind daher für solche Fälle sehr nützlich – sie ermöglichen es, mehrfach auf exakt dieselbe Stelle zu stempeln.
Für die Schallplatte und den Tonarm habe ich Memento Tuxedo Black verwendet, für die Beschriftung der Platte Ranger Archival Ink Vibrant Fuchsia.
First thing I did was stamping the record, the tone arm, and the label. I used my stamping platform because solid stamps (like the record) hardly stamp perfectly in just one go. In cases like this, stamping tools like the Stamping Platform by Tim Holtz or the MISTI are pretty useful because they allow multiple stamping onto the exact same spot.
For the record and the tone arm I used Memento Tuxedo Black, and for the label I used Ranger Archival Ink Vibrant Fuchsia.


Die drei Elemente habe ich im Anschluss ausgestanzt.
Next I die-cut all three elements.

Ich habe sogar noch mehr Dinge ausgestanzt, weil ich mir nicht sicher war, was ich alles brauchen würde, um sicherzustellen, dass sich die Schallplatte problemlos drehen lässt.
Actually, I die-cut even more items because I didn’t know for sure which elements to use in order to make sure that the record can spin freely.

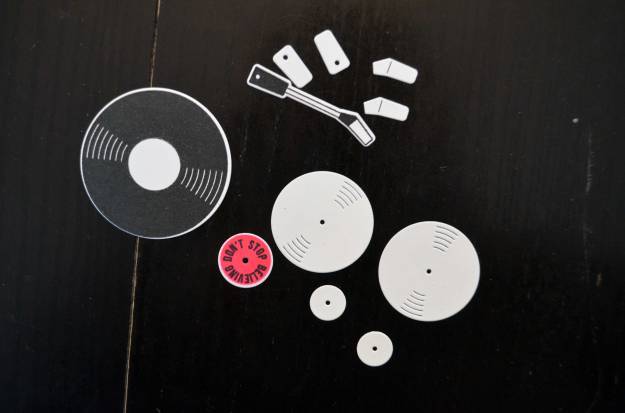
Die Stanze, die die große Platte ausstanzt, hat leider kein Loch in der Mitte, deshalb habe ich das mit Hilfe einer Nadel und einem Filzstück selbst gemacht. Damit das Loch auch an der richtigen Stelle sitzt, habe ich die Plattenbeschriftung zur Orientierung verwendet.
The die that cuts the big record doesn’t come with a hole so I used a needle and a piece of felt to make one myself. The label helped me with getting the hole at the right spot.

Als nächstes habe ich alles auf eine winzig kleine Musterbeutelklammer („Mini Brad“ mit einem Durchmesser von etwa 3 mm) aufgefädelt – in der Reihenfolge, wie sie hier auf dem Foto zu sehen ist: erst zwei kleine Scheiben aufeinander (eine würde vermutlich auch reichen) – unter diese kommen Klebepads, damit die Schallplatte genügend Abstand zur Karte hat –, dann zwei größere, dann die Schallplatte und zuletzt das Label.
Mit dem Tonarm habe ich dasselbe gemacht.
Next, I put everything together. I used a mini brad and, on top of each other, stacked two small discs (though one would’ve probably sufficed) – on the bottom of these I adhered foam squares to ensure that there’s enough space between record and card –, two bigger discs, the record, and the label.
I did the same thing with the tone arm.

Mit Hilfe eines Acrylblocks habe ich den kleinen Spruch – You rock – in die rechte obere Ecke gestempelt.
I used an acrylic block to stamp the small sentiment in the top right corner.
Wie bereits erwähnt habe ich auf der untersten kleinen Scheibe des „Schallplattenturms“ dreidimensionale Klebepads angebracht. Mit ihnen habe ich die Schallplatte und den Tonarm auf der Karte festgeklebt.
As I mentioned earlier, I adhered foam squares at the bottom of the „record tower“. With them I stuck down the record as well as the tone arm.

Und hier noch die fertige Karte:
And here’s the finished card:
Benutzte Materialien / Supplies I used
Papier / Paper
- Cardstockreste in Weiß / cardstock leftovers in white
- Klappkarte in Weiß / pre-fold card in white
Stanzen / Dies
- Sugar Cuts: Greatest Hits (SugarPea Designs)
Stempel / Stamps
- Greatest Hits (SugarPea Designs)
Stempelfarben / Inks
- Archival Ink/Vibrant Fuchsia (Ranger)
- Memento/Tuxedo Black (Tsukineko)
Werkzeug & Klebstoffe / Tools & Adhesives
- Acrylblock / acrylic block
- Big Shot + Platten + magnetische Platte / Big Shot + cutting pads + magnetic platform
- dreidimensionale Klebepads (Foam Pads) / foam squares
- Mini Brads/Klammern (Papermania/Docrafts)
- Tim Holtz Stamp Platform (Tonic Studios)
[Ganz nach oben / Back to top]
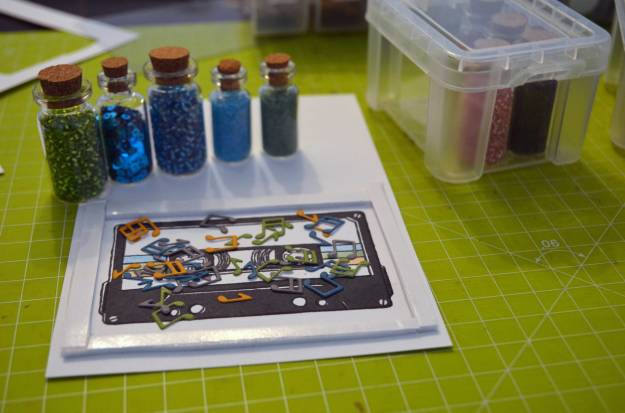
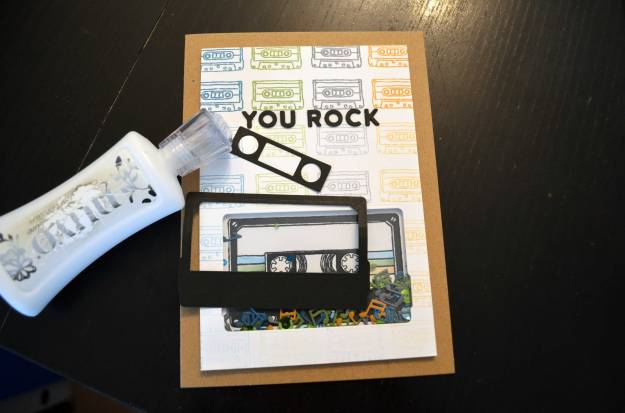
You Rock
Ich bin mit Kassetten groß geworden – was habe ich Mix Tapes aufgenommen! Als ich das tolle Stempel- und Stanzenset von Concord & 9th gesehen habe, musste ich zuschlagen – und ein ähnliches Stempelset von Hunkydory habe ich gleich auch noch gekauft, weil sich die beiden super kombinieren lassen.
I grew up with cassettes – all the mix tapes I made! When I saw the awesome stamp and die set by Concord & 9th I knew I had to have it, and the stamp set by Hunkydory went into my basket as well for it’s quite alike and both sets accompany each other beautifully.
How To
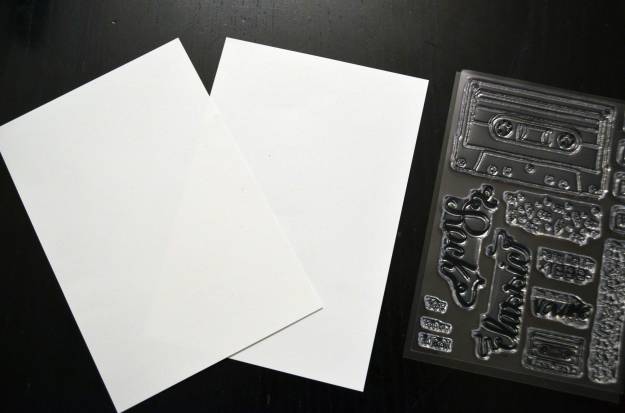
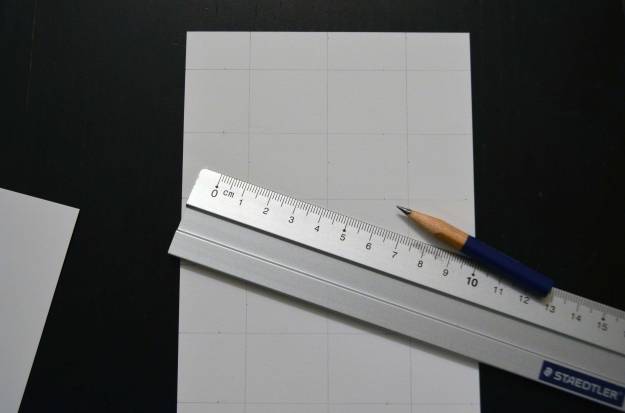
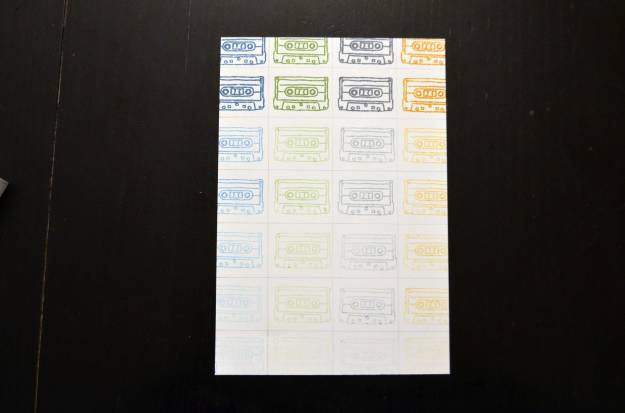
Als erstes habe ich zwei gleich große Panels aus weißem Cardstock zurechtgeschnitten. Auf eines davon habe ich mit Bleistift und Lineal ein Raster gezeichnet.
I started with cutting white cardstock into two equally measured pieces. I drew a grid onto one of the pieces.
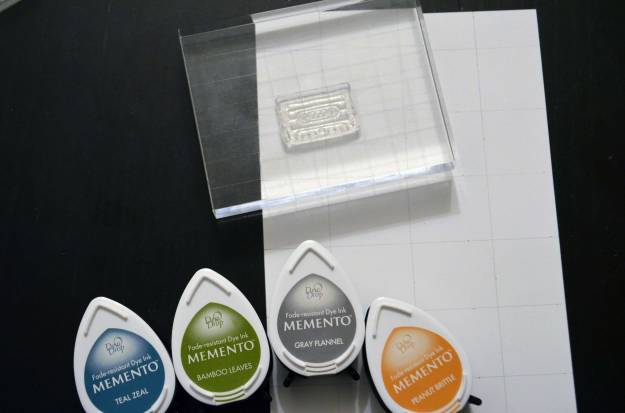
In die Rasterfelder habe ich mit Hilfe eines Acrylblocks eine kleine Kassette gestempelt, und zwar in vier verschiedenen Farben. Dabei habe ich die sogenannte „Second Generation Stamping“-Technik angewandt. Das bedeutet, dass man nur fürs erste Stempeln den Stempel einfärbt und danach erneut stempelt – ohne den Stempel erneut einzufärben. In diesem Fall habe ich eine ganze Reihe von oben nach unten gestempelt, bis der Stempelabdruck kaum mehr zu sehen war. So lässt sich ganz simpel ein Verlauf erzeugen. Jede Spalte ist in einer anderen Farbe gehalten.
I stamped a little tape in each of the grid’s panels using an acrylic block. The technique I used is called „second generation stamping“. Basically it’s repeated stamping without inking up your stamp in between. I inked up my stamp just the very first time and stamped my way from the top down to the bottom until the image was barely visible. This is a very simple way to create a gradient. I kept each column in another colour.

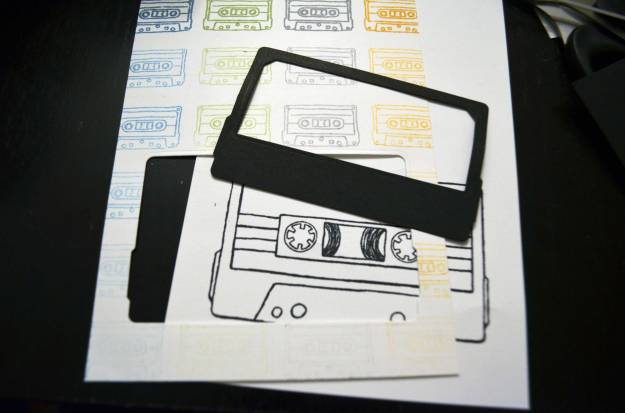
Nachdem die Tinte getrocknet war, habe ich die Bleistiftlinien ausradiert. Anschließend habe ich eine große Kassette auf mein Panel und das zweite Cardstockstück aufgestempelt, und zwar jeweils an genau derselben Stelle. Das ist recht einfach, wenn man eine Stempelhilfe – wie meine Stamping Platform – verwendet: Nach dem ersten Stempeln bleibt der Stempel an der Tür der Stempelhilfe, man legt das zweite Blatt an dieselbe Stelle wie das erste ein und stempelt erneut – fertig.
After the ink was completely dry I erased the pencil lines. Next I stamped a bigger tape onto my panel and the second piece of cardstock – each time on the exact same spot. This is quite easy when you have a stamping tool like the stamping platform I used. The stamp remains on the lid of the stamping tool after the first stamping, the second piece of cardstock is placed at the same spot as the first one. After stamping a second time it’s done. Easy.


Der Grund, warum ich diese doppelte Stempel veranstaltet habe: Aus dem Panel habe ich die Kassette mit der dazugehörigen Stanze ausgestanzt, der Stempelabdruck hat quasi als Schablone fungiert. Legt man nach dem Ausstanzen das bunte Panel auf das zweite Stück Cardstock, passen Stempelabdruck und Aussparung genau aufeinander.
And this is why I did this double-stamping action: With the coordinating die, I cut the tape from my panel – I needed to stamp the tape to have some kind of guideline. If you line up both pieces of cardstock (with the coloured panel on top) the stamped tape shows through the opening of the coloured panel.

Aus einem Reststück schwarzen Cardstocks habe ich den Rahmen der Kassette gestanzt.
I die-cut the tape’s frame from a scrap of black cardstock.

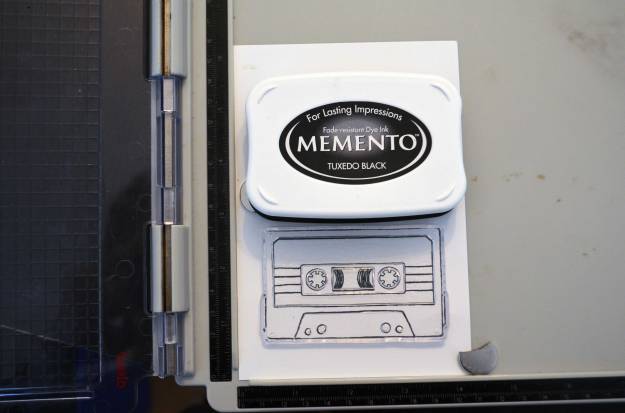
Als nächstes habe ich die Kassette auf dem zweiten Cardstockstück erneut bestempelt – in Schwarz.
Next, I stamped onto the tape on the second piece of cardstock again – in black.
Die drei Streifen der Kassette habe ich mit Farben ausgemalt, die den Stempelfarben auf dem Panel sehr ähnlich sind.
I coloured the three stripes on the tape with colours that match the inks I used for the panel.

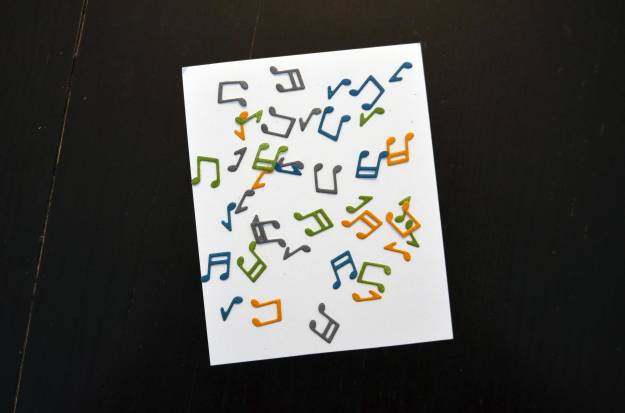
Einen Teil des „Füllmaterials“ für das Schüttelelement wollte ich selbst gestalten. Hier habe ich zu einem anderen Stanzenset (von SweetPea Designs) gegriffen, da mir die Noten im Set von Concord & 9th zu groß waren. Damit die Noten farblich zum Panel passen, habe ich alle vier bereits verwendeten Farbtöne auf ein Stück weißen Cardstock gestempelt. Dafür habe ich einen Mirror Block verwendet – das ist im Grunde nur eine große, rechteckige Clear Stamp. Eigentlich wird sie dafür verwendet, ein Stempelmotiv spiegelverkehrt aufzustempeln, aber dazu ein anderes Mal mehr.
I wanted to create some of the shaking elements by myself. I used another die set (by SweetPea Designs) because the notes included in Concord & 9th’s set seemed to be too big. To make sure the colours of the notes match my panel, I stamped with the inks I’ve already used before onto a scrap of white cardstock. To do so, I used a mirror block. A mirror block is basically just a big clear stamp in the shape of a rectangle. It’s actual purpose is to provide a possibility to stamp mirror-inverted, but let me show you that another time.

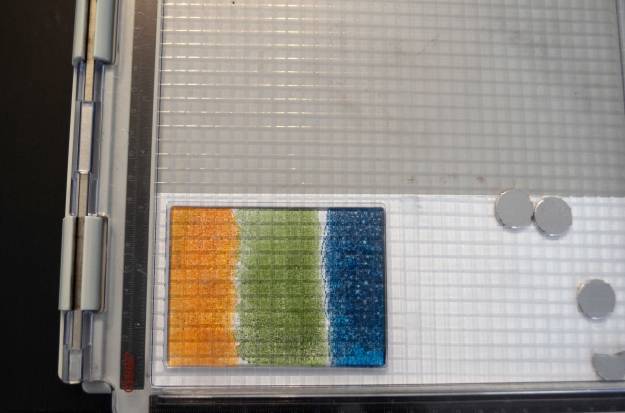
Nachdem ich die Farben aufgestempelt hatte, habe ich die Noten ausgestanzt.
After I stamped the stripes of colour, I die-cut the notes.

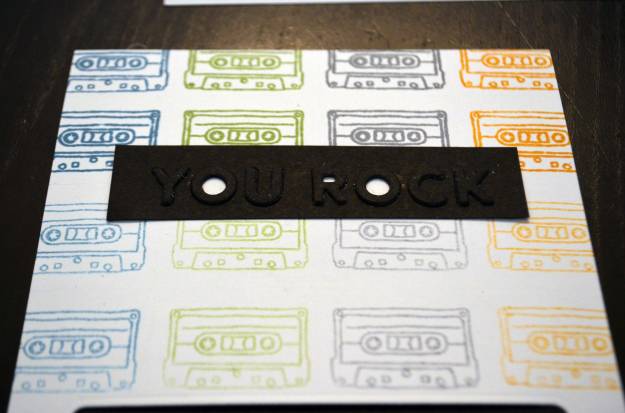
Anschließend habe ich die Buchstaben für „You Rock“ aus schwarzem Cardstock gestanzt – jeden Buchstaben dreimal. Die Buchstaben habe ich dann aufeinandergeklebt, um mehr Dimension zu erzeugen.
Afterwards I die-cut the letters for „You Rock“ from black cardstock, each letter three times. I stacked the letters together with some glue to get more dimension.

Das Stanznegativ habe ich als Schablone benutzt, indem ich es an der gewünschten Stelle aufgelegt und die mit Klebstoff versehenen Buchstaben eingepuzzelt habe.
I used the leftover from the die-cutting process as a stencil: I placed it where I wanted the sentiment to go and laid the letters (with a bit of glue on their back) in – much like a jigsaw-puzzle.


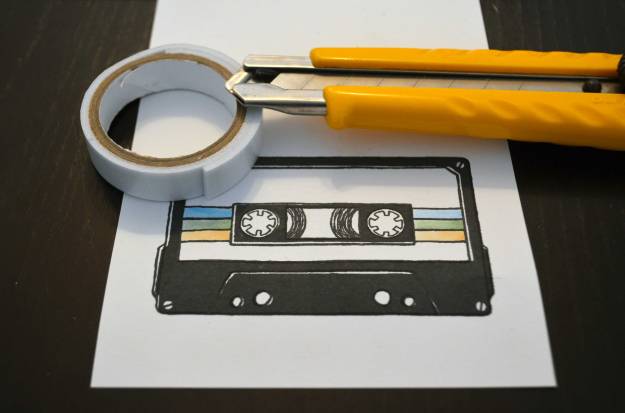
Rund um die gestempelte Kassette auf dem zweiten Stück Cardstock habe ich Abstandsklebeband angebracht. Es waren dafür nur schmale Streifen nötig, also habe ich mit einem Cutter aus einem breiten Streifen Klebeband zwei schmale geschnitten.
I adhered foam tape around the stamped tape on the second piece of cardstock. I used a box cutter to divide one broad strip of tape into two smaller stripes.

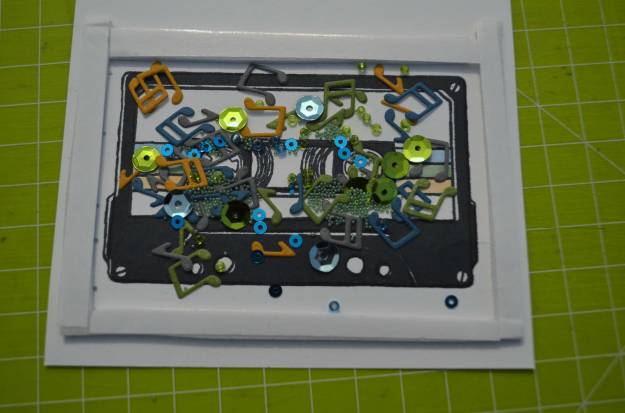
Die Schutzfolie des Abstandsklebebands hatte ich noch belassen. Zuerst musste ich das „Schüttelmaterial“ einfüllen. Neben den Noten habe ich auch noch kleine Perlen und verschieden große Pailletten in passenden Farben verwendet.
I left the release paper where it was because I needed to fill in all the shaking elements first. In addition to the notes I used tiny beads and sequins in different sizes – everything in matching colours.
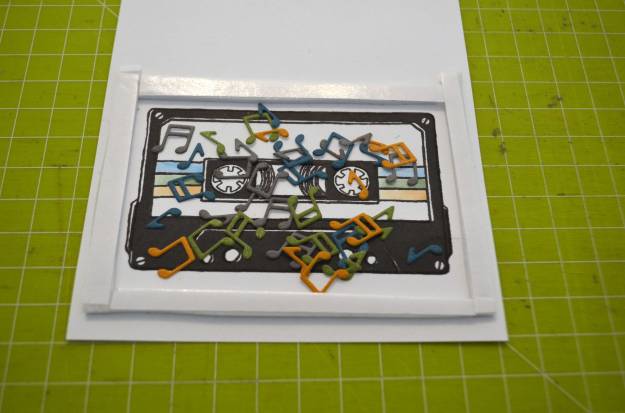
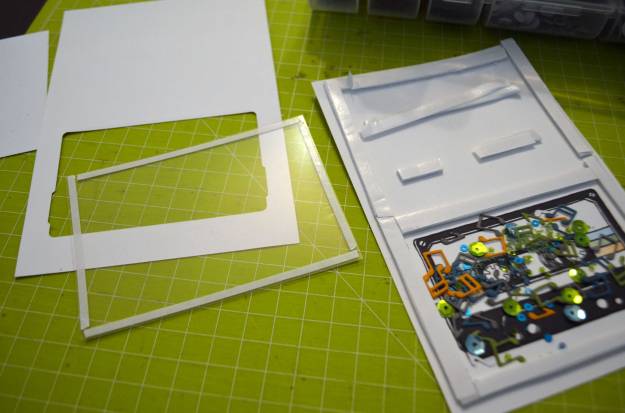
Als nächstes habe ich den Rest des Cardstockstücks mit Abstandsklebeband versehen und aus fester Folie ein Rechteck geschnitten, das etwas größer ist als die Aussparung auf dem Panel. Mit doppelseitigem Klebeband habe ich es hinter das ausgestanzte Fenster geklebt. Danach habe ich die Schutzfolien des Abstandsklebebands entfernt und das Panel auf den Shaker geklebt.
Next, I put more foam tape on the rest of the cardstock. I cut a rectangle – slightly bigger than the window I die-cut from my panel – from sturdy acetate which I adhered with some double-sided tape onto the back of the panel. Then I removed the release paper from the foam tape and put everything together.
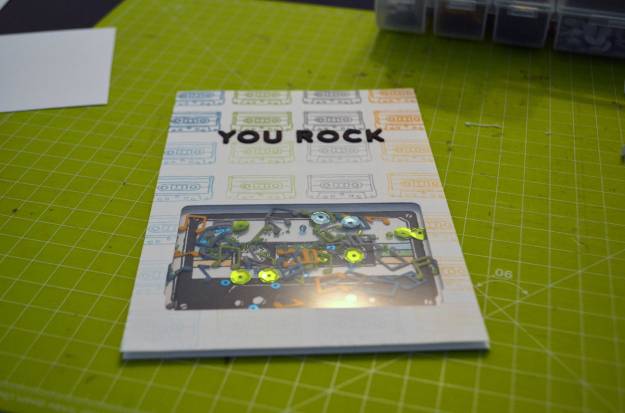
Das Ganze habe ich dann auf eine fertige Klappkarte in Kraftbraun geklebt (mit doppelseitigem Klebeband).
I adhered everything to my card base (I used double-sided tape).

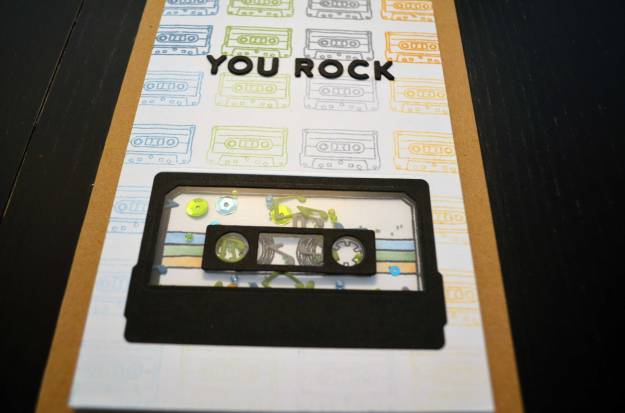
Dann habe ich mir einen Kaffee gemacht und mich vor den Fernseher gesetzt, weil ich dachte, ich bin fertig – allerdings hatte ich noch etwas Wesentliches vergessen: den Rahmen der Kassette, der schon ausgestanzt bereit lag. Ihn habe ich noch rasch mit starkem Flüssigkleber angebracht.
Und dann war ich wirklich fertig.
Next, I made some coffee and switched on the telly because I thought I was finished – but I forgot something quite substantial: the tape’s frame which I’d already die-cut. I glued it down with some strong liquid adhesive.
Then I was done for real.
Benutzte Materialien / Supplies I used
Papier & Folie / Paper & Acetate
- Cardstock in Weiß und Schwarz / cardstock in white and black
- Klappkarte in Kraft / pre-fold card in kraft brown
- feste Folie / sturdy acetate
Stanzen / Dies
- Mix Tape Dies (Concord & 9th)
- Sugar Cuts: Greatest Hits (SugarPea Designs)
Stempel / Stamps
- For the Love of Stamps: Retro Mix Tape (Hunkydory)
- Mirror Image (My Favorite Things)
- Mix Tape (Concord & 9th)
Stempelfarben / Inks
Werkzeug & Klebstoffe / Tools & Adhesives
- Abstandsklebeband / foam tape
- Acrylblock / acrylic block
- Big Shot + Platten + magnetische Platte / Big Shot + cutting pads + magnetic platform
- Cutter / craft knife
- doppelseitiges Klebeband / double-sided tape
- Nuvo Deluxe Adhesive (Tonic Studios)
- Paper Trimmer Super Trimmer 604/153e (Tonic Studios)
- Tim Holtz Stamp Platform (Tonic Studios)
Embellishments
- Pailletten / sequins
- Miniperlen / mini beads
Farben / Paints & Pens
- Chameleon Color Tones Pens (Chameleon Art Products)
