Eine Schablone, vier Transferfolien – und eine Menge Zeit. Das sind die Zutaten für diese glänzenden Babys.
One stencil, four foil transfer sheets – and a lot of time. Those are the ingredients for these shiny babies.


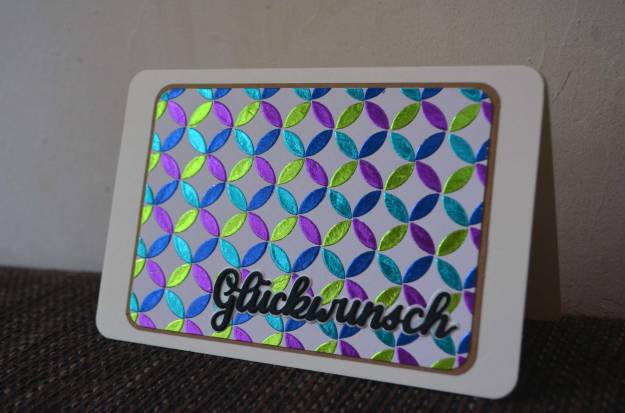
In dieses glänzende Trio habe ich etliche Arbeitsstunden investiert – aber es hat sich gelohnt, finde ich.
It took several hours to finish these three shiny cards, but they are worth every minute.
How To


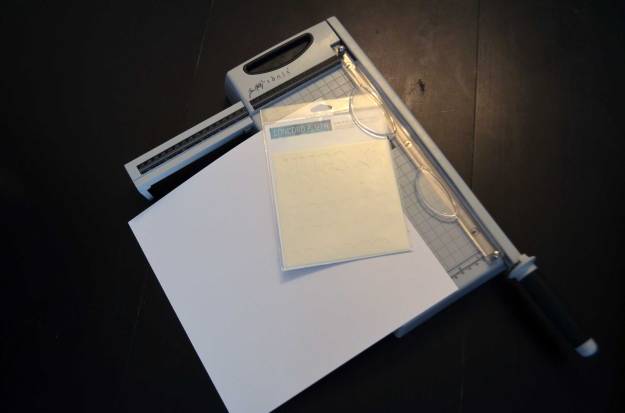
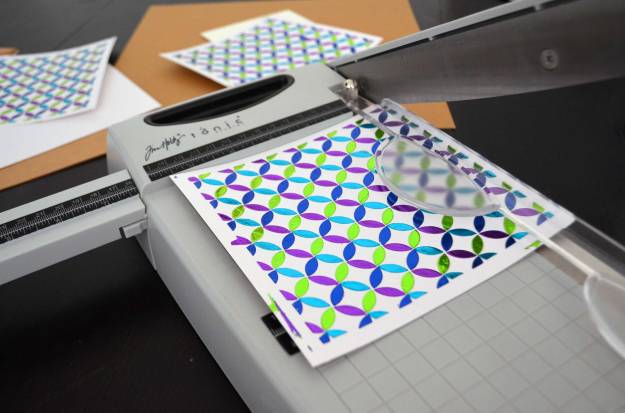
Ich wusste anfangs nicht, wie groß bzw. in welchem Format ich meine Karten gestalten wollte, daher bin ich auf Nummer sicher gegangen und habe meine Panels auf etwa dieselbe Größe wie die Schablone geschnitten.
In the beginning, I didn’t know which size resp. which format I wanted my final cards to be, so I played it safe and cut my panels to the same size as the stencil.

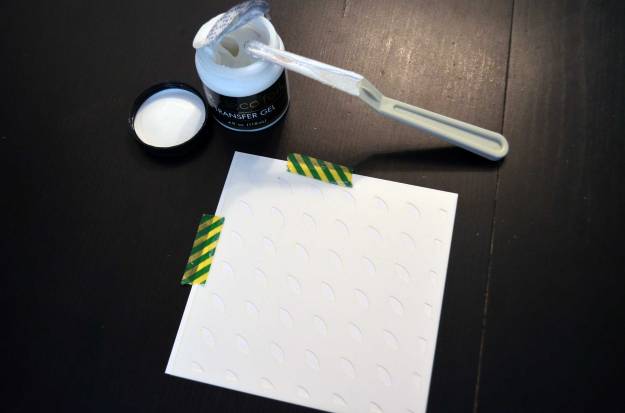
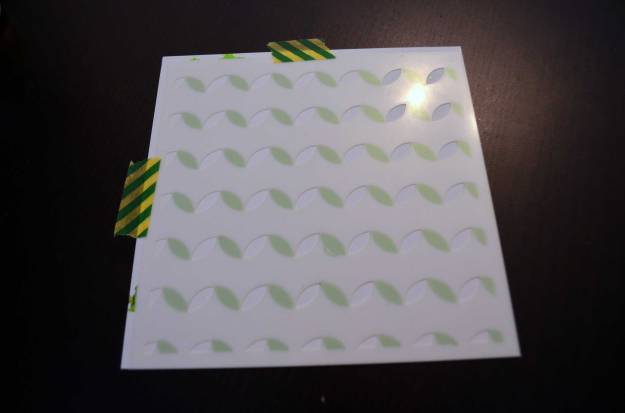
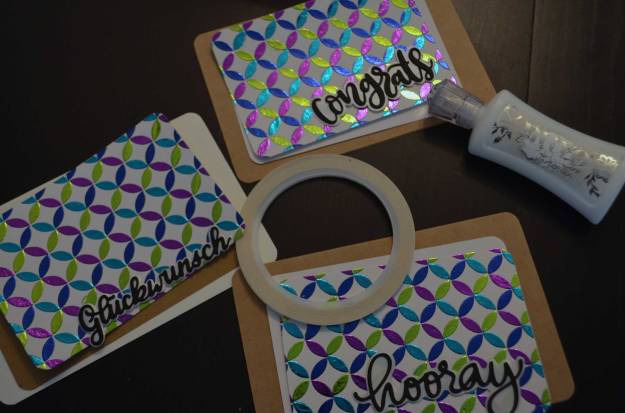
Ich habe die Schablone mit Washi Tape an Panel und Tisch befestigt und eine dünne Schicht Transfer Gel mit einem Spachtel aufgetragen.
I used washi tape to secure the stencil on top of my panel and applied a thin layer of Transfer Gel with a palette-knife.


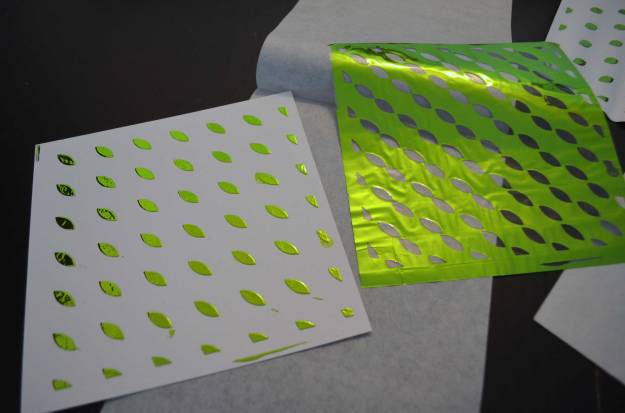
Nach der Trocknungszeit (Transfer Gel benötigt ca. eine Stunde, um trocken zu werden – ist das ursprüngliche Weiß der Paste transparent geworden, ist sie trocken genug) habe ich das erste Mal foliert. Dabei ist mir beim ersten Panel ein Hoppala passiert: Ich war zu großzügig mit dem Schutzpapier, und mein Laminiergerät hat daraufhin das Ganze „gefressen“. Daher habe ich das erste Panel verworfen (die Folie konnte ich zum Glück weiter verwenden) und statt vier eben nur drei Karten gemacht.
After the drying time was up (Transfer Gel needs up to an hour to dry; you know it’s dry when its colour turns from white to clear), I applied foil for the first time. A little accident happened: I used too much parchment paper and my laminator „ate“ the whole thing. I had to toss the panel (luckily, I could use the foil again) – and made three instead of the intended four cards.


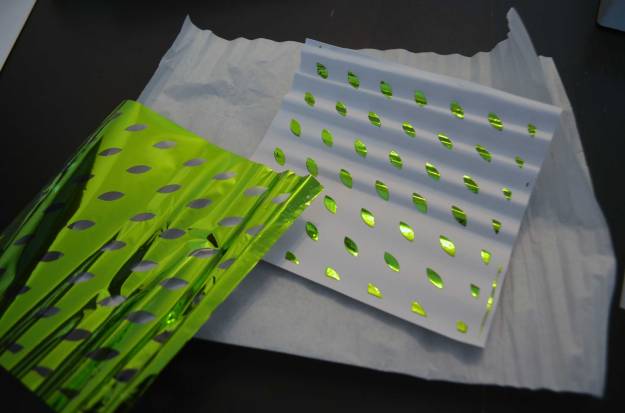
Bei den anderen drei Panels hat das Folieren zum Glück reibungslos funktioniert.
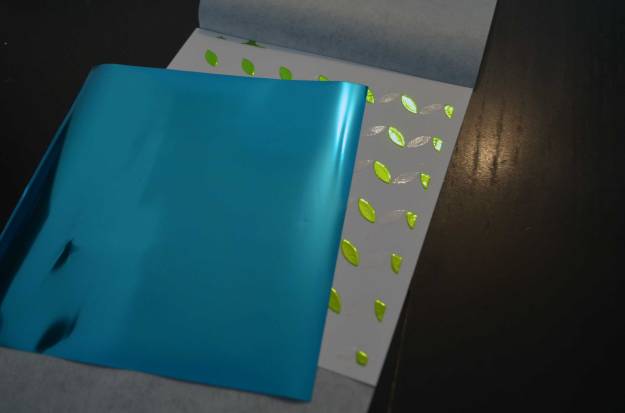
Ich habe dieselbe Folie für alle drei Panels verwendet, indem ich die Folie bei jedem Folieren gedreht oder verschoben habe. Ich musste nur darauf achten, dass die bereits leeren Stellen nicht auf dem Gel lagen.
Everything went well with the other three panels.
I used the same foil for all three panels. I just turned or shifted it so that the empty spots didn’t cover the Gel.
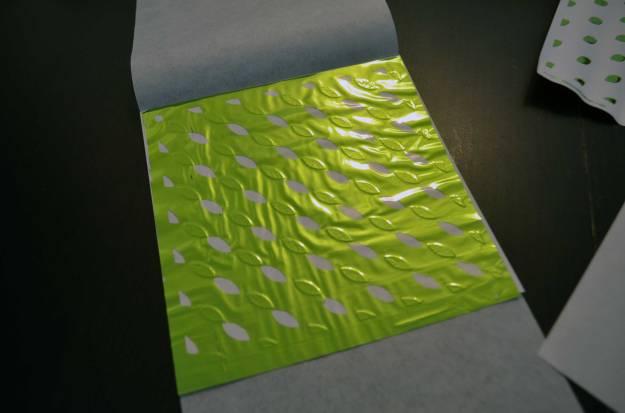
Danach habe ich die Schablone erneut aufgelegt und eine weitere Schicht Transfer Gel aufgetragen. Die Schablone, die ich benutzt habe, ist von Concord & 9th und eine sogenannte Turnabout Schablone. Sie funktioniert nach demselben Prinzip wie die Turnabout Stempel, ist aber einfacher zu handhaben und günstiger.
Wieder musste ich warten, bevor ich die nächste Folie auflegen und alles durch das Laminiergerät schicken konnte.
After that, I secured my stencil once again on top of the panel and applied another layer of Transfer Gel. The stencil I used is a so-called turnabout stencil from Concord & 9th. It works just like the turnabout stamps but is easier to handle and less expensive.
Again, I had to wait before I could apply the next foil and send everything through the laminator.

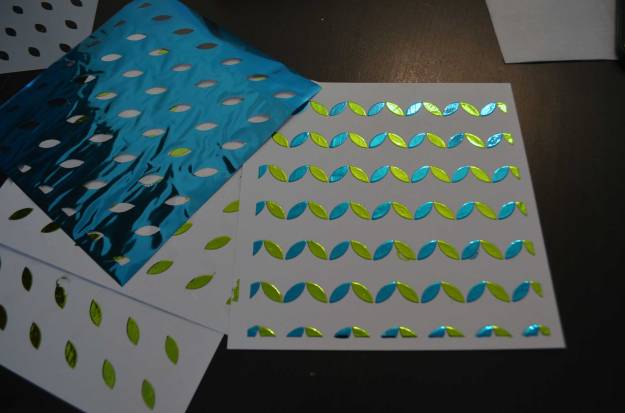
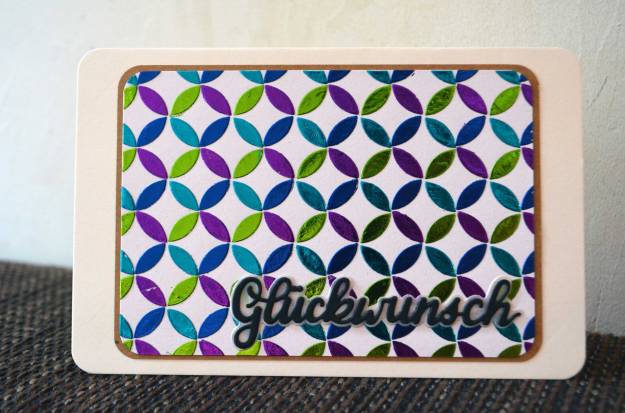
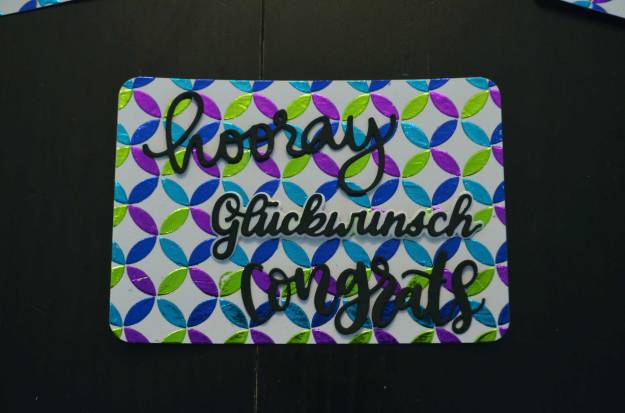
All das habe ich insgesamt viermal gemacht – und dieses schöne Ergebnis erhalten:
I did all of that four times and was happy with this result:


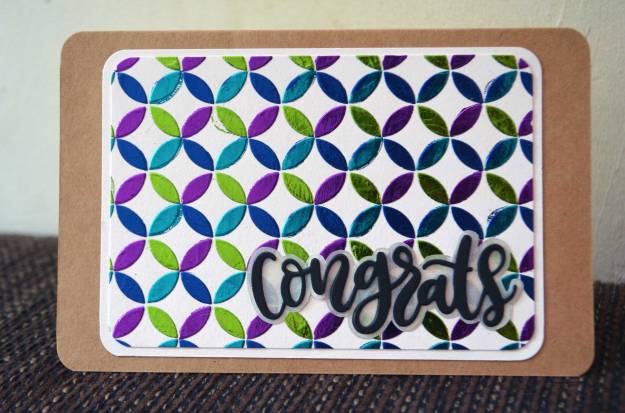
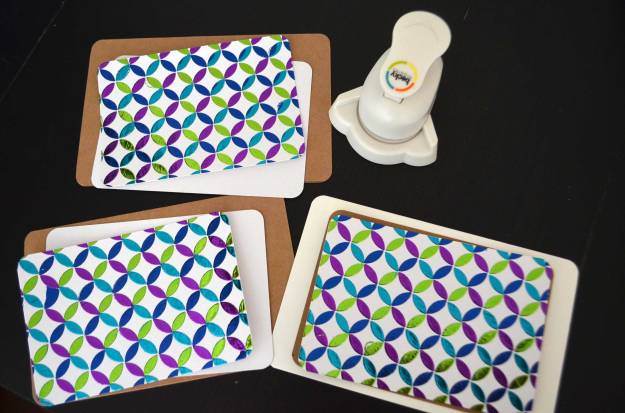
Die Panels habe ich dann kleiner geschnitten, mit einem Stück etwas größeren Cardstock in Kraftbraun bzw. Weiß unterlegt und alles auf eine Klappkarte in Kraftbraun bzw. Weiß geklebt.
Die Ecken habe ich jeweils mit einem Eckenabrunder abgerundet.
I trimmed down the panels, layed a piece of slightly bigger (kraft resp. white) cardstock underneath, and glued down everything to note cards in kraft resp. white.
I used a corner rounder on all corners.


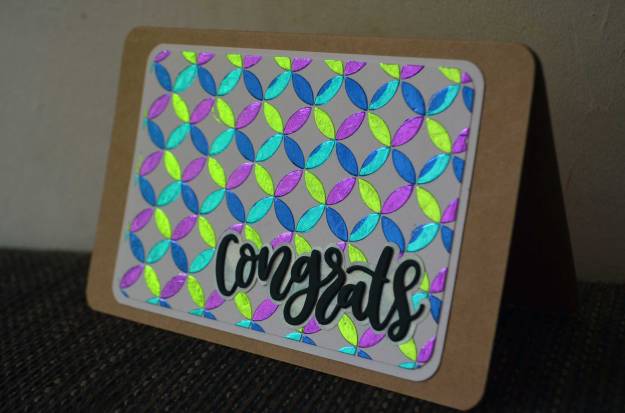
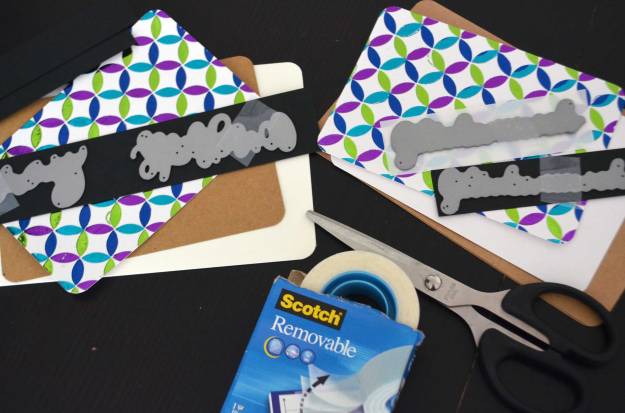
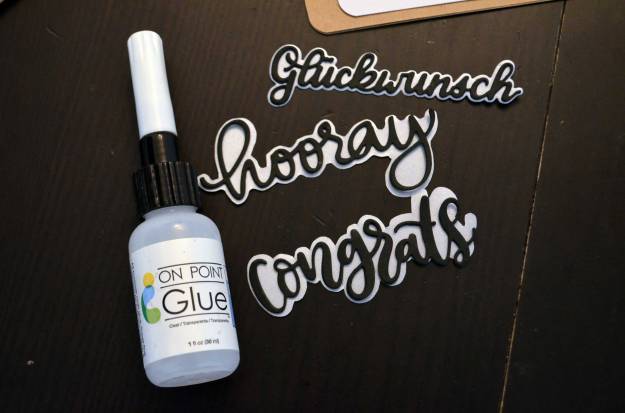
Ich habe aus schwarzem Cardstock drei Wörter – Glückwunsch, Congrats und Hooray – jeweils dreimal ausgestanzt und aufeinandergeklebt, um Dimension zu erzeugen. Damit die Stanzteile sich vom Hintergrund besser abheben, habe ich aus Pergament „Schatten“ ausgeschnitten.
Beim „Glückwunsch“ hatte ich es dabei leicht, weil bei der Textstanze bereits ein Schattenstanzen dabei ist. Die anderen zwei Schatten habe ich von Hand gemacht, indem ich die Stanzschablone verkehrt aufgeklebt, mit Bleistift nachgezogen und dann alles mit einer Schere ausgeschnitten habe.
I die-cut three sentiments – Glückwunsch, congrats and hooray – from black cardstock, each one three times. I stacked them together to create dimension. To prevent the sentiments from disappearing against the busy background, I cut out „shadows“ from vellum.
That was easy with the „Glückwunsch“ because the word die comes with a matching shadow die. For the other two sentiments, I made the shadows by myself. I traced the word dies with a pencil and cut them out with scissors.
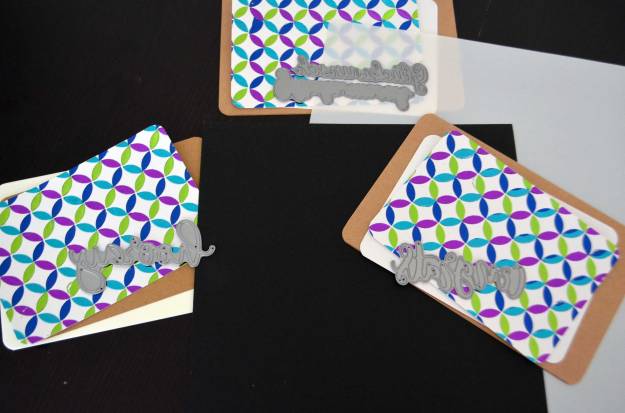
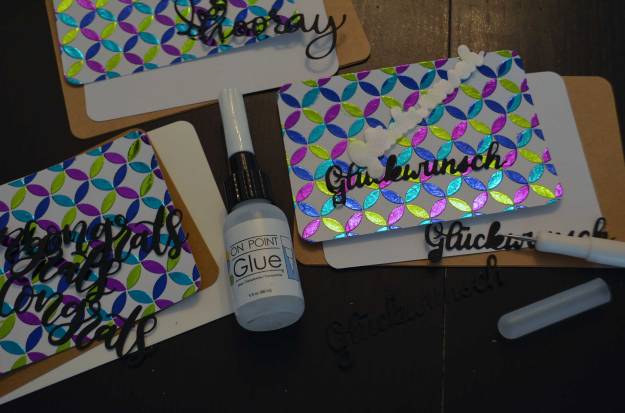


Die Wörter habe ich mit Flüssigkleber angebracht. Damit man den nicht durchs Pergament schimmern sieht, habe ich nur dort Klebstoff aufgetragen, wo Cardstock ist.
I adhered the sentiments with liquid adhesive. Glue shows through vellum, so I applied it only there where there is cardstock.


Benutzte Materialien / Supplies I used
Papier / Paper
- Cardstock in Weiß, Schwarz und Kraftbraun / cardstock in white, black, and kraft brown
- Pergamentpapier / vellum
- Klappkarten in Weiß und Kraftbraun / prefold cards in white and kraft brown
Stanzen / Dies
- Cool Cuts Glückwunsch (Create A Smile)
- Creative Cuts Hooray Script (Mama Elephant)
- Die-namics Congrats (My Favorite Things)
Schablonen / Stencils
- Retro Petals Turnabout Stencils (Concord & 9th)
Werkzeug & Klebstoffe / Tools & Adhesives
- Big Shot + Platten + magnetische Platte / Big Shot + cutting pads + magnetic platform
- doppelseitiges Klebeband / double-sided tape
- Eckenabrunder (Becky Higgins/Project Life/American Crafts) / corner rounder
- Nuvo Deluxe Adhesive (Tonic Studios)
- On Point Glue (Imagine Crafts/Tsukineko)
- Paper Trimmer 12,25″/31 cm Maxi Guillotine 1980ePaper Trimmer 12,25″/31 cm Maxi Guillotine 1980e (Tonic Studios)
- Schere / scissors
- Washi Tape zum Befestigen / washi tape for temporary adhering
- wiederablösbares Klebeband (3M Scotch) / removable tape (3M Scotch)
Embellishments
- iCraft Deco Foil Transfer Gel (Therm-o-Web)
- iCraft Deco Foil Transfer Sheets Deep Blue (Therm-o-Web)
- iCraft Deco Foil Transfer Sheets Purple (Therm-o-Web)
- iCraft Deco Foil Transfer Sheets Spring Green (Therm-o-Web)
- iCraft Deco Foil Transfer Sheets Teal (Therm-o-Web)

those are amazing! well worth the time!
LikeGefällt 1 Person