Diese Karte habe ich für den neugeborenen Sohn meiner Cousine gebastelt.
I made this card for my cousin’s newborn son.
Glückwunschkarten zur Geburt finde ich persönlich am besten, wenn sie absolut individuell sind – deshalb warte ich immer ab, bis ich den Namen des Neugeborenen kenne, bevor ich mit der Arbeit an einer Karte beginne.
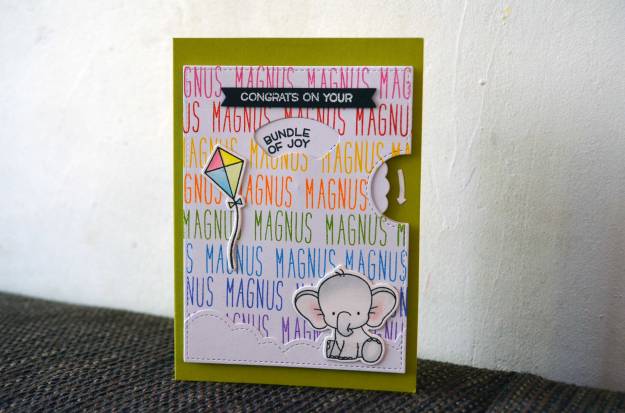
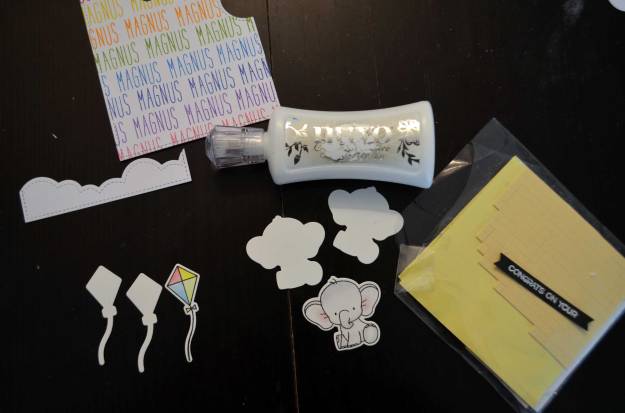
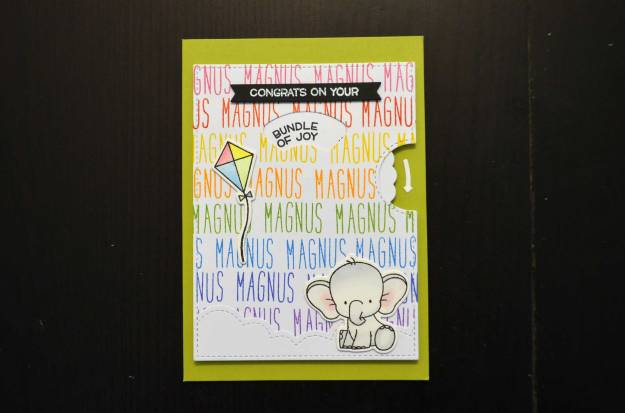
Eine Variante, mit dem Namen zu spielen, ist es, mit ihm den Hintergrund zu gestalten. Das kann man ganz subtil machen wie bei dieser Karte – oder etwas auffälliger in Regenbogenfarben wie hier.
Die Karte ist übrigens nicht nur zum Ansehen, man kann auch ein wenig mit ihr spielen, da es sich um eine Reveal Wheel Karte handelt: Dreht man rechts am Rad, erscheinen im kleinen Fenster verschiedene Ergänzungen zu „Congrats on your …“.
For new baby cards, I love to go for individuality. That’s why I always wait until I know the newborn’s name before I start working on a card.
One way to play with a name is to create the background with it. You can do that either very subtle (like I did for this card) or more flashy (e.g. in rainbow colours like I did here).
By the way, you can not only look at this card but also play with it, because it’s a reveal wheel card: If you spin the wheel on the right, different messages that coordinate with the „Congrats on your …“ appear in the little window.
How To
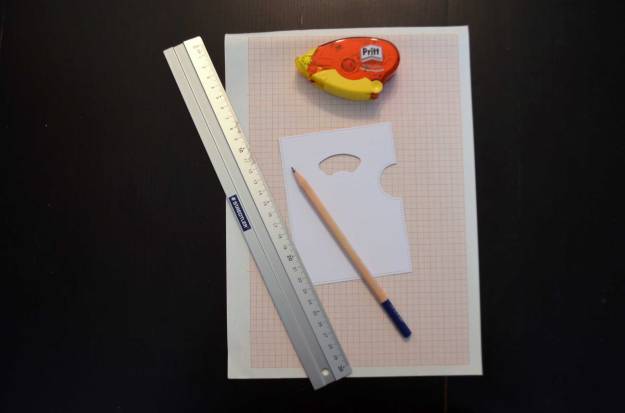
Zunächst habe ich die Bestandteile des interaktiven Elements, des Reveal Wheels, aus weißem Cardstock ausgestanzt.
I started with die-cutting the individual parts of the interactive element, the reveal wheel, from white cardstock.


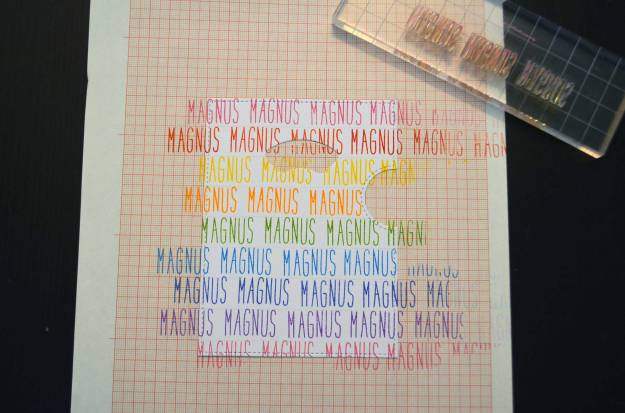
Den vorderen Teil mit dem Fenster habe ich mithilfe von etwas wiederablösbarem Klebstoff auf einem Blatt Millimeterpapier befestigt. So war es sehr leicht, feine Bleistiftlinien in immer gleichen Abständen zu ziehen. Diese Abstände bemessen sich nach der Höhe der Buchstaben, die ich zum Stempeln benutzt habe (etwa 1,5 cm).
A bit repositionable glue kept the front panel with the little window on a sheet of scale paper. The scale paper is a great help when it comes to draw pencil lines with ever the same distance between each line. The height of each line correspondends with the size of the letters I used to stamp (approx. 1,5 cm).
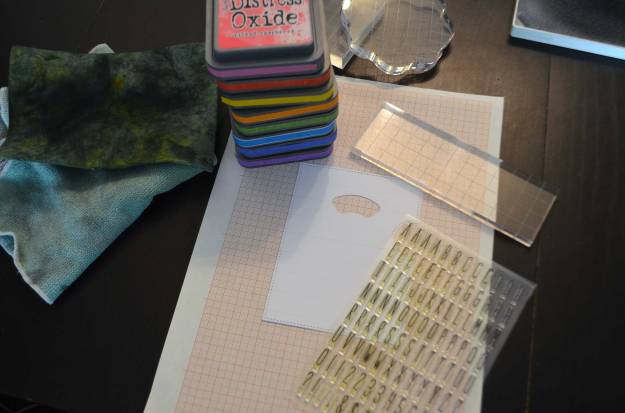
Zum Stempeln habe ich einen langen Acrylblock und acht Distress Oxide-Töne benutzt. Das Buchstabenset von Lawn Fawn enthält glücklicherweise jeden Buchstaben mehrmals, so konnte ich den Namen gleich dreimal zugleich stempeln. Bevor ich auf mein Panel gestempelt habe, habe ich das Ganze erst einmal auf einem Blatt Schmierpapier ausprobiert.
I used a long acrylic block and eight shades of Distress Oxide to stamp. Luckily, the alphabet stamp set by Lawn Fawn contains each letter several times – thanks to that I could stamp the name three times at once. Before I stamped onto my panel, I tried it on a piece of scrap paper.
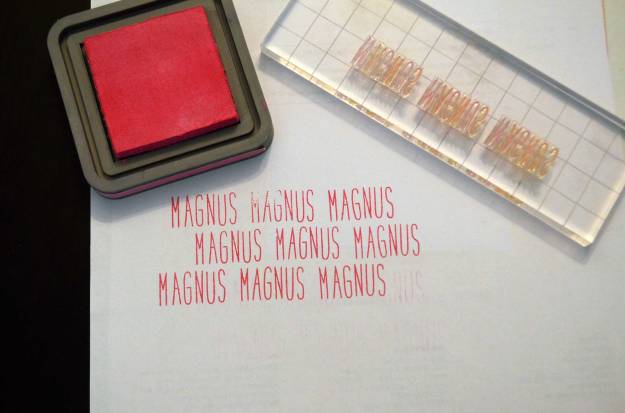
Danach war das Bestempeln des Panels an der Reihe: Ich habe jede Zeile in einer anderen Farbe (Pink – Rot – Gelb – Orange – Grün – Hellblau – Dunkelblau – Lila – Pink) gestempelt und dabei darauf geachtet, die Namen nicht direkt untereinander, sondern etwas versetzt zu stempeln. Das wirkt verspielter.
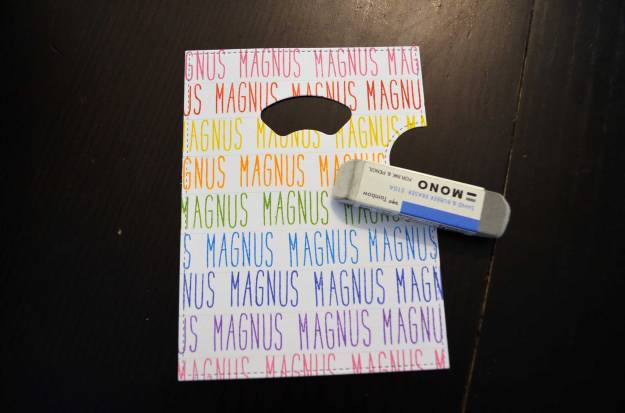
Nachdem die Tinte getrocknet war, habe ich die Bleistiftlinien ausradiert.
After that, I stamped onto my panel. I stamped each line in a different colour (pink – red – yellow – orange – green – light blue – dark blue – purple – pink). For a playful look, I made sure I stamped the name slightly offset each time.
I waited for the ink to dry completely before erasing the pencil lines.
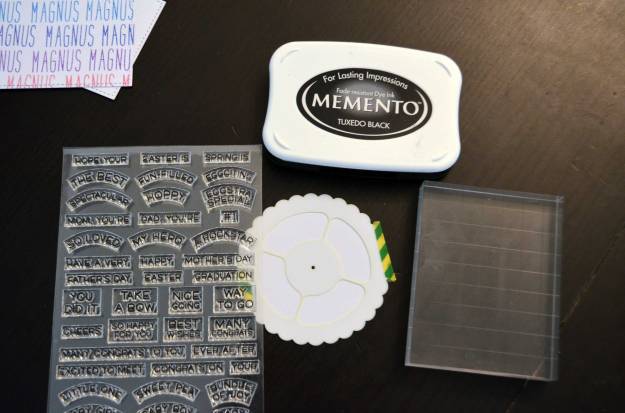
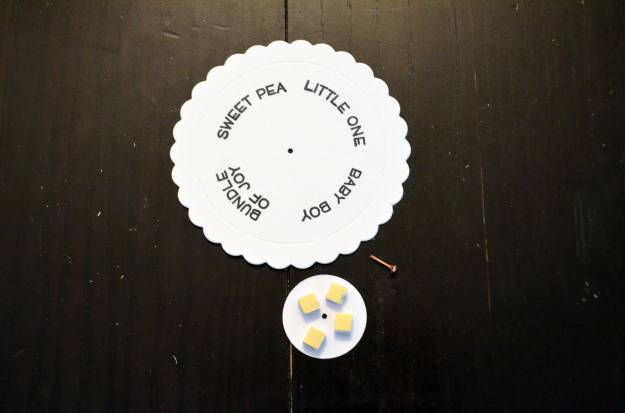
Als nächstes habe ich mit Memento Tuxedo Black die kleinen Fensterbotschaften auf das Reveal Wheel gestempelt. Um sicherzugehen, dass diese ganz genau an den richtigen Stellen sitzen, habe ich die passende Schablone von Lawn Fawn verwendet. Die muss man sich übrigens nicht unbedingt kaufen, weil die Stanze nicht nur ausschneidet, sondern auch praktische Hilfslinien ins Papier prägt, aber mit der Schablone ist die Sache noch leichter.
Next, I used Memento Tuxedo Black to stamp four little sentiments on the reveal wheel. To make sure to hit the right spots, I used the coordinating stencil from Lawn Fawn. You don’t really need to buy the stencil because the die does not only cut the wheel but also provides some very helpful score lines. The stencil makes the whole thing even easier, but it isn’t a must.
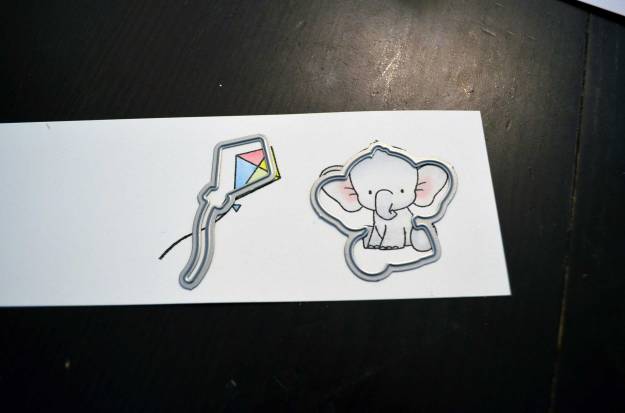
Den kleinen Elefanten und den Drachen habe ich mit VersaFine gestempelt und transparent embosst, damit die Tinte (die sich eigentlich nicht mit alkoholbasierten Farben verträgt und bei Kontakt ausblutet) von den Alkoholmarkern, die ich zum Ausmalen benutzt habe, geschützt bleibt.
I used VersaFine to stamp the elephant and the kite. To protect the ink (VersaFine would bleed if used with alcohol-based colours) from the alcohol-based markers I used to colour the images, I heat-embossed everything with clear embossing powder.

Den Spruch „Congrats on your“ habe ich mit VersaMark auf ein Stück schwarzen Cardstock, den ich zuvor mit meinem Antistatiktool behandelt habe, gestempelt und mit weißem Puder embosst.
I stamped the sentiment „Congrats on your“ with VersaMark onto a piece of black cardstock (which I prepared with my anti-static tool) and heat-embossed it with white embossing powder.

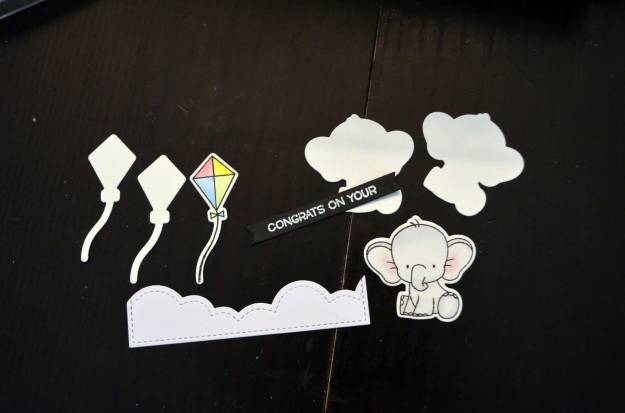
Anschließend habe ich Elefant und Drachen mit Chameleon Pens koloriert und mit den dazugehörigen Stanzen ausgeschnitten.
Next, I coloured the elephant and the kite with Chameleon Pens and die-cut both images with the coordinating dies.

Den weiß embossten Spruch habe ich mit einer kleinen Fishtail-Stanze ausgeschnitten, und aus einem Reststück weißen Cardstocks habe ich mit einer Randstanze eine Wolke ausgestanzt.
Again some die-cutting: I used a fishtail die for the sentiment and a border die to cut out a cloud.


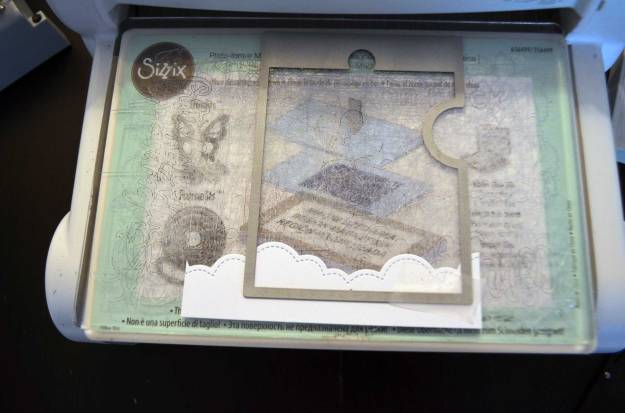
Damit die Wolke die richtige Breite hat und der hübsche Stickrand auch dort zu sehen ist, habe ich das Wolkenstück auf das Panel gelegt, zusammen mit dem Panel in die Stanze, mit der ich schon das Panel ausgeschnitten habe, eingepasst, das Wolkenstück mit etwas ablösbarem Klebeband auf der Stanze fixiert und das Panel wieder entfernt. Anschließend habe ich nur das Wolkenstück durch meine Stanz- und Prägemaschine geschickt.
I wanted the cloud to be the same size and the same stitched border as the panel. So I layed the cloud onto the panel and used the panel die once again after I secured the cloud piece with removable tape directly to the die and removed the panel itself.


Elefant und Drachen habe ich jeweils dreimal ausgestanzt, zweimal davon blank. Die Einzelteile habe ich aufeinander geklebt, um Dimension zu erzeugen. Beides habe ich – genauso wie die Wolke – mit starkem Flüssigkleber direkt auf das Panel geklebt. Den Spruch „Congrats on your“ habe ich mit dreidimensionalen Klebepads angebracht.
I die-cut the elephant and the kite three times (two times blank). I stacked the individual parts to create some dimension. With some strong liquid adhesive, I stuck down both die-cuts and the cloud directly onto the panel. I used foam squares to adhere the sentiment.
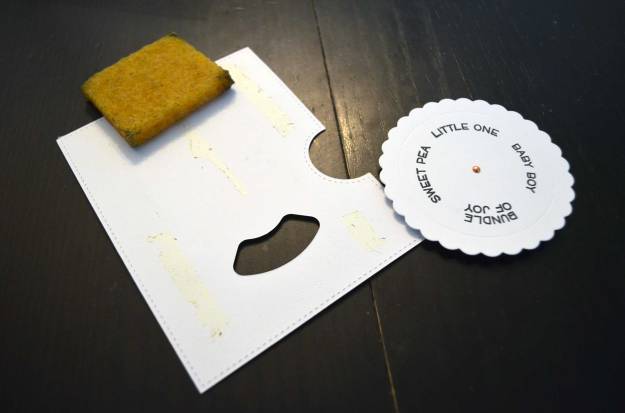
Zeit, den Drehmechanismus zu machen: Dazu muss man einfach nur eine winzig kleine Musterklammer durch das Reveal Wheel und anschließend durch den zweiten, kleineren Kreis, der auf der Rückseite mit einigen dreidimensionalen Klebepads versehen wird, stecken und ihre „Beine“ hinten auseinanderdrücken.
Time to create the spinning mechanism. Therefore, I put a tiny brad through the little whole of the reveal wheel and the smaller circle (I stuck some foam squares to the back of the circle beforehand) and spread it.

Das Panel hatte ich zuvor ja auf dem Millimeterpapier befestigt. Der temporäre Klebstoff war mir nun aber im Weg, weil er das Reveal Wheel vom freien Drehen abhielt. Also habe ich ihn mit einem speziellen Radiergummi – das Ding ist dafür konzipiert, Klebstoff wegzurubbeln – entfernt.
Previously, I used some temporary glue on the panel to adhere it to the scale paper. This glue got in my way because it prevented the reveal wheel from spinning freely. So I removed it by using a special rubber which is designed for this exact purpose.
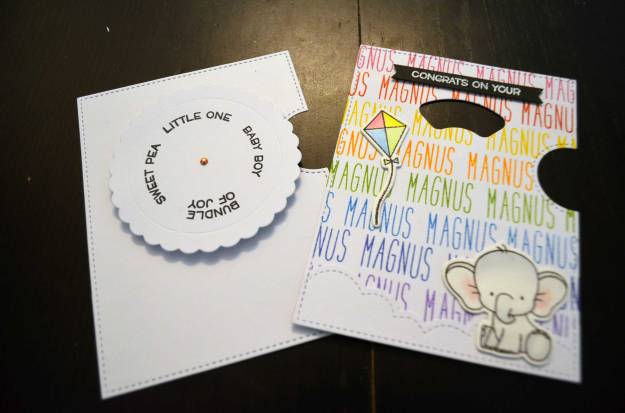
Als nächstes habe ich das Reveal Wheel so angepasst, dass die kleinen Sprüche genau im kleinen Fenster zu sehen sind. Das Ganze fest im Griff, habe ich das Schutzpapier von den Klebepads abgezogen, das rückseitige Gegenstück des Panels bündig angelegt und festgedrückt. So klebt das Reveal Wheel genau an der richtigen Stelle. Auf YouTube und der Lawn Fawn-Website finden sich viele Videos, die genau erklären, wie das Reveal Wheel zusammengebaut wird.
Next, I put the reveal wheel behind the panel and adjusted it until I found the sentiments fitted perfectly into the window. Without letting go, I removed the release paper from the foam squares, lined the backing panel up with the front panel and pressed both panels firmly together. As a result, the reveal wheel sticks exactly where it needs to stick. You can find a lot of video tutorials how to assemble the reveal wheel on YouTube and Lawn Fawn’s website.

Auf dem Rückenstück habe ich ein paar Streifen Abstandsklebeband angebracht, das Schutzpapier abgezogen und das Panel bündig aufgesetzt.
I used some strips of foam tape on the backing, removed the release paper, aligned the panel, and stuck it down.

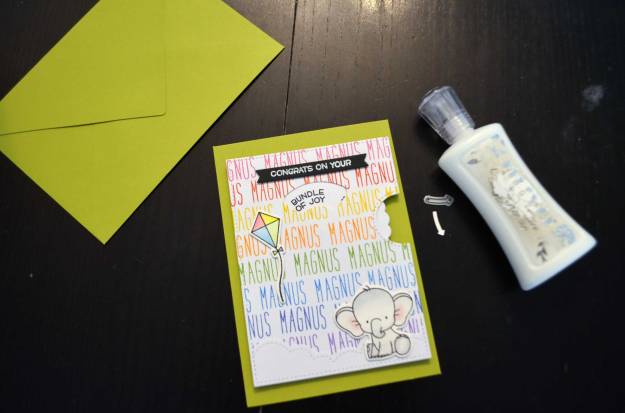
Das interaktive Element habe ich mit Flüssigkleber auf eine Klappkarte geklebt. Außerdem habe ich noch einen winzigen Pfeil, der beim Reveal Wheel-Set dabei ist, ausgestanzt und aufgeklebt.
I adhered the interactive element with liquid glue onto a note card. Plus, I added a small arrow which is part of the reveal wheel die set.
Benutzte Materialien / Supplies I used
Papier / Paper
- Cardstock in Weiß und Schwarz / cardstock in white and black
- Klappkarte in Grün / prefold card in green
- Millimeterpapier / scale paper
- Schmierpapier / scrap paper
Stanzen / Dies
- Die-namics BB Adorable Elephants (My Favorite Things)
- Die-namics Skinny Strips (My Favorite Things)
- Lawn Cuts Reveal Wheel (Lawn Fawn)
Stempel / Stamps
- BB Adorable Elephants (My Favorite Things)
- Milo’s ABCs (Lawn Fawn)
- Reveal Wheel Sentiments (Lawn Fawn)
Stempelfarben / Inks
- Distress Oxide/Blueprint Sketch, Candied Apple, Carved Pumpkin, Mowed Lawn, Mustard Seed, Picked Raspberry, Salty Ocean und Wilted Violet (Ranger)
- Memento/Tuxedo Black (Tsukineko)
- VersaFine/Onyx Black (Tsukineko)
- VersaMark (Tsukineko)
Embossing / Heat Embossing
- Clear Gloss Superfine (WOW!)
- Opaque Bright White Super Fine (WOW!)
Schablonen / Stencils
- Reveal Wheel Templates: Essential Shapes (Lawn Fawn)
Werkzeug & Klebstoffe / Tools & Adhesives
- Abstandsklebeband / foam tape
- Adhesive Eraser (Xyron)
- Antistatiktool / anti-static tool
- Acrylblock / acrylic block
- Big Shot + Platten + magnetische Platte / Big Shot + cutting pads + magnetic platform
- dreidimensionale Klebepads (Foam Pads) / foam squares
- Heat Tool (WOW!)
- Kleberoller (wiederablösbar): Refill Roller non-permanent (Pritt) / tape runner (removable): Refill Roller non-permanent (Pritt)
- Lineal / ruler
- Mini Brads/Klammern (Papermania/Docrafts)
- Mono Sand & Rubber Eraser (Tombow)
- Nuvo Deluxe Adhesive (Tonic Studios)
- Paper Trimmer 8,5″/22 cm 160e (Tonic Studios)
- Paper Trimmer 12,25″/31 cm Maxi Guillotine 1980ePaper Trimmer 12,25″/31 cm Maxi Guillotine 1980e (Tonic Studios)
- Schere / scissors
- Stamp Shammy (Lawn Fawn)
- wiederablösbares Klebeband (3M Scotch) / removable tape (3M Scotch)
Farben / Paints & Pens
- Chameleon Color Tones Pens (Chameleon Art Products)

Pingback: Weihnachtshaus / Christmas House (Reveal Wheel) | Felix bastelt
Pingback: Wahrsagerkatze / Fortune Teller Tabby | Felix bastelt
Pingback: Dankbare Hasen / Thankful Bunnies (Reveal Wheel) | Felix bastelt