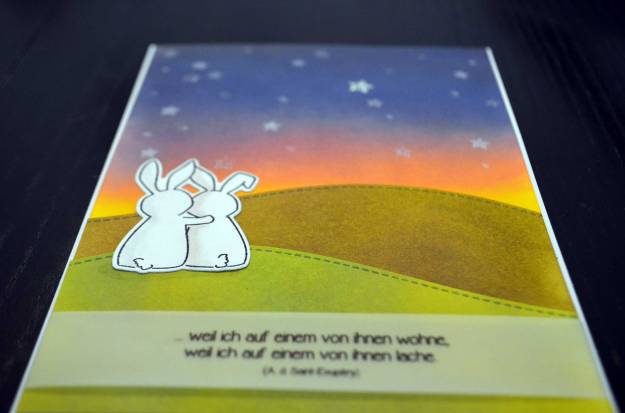
„Herzensmenschen“ ist eine Organisation, die Eltern von Sternenkindern und Frühchen Hilfestellung bietet. Sternenkinder sind Kinder, die leider viel zu früh gestorben sind: entweder bereits im Mutterleib, während oder kurz nach der Geburt.
Für diese Organisation habe ich ein paar Karten mit diesem Design gemacht.
„Herzensmenschen“ is an organisation that helps parents of star children and preemies. Star children are children who died much too soon: in the womb, during birth or shortly after.
I made some cards with this design for this organisation. Read more about it here.
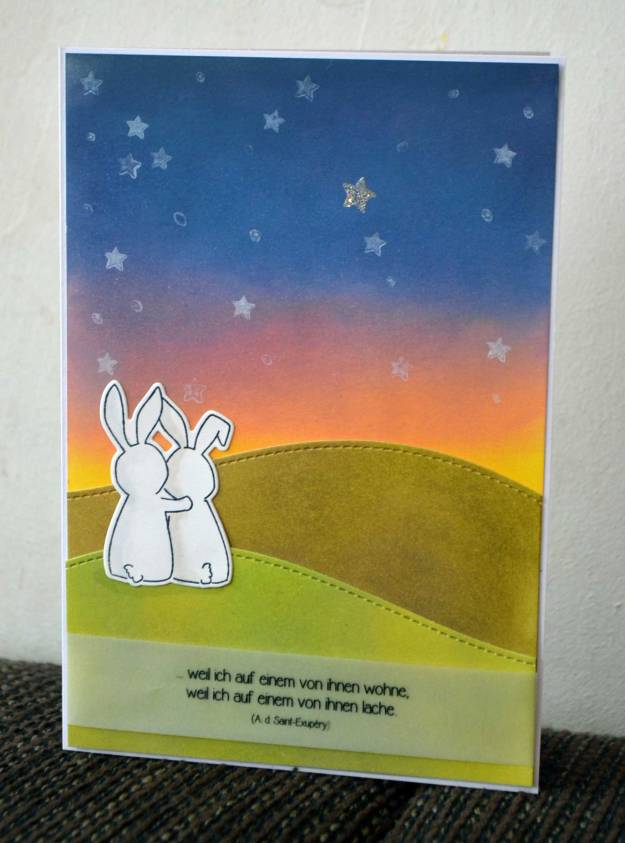
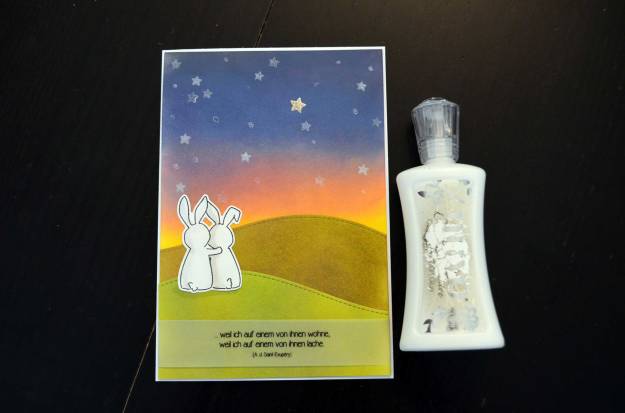
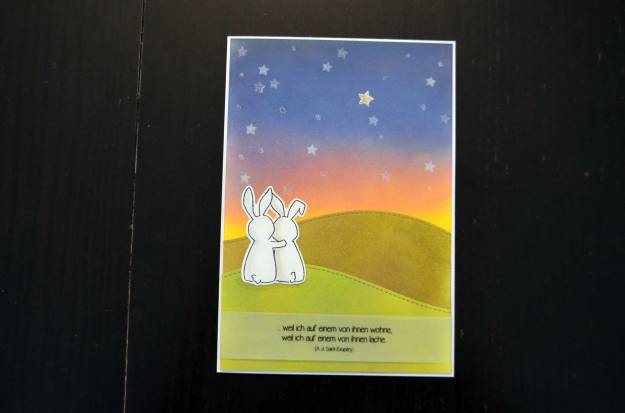
Die friedliche Abendstimmung, das Hasenpärchen, der glänzende Stern am Himmel – man könnte auch ganz leicht eine romantische Karte daraus machen. Dass der Anlass für die Karte kein glücklicher ist, erkennt man aber am Zitat aus „Der kleine Prinz“ von Antoine de Saint-Exupéry.
The peaceful setting, the pair of rabbits, the twinkling star at the evening sky – this could easily be a romantic card. The sentiment – a quote from „The Little Prince“ by Antoine de Saint-Exupéry (in English, it reads: „In one of the stars I shall be living. In one of them I shall be laughing.“) – reveals the sad occasion.
How To
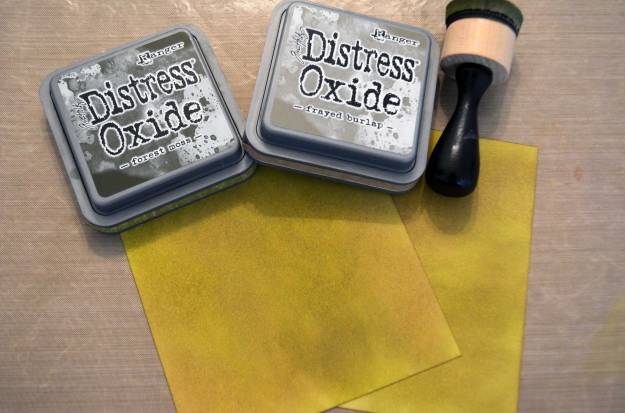
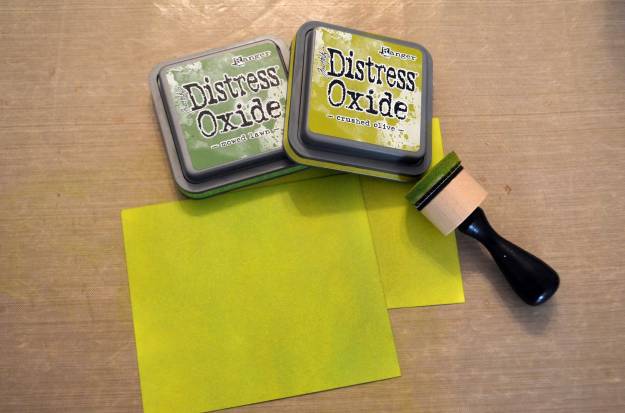
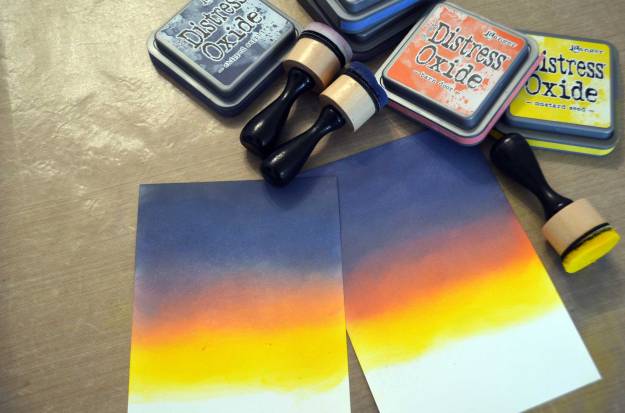
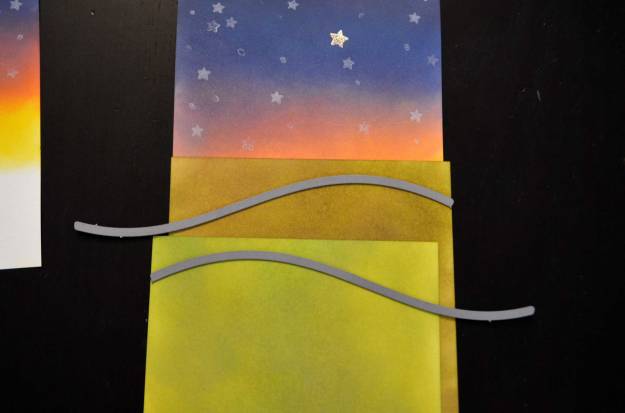
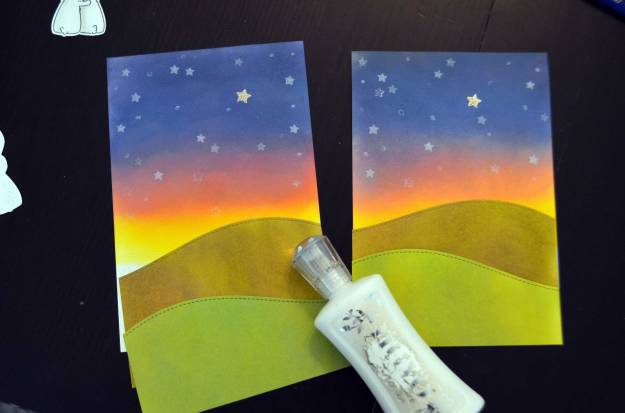
Für diese Karte musste ich ziemlich viel Tinte (Distress Oxide) verblenden. Begonnen habe ich mit den Hügeln: Der hintere, dunklere, ist eine Mischung aus Frayed Burlap und Forest Moss, der vordere, hellere eine aus Mowed Lawn und Crushed Olive.
Beide Male habe ich die Tinten mit einem Blending Tool aufgetragen und miteinander vermischt. Ich habe jeweils mit dem helleren Ton begonnen und den dunkleren vorsichtig hinzugefügt.
I blended a lot of ink (Distress Oxide) for this card. I started with the hills: For the one in the back I used Frayed Burlap and Forest Moss, for the one in the foreground Mowed Lawn and Crushed Olive.
I used a blending tool to apply and blend the inks. Each time, I began with the lighter shade and carefully added the darker one.

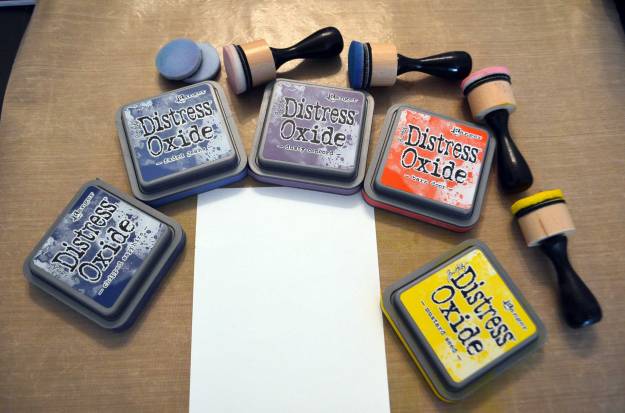
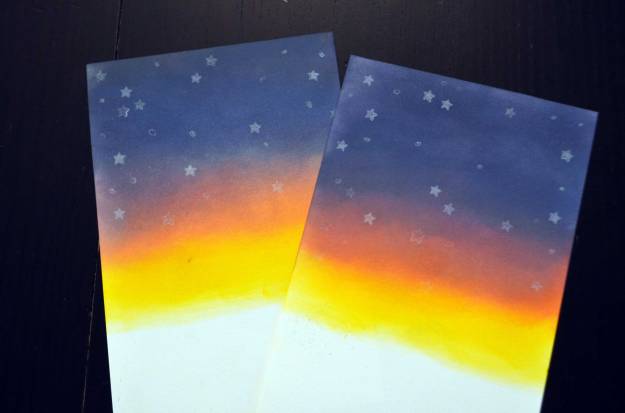
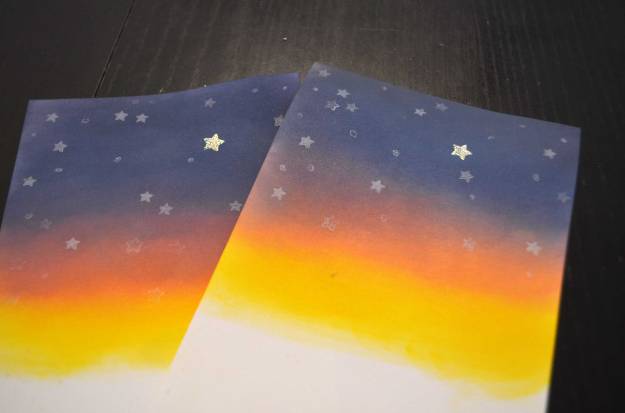
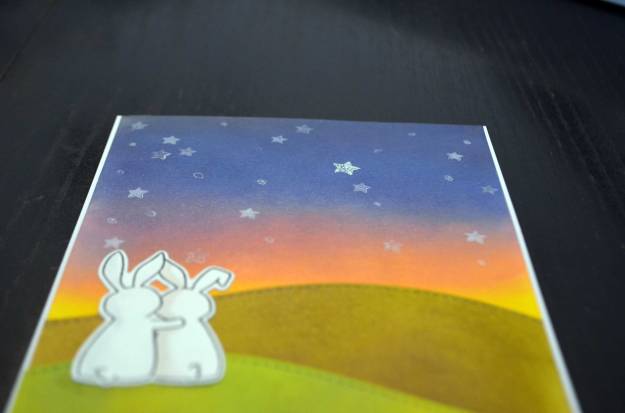
Den Abendhimmel habe ich anhand von Fotos gestaltet – der Farbverlauf reicht von einem sehr dunklen Blau bis zu einem warmen, hellen Gelb. Wieder waren Blending Tools im Einsatz. Den untersten Teil des Hintergrunds habe ich weiß gelassen, weil er von den Hügeln verdeckt werden wird.
On the basis of photos, I created the evening sky. The colour gradient starts with a very dark blue and ends in a light, warm yellow. Again, I used blending tools. I didn’t colour the very bottom of the panel as the hills will hide it anyway.

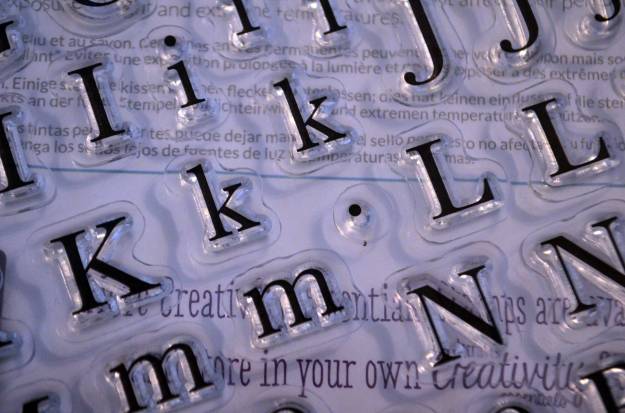
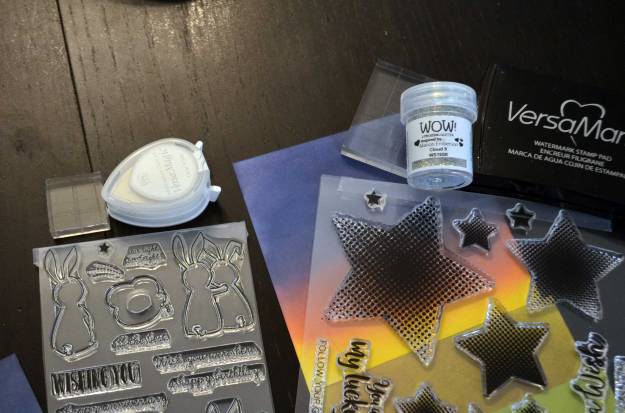
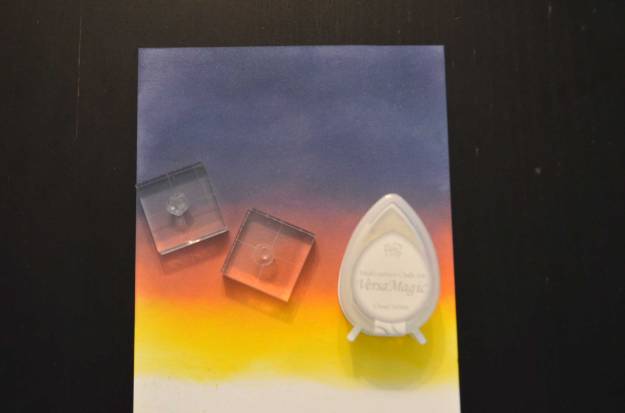
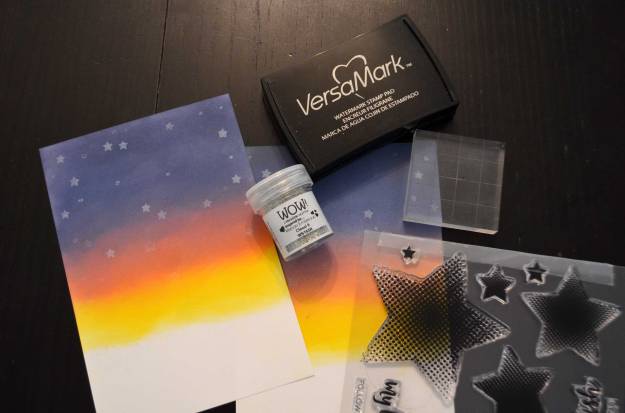
Um einen Sternenhimmel zu kreieren, habe ich zum einen den Punkt eines Alphabet-Sets verwendet und andererseits zwei Sterne aus zwei verschiedenen Stempelsets. Den größeren von beiden Sternen habe ich mit VersaMark aufgestempelt und mit einem glitzernden Puder embosst – er stellt das verstorbene Kind dar. Mit weißer Pigmenttinte habe ich den kleineren Stern und den Punkt mehrfach aufgestempelt.
To create the starry sky, I used the full stop from an alphabet set and two stars from different stamp sets. I used VersaMark to stamp the bigger star and heat-embossed it with a sparkling embossing powder – this star represents the child. I stamped the smaller star and the full stop repeatedly with a white pigment ink.
Danach habe ich die Hügel mit Randstanzen ausgeschnitten.
Next, I die-cut the hills with border dies.

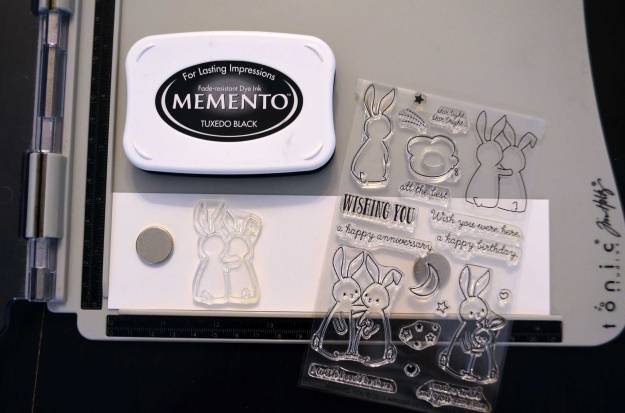
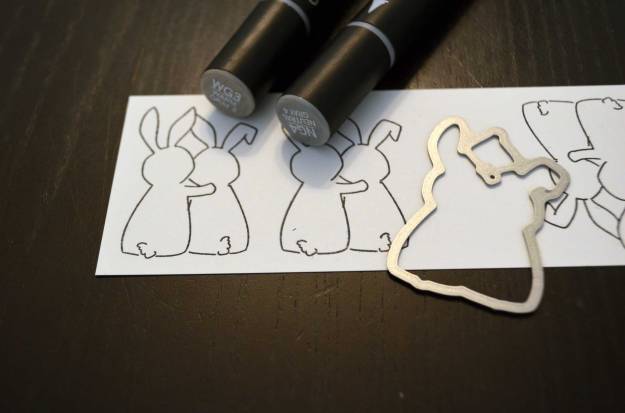
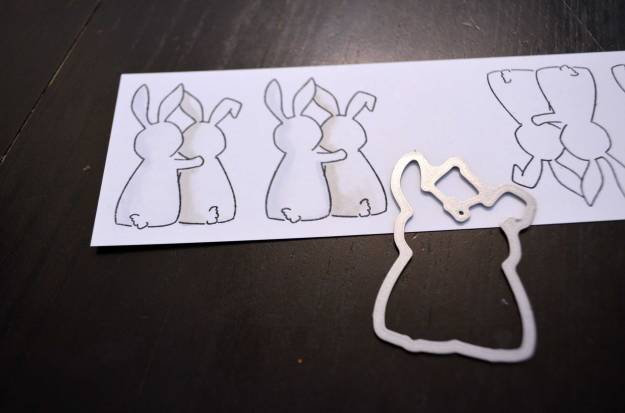
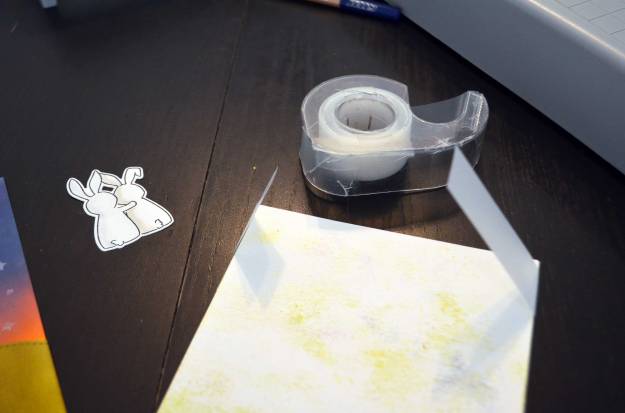
Das Hasenpaar habe ich mit Memento Tuxedo Black gestempelt, mit Chameleon Pens ausgemalt und anschließend ausgestanzt.
I stamped rabbits with Memento Tuxedo Black, coloured them with Chameleon Pens and die-cut them.
Die Hügel habe ich auf das Panel aufgelegt und so lange herumgeschoben, bis ich zufrieden war. Dann habe ich auf der Rückseite mit Bleistift markiert, wo ich die beiden Hügel beschneiden musste.
I moved the hills around the panel until I was happy with the placement. I used a pencil to mark on the back where to trim them.
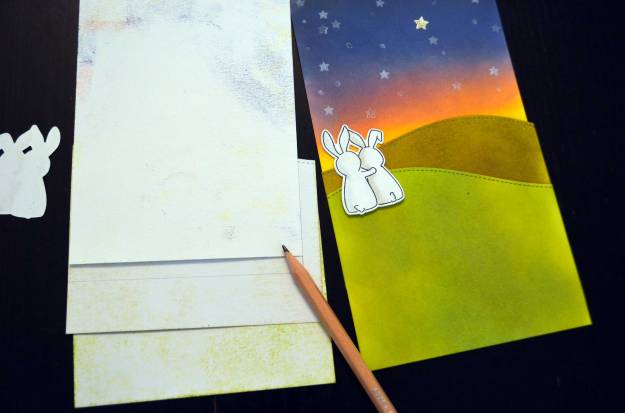
Die Hügel habe ich mit Flüssigkleber auf den Hintergrund geklebt, die Hasen – ebenfalls mit Flüssigkleber – auf die Hügel.
I used liquid adhesive to glue the hills onto the background and the rabbits onto the hills.
Das Zitat habe ich mit meinem Computer gestaltet und auf Transparentpapier ausgedruckt. Davon habe ich einen Streifen abgeschnitten, diesen um den Hintergrund geschlagen und auf der Rückseite mit einem Streifen Klebeband fixiert.
I generated the quote on my computer and printed it on transparent paper. I cut it into a strip which I wrapped around the panel. I taped it down on the back of the panel.

Mit Flüssigkleber habe ich das Panel auf eine weiße Klappkarte geklebt.
I used liquid glue to adhere the panel to a white note card.

Benutzte Materialien / Supplies I Used
Papier / Paper
- Cardstock in Weiß / cardstock in white
- Klappkarte in Weiß / prefold card in white
- Transparentpapier / transparent paper
Stanzen / Dies
- Lawn Cuts Stiched Hillside Borders (Lawn Fawn)
- Wishing You Die (WPlus9)
Stempel / Stamps
- Alphas Trad (docrafts) [Wird offenbar nicht mehr hergestellt, daher kein Link.]
- Halftone Stars Stamp Set (Altenew)
- Wishing You (WPlus9)
Stempelfarben / Inks
- Distress Oxide/Barn Door, Chipped Sapphire, Crushed Olive, Dusty Concord, Faded Jeans, Forest Moss, Frayed Burlap, Mowed Lawn und Mustard Seed (Ranger)
- Memento/Tuxedo Black (Tsukineko)
- VersaMagic/Cloud White (Tsukineko)
- VersaMark (Tsukineko)
Embossing / Heat-Embossing
- Cloud 9 (WOW!)
Werkzeug & Klebstoffe / Tools & Adhesives
- Antistatiktool / anti-static tool
- Acrylblock / acrylic block
- Big Shot + Platten + magnetische Platte / Big Shot + cutting pads + magnetic platform
- Blending Tools (Ranger)
- Craft Sheet (Ranger)
- Heat Tool (WOW!)
- Nuvo Deluxe Adhesive (Tonic Studios)
- Paper Trimmer 12,25″/31 cm Maxi Guillotine 1980ePaper Trimmer 12,25″/31 cm Maxi Guillotine 1980e (Tonic Studios)
- Tim Holtz Stamp Platform (Tonic Studios)
Farben / Paints & Pens
- Chameleon Color Tones Pens (Chameleon Art Products)
