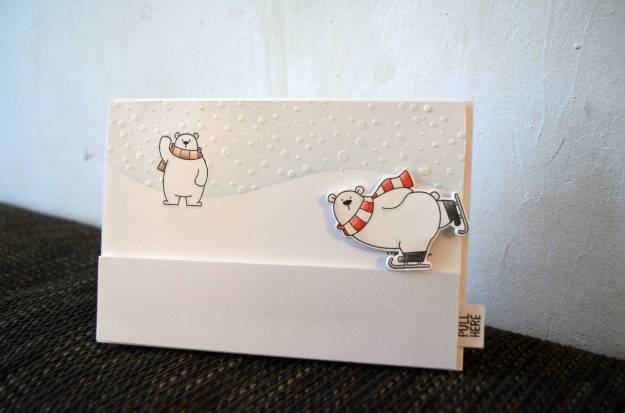
Diesen Ziehslider habe ich für Paula gemacht. Paula macht ebenfalls Karten, und zwar ziemlich schöne. Wir haben uns noch nie persönlich getroffen, aber wir sind Freundinnen – Bastelfreundinnen! Das bedeutet, dass wir uns immer mal wieder Karten schicken (und Bastelsachen).
I made this pull-the-tab-slider for Paula. Paula also makes cards, namely very beautiful cards. We haven’t met in person so far, but we are friends – crafting friends! That means we send each other cards (and crafting stuff).

Auf Instagram kann man sich ein kurzes Video des Sliders ansehen. Und wer wissen will, wie man ihn macht, die/der lese einfach weiter.
You can watch a short video of the slider on Instagram. And in case you want to know how to make one yourself, just keep on reading.
How to
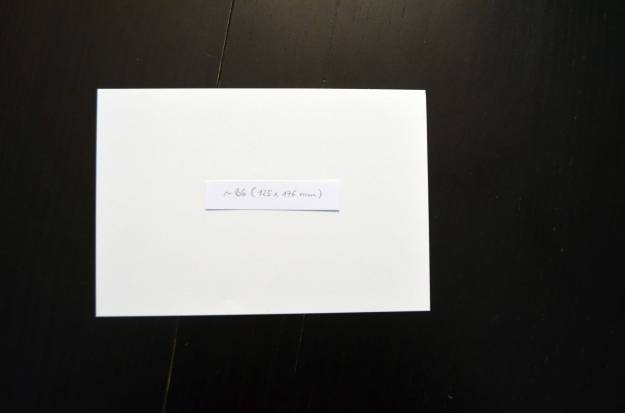
Zunächst habe ich ein Stück Cardstock in Weiß auf das Format B6 zurechtgeschnitten (also so in etwa).
First, I cut a piece of white cardstock to be B6 (well, about B6).
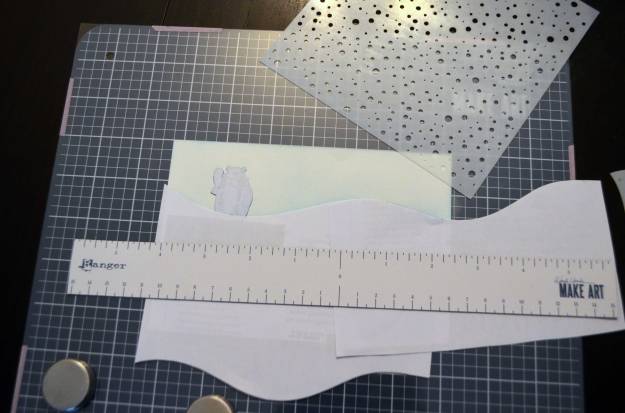
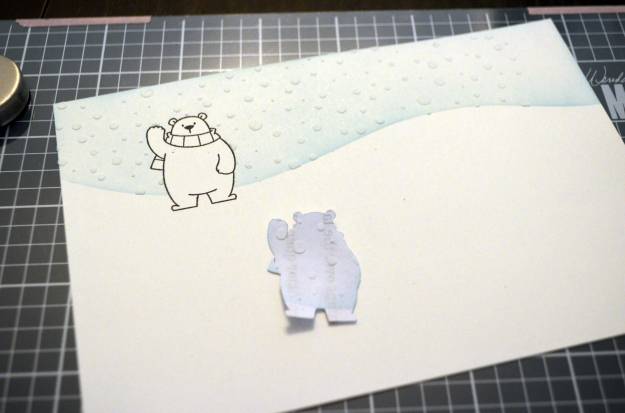
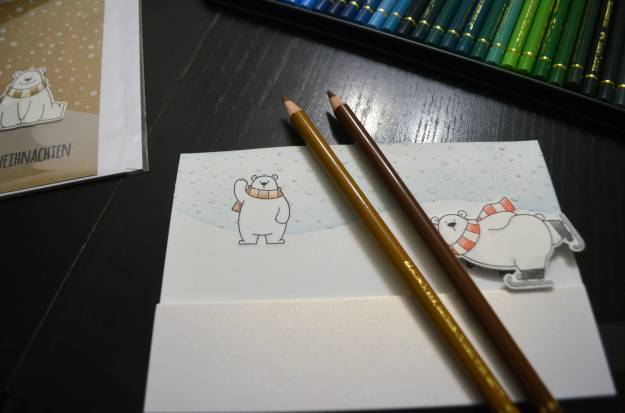
Auf diesen Cardstock habe ich den kleineren der beiden Bären gestempelt. Dazu habe ich mein Stamp Tool und Memento Tuxedo Black verwendet.
Onto this cardstock, I stamped the smaller of the two bears. I used my stamp platform and Memento Tuxedo Black to do so.

Den Bären habe ich im Anschluss maskiert. Die Maske ist aus Kopierpapier und wurde von meinem Schneideplotter ausgeschnitten.
I masked the bear. The mask is cut from copy paper – and my electronic cutting machine did the cutting.

Um den Himmel zu machen, habe ich Distress Oxide Tumbled Glass, eine Blending Brush und eine Schablone verwendet. Da die Schablone aber zu klein ist, um die gesamte Breite des Panels abzudecken, habe ich mir schnell aus Kopierpapier selbst eine Schablone gebastelt. Die „richtige“ Schablone hat mir dabei als Hilfe gedient.
To create the sky, I used Distress Oxide Tumbled Glass, a blending brush, and a stencil. The stencil is too small to cover the whole width of the panel, so I made my own stencil from copy paper. The „real“ stencil served as template.


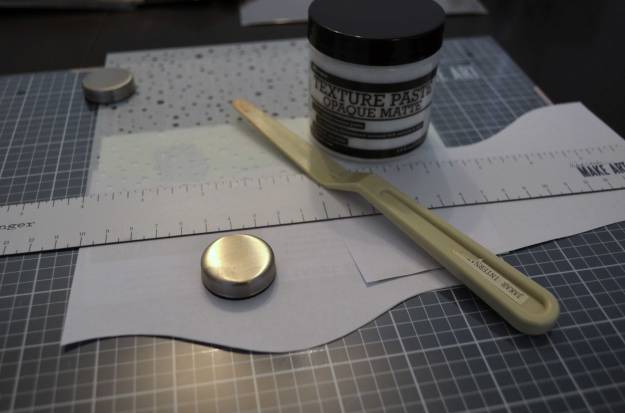
Ein wenig Schneefall wollte ich auch noch machen. Dafür habe ich eine weitere Schablone, einen Spachtel und opake Texturpaste in Weiß verwendet.
I wanted to create a bit of snowfall, too. In order to do so, I used a stencil, a palette knife, and opaque texture paste in white.

Dann habe ich die Maske entfernt.
Then, I removed the mask.
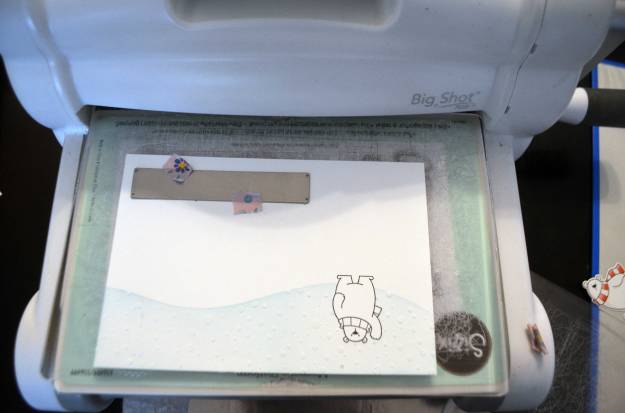
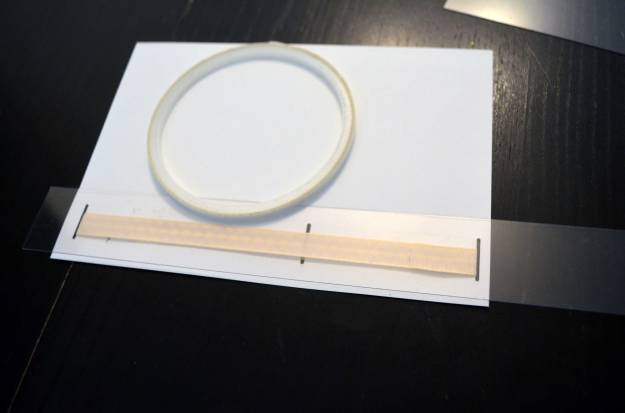
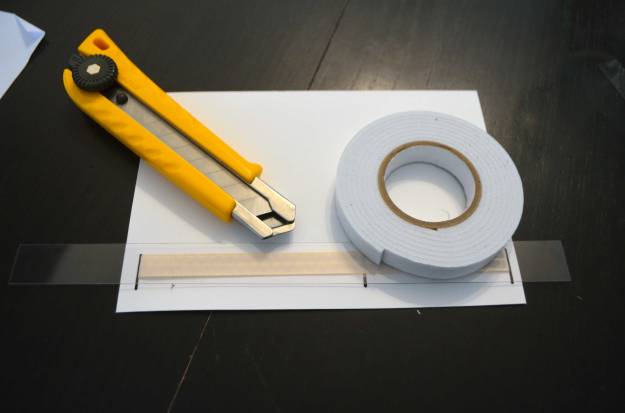
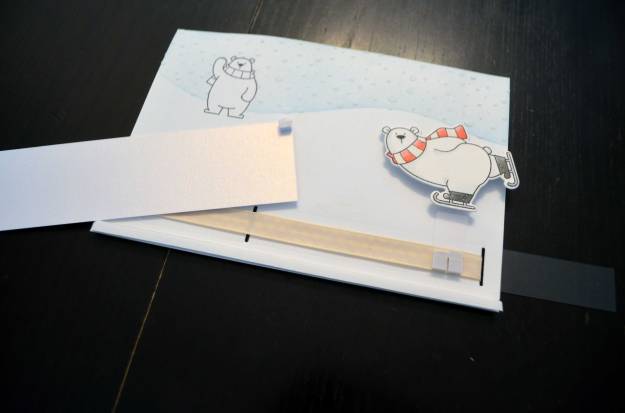
Für den Slidermechanismus braucht es zwei Schlitze. Die kann man mit dem Cutter machen – oder mit einer Stanze. Ich wollte die ganze Breite des Panels nutzen und habe daher zwei verschieden lange Stanzen kombiniert.
The slider mechanism needs two slits to function. You can make them with a craft knife – or a die. I wanted the slider to go all the way from right to left, so I combined two different sized dies.


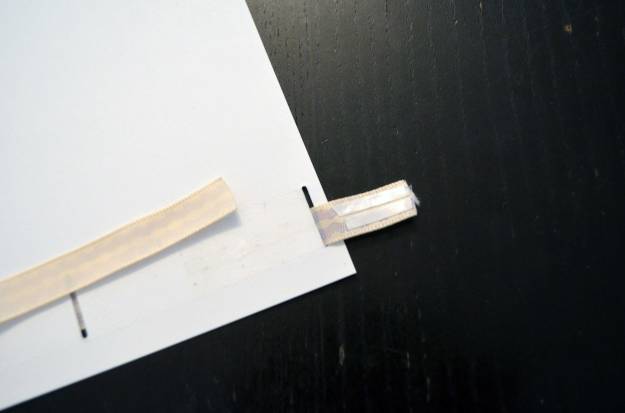
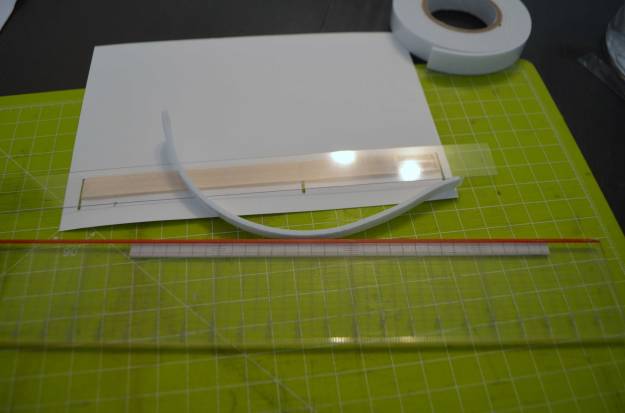
Für einen Ziehslider braucht es eine Art Band, das durch die Schlitze läuft. Das kann z. B. ein Stück weiche Folie sein (wie ich es hier verwende). Dieses Mal wollte ich jedoch ausprobieren, ob ein Band aus Satin auch gut funktioniert. Damit es auch gut durch die Schlitze flutscht, habe ich ein Stück Klebeband durchgezogen und festgeklebt. So werden die Kanten etwas rutschiger.
A pull-the-tab-slider requires a kind of band that runs through the slits. Such a thing can be made from a plastic film like I used here. This time, I wanted to try if a piece of satin ribbon also works. To make sure the ribbon goes smoothly through the slits, I lined the slits with a piece of tape. The tape makes the edges of the slit a bit slicker.

Als nächstes habe ich das Band durch die Schlitze gezogen und es mit doppelseitigem Klebeband zur Schlaufe geschlossen. Es sollte sich später herausstellen, dass das Klebeband eine schlechte Wahl war: Beim Ausprobieren der fertigen Karte hat sich die Schlaufe gelöst und der Mechanismus war hinüber. Zum Glück konnte ich die Karte einigermaßen unbeschadet auseinandernehmen und die Schlaufe erneut schließen – dieses Mal habe ich zum Tacker gegriffen. (Von dieser Reperaturaktion gibt es leider keine Fotos.)
Next, I threaded the ribbon through the slits and used double-sided tape to secure it to a loop. Turned out that the tape was a bad choice: As I tested the mechanism once the card was finished, the loop came undone and the mechanism was ruined. Luckily, I was able to disassemble the card without destroying it. Thus, I could close the loop again – but this time, I used staples. (Unfortunately, I didn’t make photos of the repair process.)


Egal, mit welcher Methode man sein Band fixiert, wichtig ist, dass diese Stelle direkt an dem Schlitz liegt, der jener Stelle des Sliders, an der man zieht, weiter entfernt ist. Und zwar auf der Rückseite des Panels!
Mein Ziehsliderstück besteht aus einem Streifen sehr fester Folie, den ich mit doppelseitigem Klebeband auf der Schlaufe befestigt habe. Später beim Reparieren habe ich diesen Streifen noch mit einem Cardstockstreifen verstärkt. Je widerstandsfähiger das Element ist, das man als Sliderstreifen verwendet, umso besser.
No matter how you secure your loop, you need to make sure that this particular spot is next to the slit that is further away from that end of the pull-tab you actually grab to pull. Make sure you work on the back of your panel.
My slider piece consists of a strip of very sturdy acetate. I adhered it with double-sided tape on the loop. Later on, as I was repairing the mechanism, I added a strip of cardstock as enhancement. The more resistant the element you use as slider, the better.
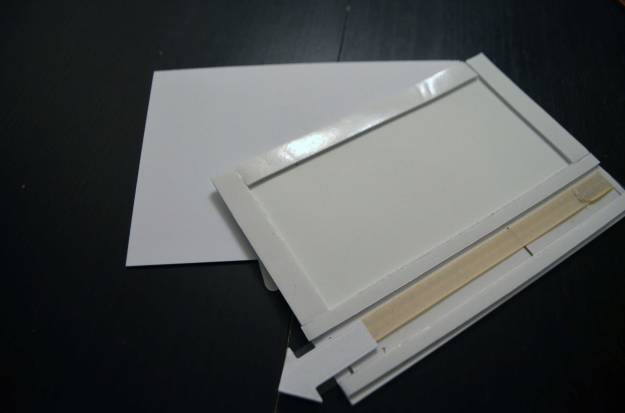
Ich habe doppelseitiges Abstandsklebeband verwendet, um den Sliderkanal zu konstruieren. Mit einem Cutter habe ich das Band halbiert und ober- sowie unterhalb des Sliderstreifens angebracht. Weitere Streifen Klebeband habe ich an den drei übrigen Seiten des Panels angebracht. Die Schutzfolie bleibt derweil noch oben.
I used foam tape to make the slider channel. I cut a strip of tape in half with my craft knife and stuck it down above and below the slider. I applied more foam tape on the other three sides of the panel. Don’t remove the backing yet.

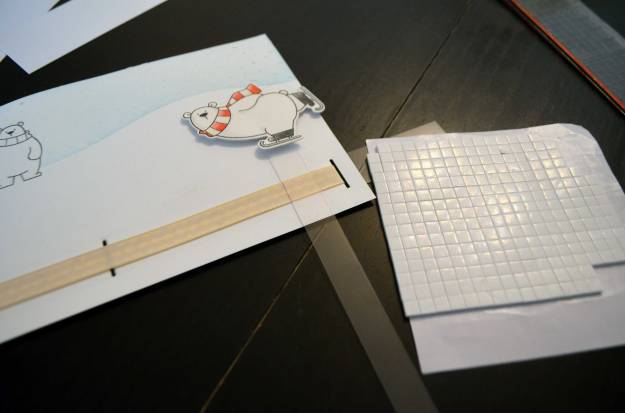
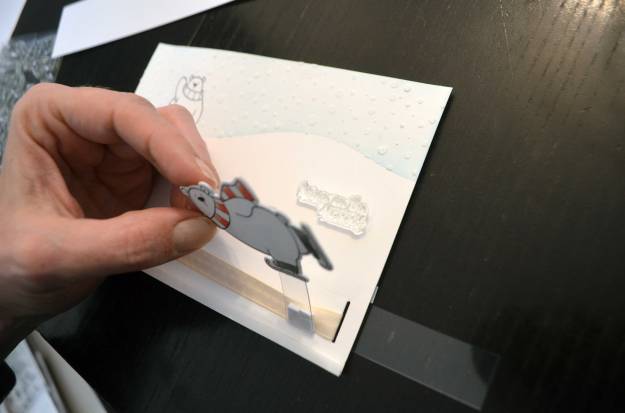
Auf der Vorderseite habe ich dann den großen Bären (den ich zuvor mit Memento Tuxedo Black auf weißen Cardstock gestempelt, mit Farbstiften koloriert und anschließend ausgestanzt habe) angebracht. Ich habe ihn auf einen Streifen fester Folie geklebt. Das andere Ende des Streifens habe ich mit ein paar dreidimensionalen Klebepads auf der Sliderschlaufe befestigt.
On the panel’s front, I adhered the big bear (which I stamped with Memento Tuxedo Black onto white cardstock; I coloured him with coloured pencils and die-cut him). I glued him down onto a strip of sturdy acetate. With foam squares, I adhered the other end of the acetate strip to the slider loop.

Danach habe ich die Schleife unter einem Stück Perlmuttcardstock versteckt. Den Cardstock habe ich etwas erhöht angebracht; dafür habe ich an der unteren Kante einen dünnen Streifen Abstandsklebeband und auf der oberen Seite Klebepads verwendet. Links und rechts darf nicht geklebt werden, sonst wird der Slidermechanismus behindert.
Afterwards, I hid the slider loop under a piece of shimmery cardstock. I used a thin strip of foam tape on the bottom and some foam square on the top to adhere the cardstock slightly raised. Don’t put anything sticky on the left and right side as this would interfere with the sliding mechanism.
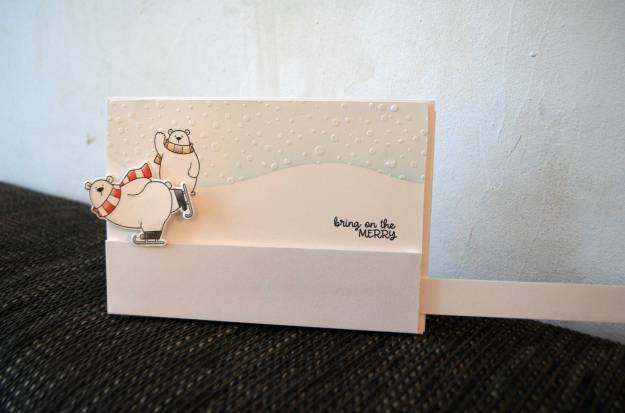
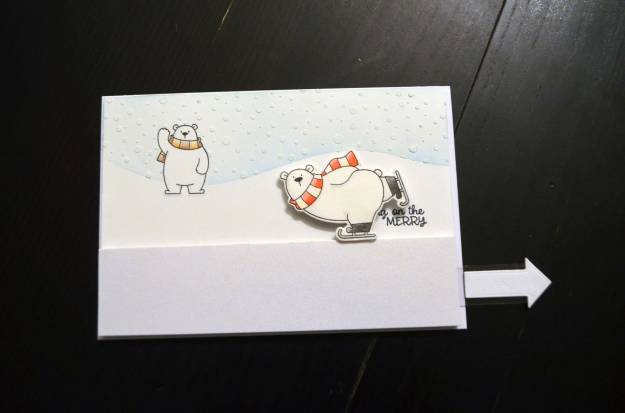
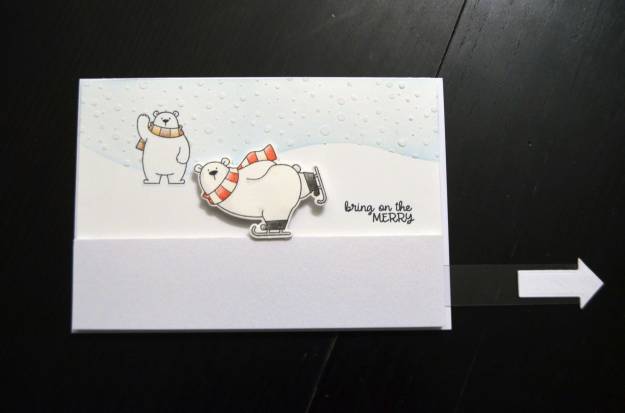
Den Gruß habe ich hinter dem großen Bären versteckt – so wird er erst sichtbar, wenn der Bär losfährt (also wenn man am Slidertab zieht).
I hid the sentiment behind the big bear. This way, it’s only then visible when the bear starts skating (aka when you pull the tab).

Gestempelt habe ich mit Memento Tuxedo Black.
I used Memento Tuxedo Black for stamping.
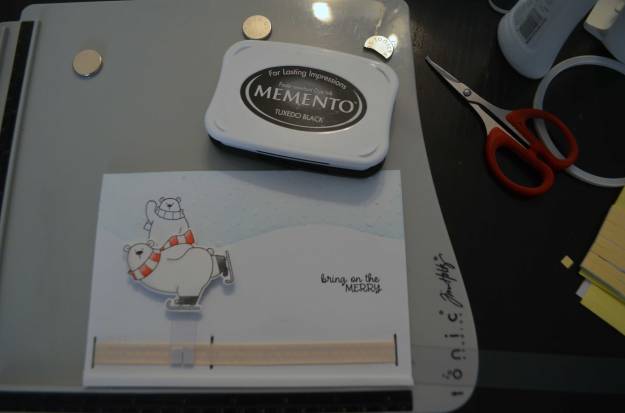

Mit Farbstiften habe ich dann noch den kleinen Bären koloriert.
I used coloured pencils to colour the small bear.
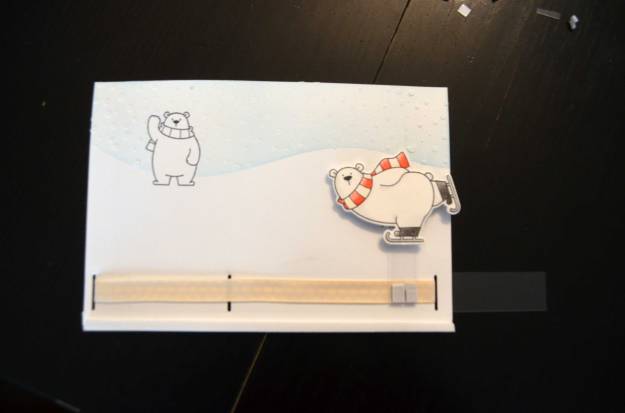
Nachdem ich den Sliderstreifen vorne und hinten mit einer Schere gekürzt hatte, habe ich aus weißem Cardstock zwei Pfeile gestanzt und sie am hervorstehenden Sliderstreifen befestigt, damit man weiß, wo man ziehen muss. Nach dem Reparieren habe ich statt der Pfeile einfach einen Hinweis auf den Streifen gestempelt.
After I trimmed the slider strip with my scissors, I die-cut two arrows from white cardstock and adhered them to the slider strip so you know where to pull. After I repaired my card, I replaced the arrows with a simple hint I stamped directly onto the tab.
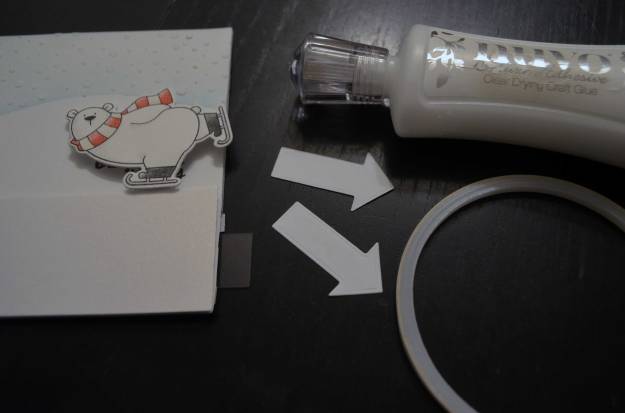
Als letzten Schritt habe ich die Schutzfolien abgezogen und das Panel auf eine Klappkarte geklebt.
The final step was to remove the backing of the tape and to adhere the panel onto a note card.

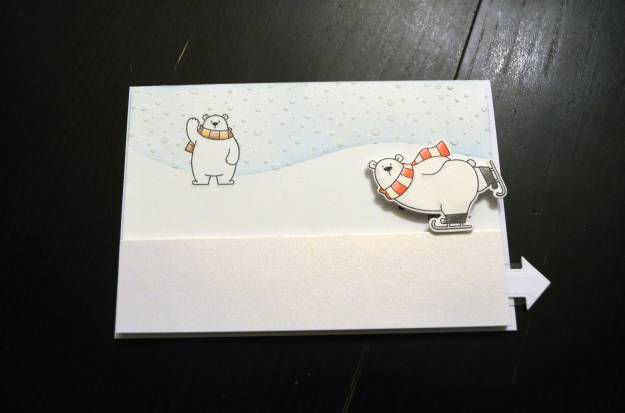

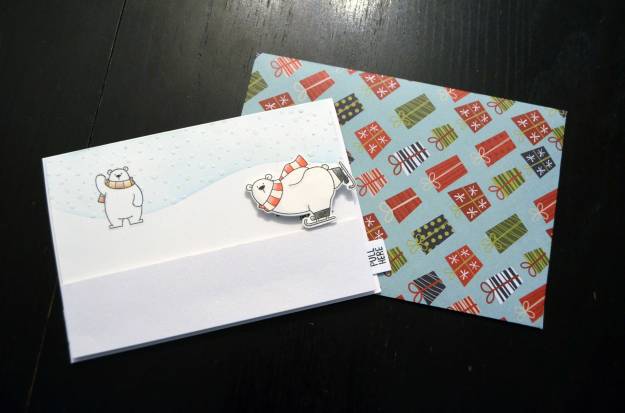
Ab hier sieht man nun die reparierte Karte. Den Umschlag dazu habe ich selbst gemacht, weil die Karte zu groß und zu dick für ein fertiges Kuvert war.
From here, you can see the repaired card. I made the envelope by myself as the card proved to be to big and thick to fit in a standard envelope.
Benutzte Materialien / Supplies I used
Papier & Folie / Paper & Acetate
- Cardstock in Weiß / cardstock in white
- Cardstock in Perlmutt / shimmery cardstock
- feste Folie / sturdy acetate
- Klappkarte in Weiß / pre-fold card in white
- Schmierpapier für die Maske und zum Abdecken / scrap paper for the masks and covering
Stanzen / Dies
- Die-namics Double Slider Loop Slots (My Favorite Things)
- Die-namics Polar Bear Pals (My Favorite Things)
- Xcut Mini Die Arrows (docrafts) [Wird leider nicht mehr hergestellt, daher kein Link.] / [Sadly retired, so no link this time.]
Stempel / Stamps
- BB Polar Bear Pals (My Favorite Things)
- Polar Playtime (Avery Elle)
- Push Here (Lawn Fawn)
Stempelfarben / Inks
- Memento/Tuxedo Black (Tsukineko)
Schablonen / Stencils
- Drifts & Hills (My Favorite Things)
- Snowed In (Carta Bella)
Werkzeug & Klebstoffe / Tools & Adhesives
- Abstandsklebeband / foam tape
- Big Shot + Platten + magnetische Platte / Big Shot + cutting pads + magentic platform
- Cutter / craft knife
- doppelseitiges Klebeband / double-sided tape
- dreidimensionale Klebepads (Foam Pads) / foam squares
- Lineal / ruler
- Make-up-Bürsten (EMax Design) / make-up brushes (EMax Design)
- Montagekleber Re-Tac (Ghiant) / repositionable mount spray
- Nuvo Deluxe Adhesive (Tonic Studios)
- Paper Trimmer 8,5″/22 cm 160e (Tonic Studios)
- Schere / scissors
- Silhouette Portrait 2 (Silhouette America)
- Spachtel / palette knife
- Tim Holtz Stamp Platform (Tonic Studios)
- Washi Tape zum Befestigen / washi tape for securing
- Wendy Vecchi MAKE ART Stay-tion (Ranger)
Embellishments
- Satinband / satin ribbon
- Texture Paste Opaque Matte (Ranger)
Farben / Paints & Pens
- Polychromos (Faber-Castell)
