Eine der am einfachsten zu machenden interaktiven Karten sind sicherlich Ziehslider wie dieser. Es gibt zwar spezielle Stanzensets dafür, aber man kann sie z. B. auch mit einem simplen Cutter machen.
Pull-the-tab-slider like this one are very easy to make. There are special die sets for this kind of interactive cards, but you don’t need them. An ordinary crafting knife for example does the trick as well.

How to
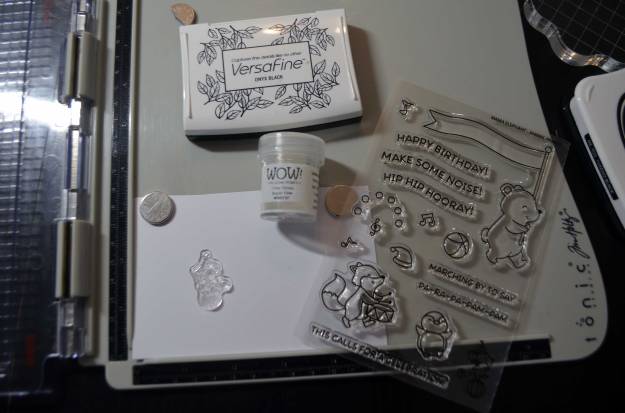
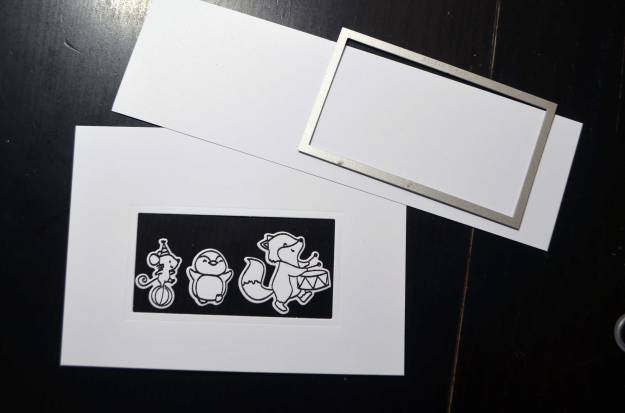
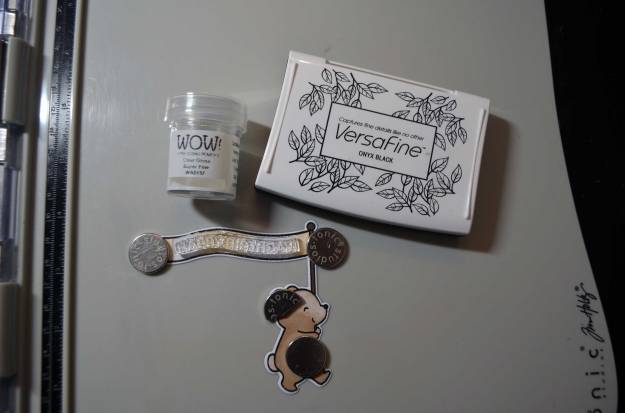
Zunächst habe ich alle Tiere, die ich für die Karte verwendet habe, mit VersaFine Onyx Black auf weißen Cardstock gestempelt und im Anschluss mit transparentem Embossing Powder embosst, da ich sie mit Alkoholmarkern kolorieren wollte und VersaFine (eine ölbasierte Tinte) sich mit Alkoholmarkern nicht verträgt und ausblutet. Die embosste Schicht schützt die Tinte. Außerdem glänzt dann alles so hübsch.
Danach habe ich alles mit den dazugehörigen Stanzen ausgestanzt und fürs Erste zur Seite gelegt.
First, I stamped the critters I used for the card with VersaFine Onyx Black onto white cardstock. I heat-embossed the images with clear embossing powder because I wanted to colour them with alcohol markers – and VersaFine (an oil-based ink) doesn’t work well with alcohol markers (it bleeds). The embossed layer protects the ink, and it gives a nice shine.
Next, I used the coordinating dies to cut out the critters. I put the die-cuts aside and continued with working on the slider element.
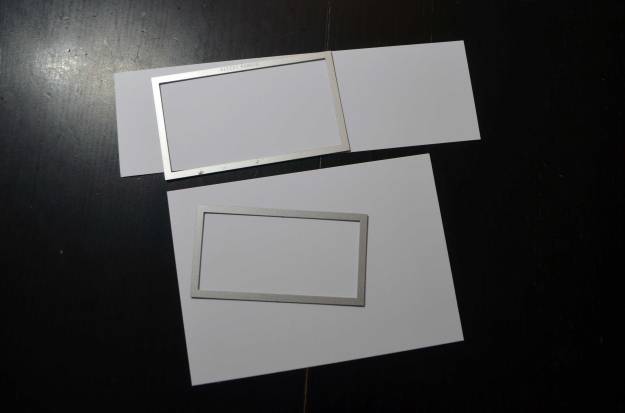
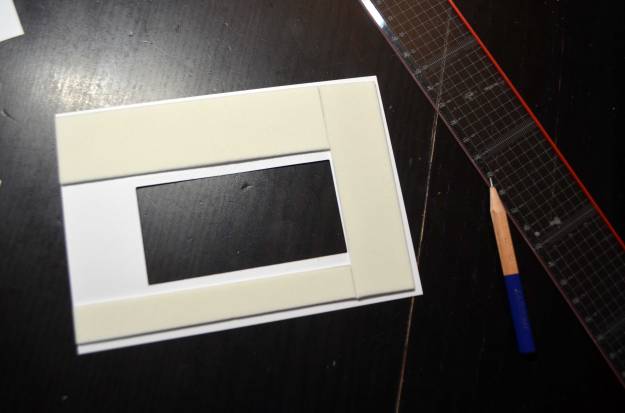
Für diesen Schritt kann man auch einen Cutter verwenden, ich habe aber zu zwei Rechteckstanzen aus einem Set gegriffen. Mit der kleineren Stanze habe ich in mein Panel, das ich zuvor mit meinem Papierschneider auf die zur Klappkarte passenden Größe (etwas kleiner) gebracht habe, ein Fenster geschnitten. Mit der größeren habe ich den Ziehslider gemacht. Da er natürlich länger als die Stanze selbst sein muss, habe ich in zwei Schritten gestanzt. Dazu gleich mehr.
For this step, you could use a craft knife, or you use dies like I did. I die-cut a window with a rectangle die from the panel (which I previously trimmed to fit the note card, it’s a tad smaller than the card). With the next bigger die (the dies are part of a set), I made the slider itself. It has to be longer than the die, so I cut in two steps. I will get back to this in a moment.
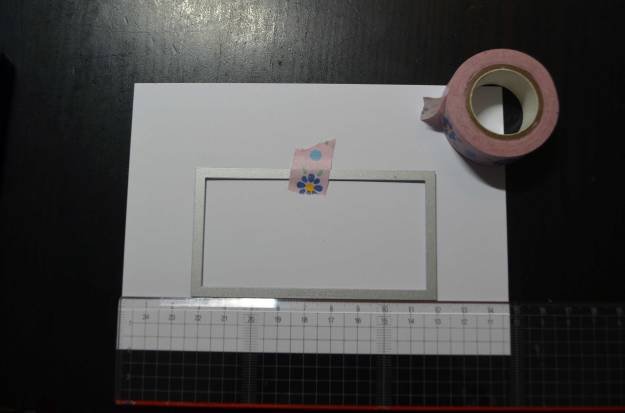
 Um den Slider länger zu machen als die Stanze ist, habe ich im ersten Schritt nur teilweise gestanzt. Dazu lässt man einen Teil der Stanze über die Schneideplatte stehen und schickt dann alles durch die Maschine. Im Anschluss legt man die Stanze etwas versetzt wieder an; um einen geraden Schnitt zu erhalten, verwendet man am besten die schon ausgeschnittenen Kanten als Führung. Dann legt man das Ganze wieder so auf die Schneideplatte, dass nur dort Druck ausgeübt wird, wo auch geschnitten werden soll, und schickt alles durch die Maschine.
To make a slider that is longer than the die itself, I used a technique called partial die-cutting. You just place the die so that a part of it won’t be cut as it is not laying on the cutting pad. You sent this through your die-cutting machine, remove the die and place it again, but this time you shift it. Use the cuts you’ve already made as guidelines (the die will „fall“ in place). Now lay everything down onto your cutting pad – again in a fashion that will allow partial cutting. Send it through the die-cutting machine.

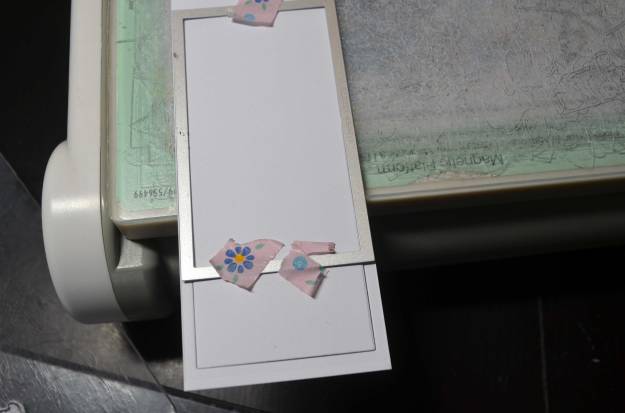
Den Slider habe ich dann so hinter das Panel gelegt, dass er das Fenster komplett ausfüllt und seitlich übersteht. Er ist mir etwas kurz geraten; später habe ich ihn dann verlängert, indem ich einfach ein Stück Cardstock aufgeklebt habe.
I placed the slider behind the panel and made sure it covered the window completely and sticked out on the side. It was a bit short; later on, I extended it by simply glueing a piece of cardstock onto it.

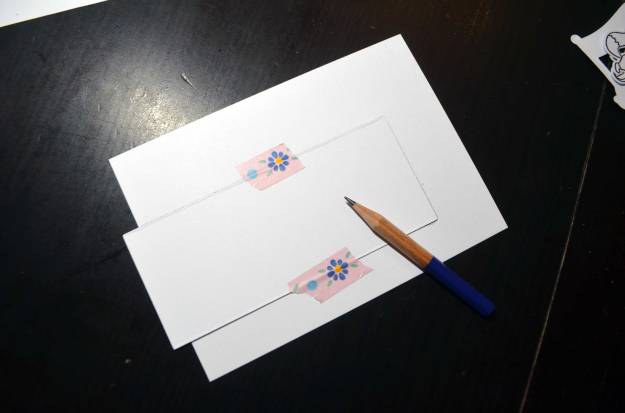
Ich habe alles umgedreht und den Slider temporär mit Washi Tape fixiert. Um den Slider habe ich eine Bleistiftlinie gezogen, damit ich weiß, wo ich meine Abstandshalter später anbringen muss.
I flipped everything and used washi tape to keep the slider in place for the moment. I traced the slider with a pencil so I would know where to put my spacers later on.
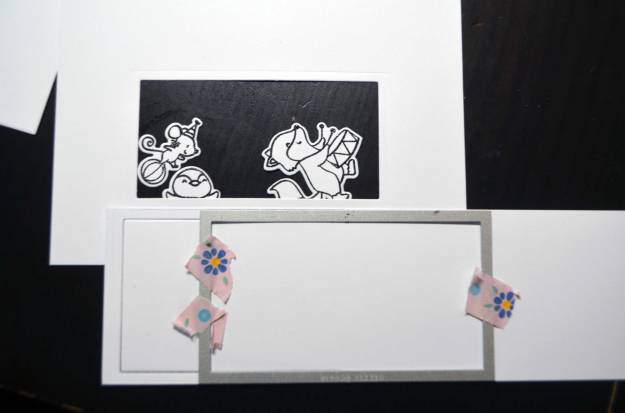
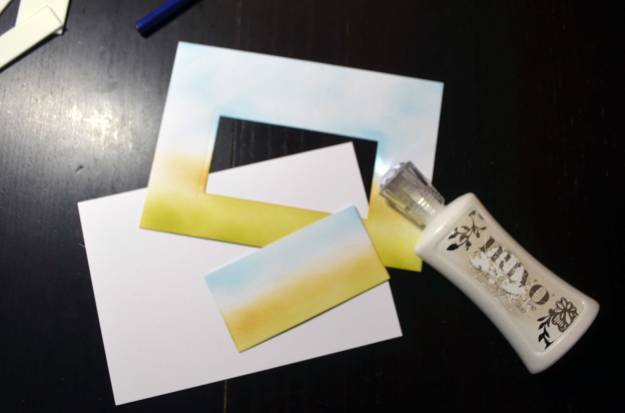
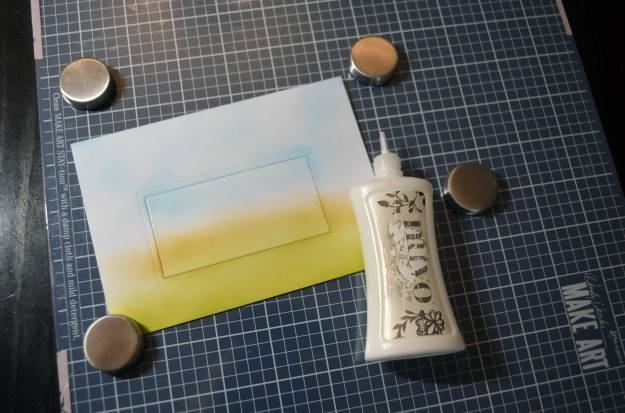
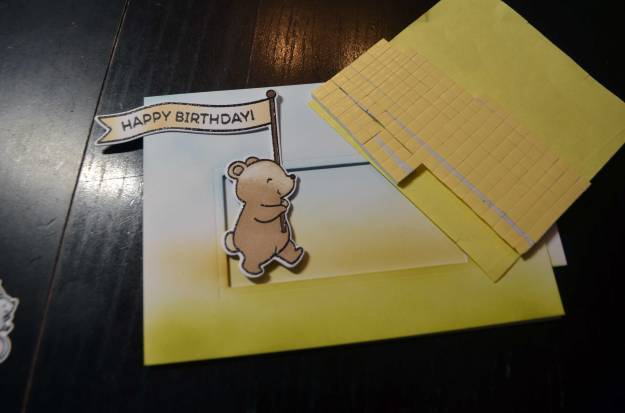
Auf die Vorderseite habe ich dann mit Distress Oxides und Blending Brushes einen sehr simplen Hintergrund gemacht – sowohl auf dem Panel als auch auf dem Slider.
I created a very simple backdrop on the front (of the panel as well as the slider), using Distress Oxides and blending brushes.

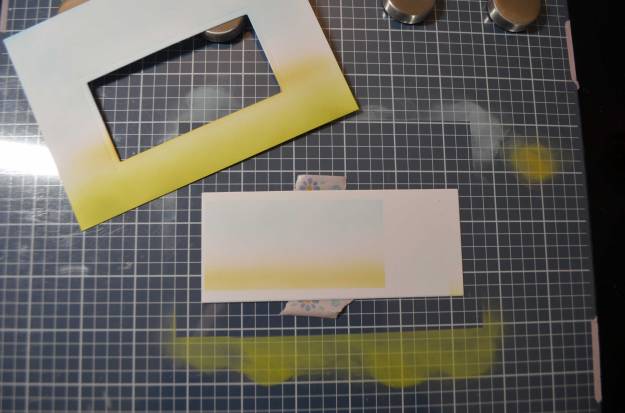
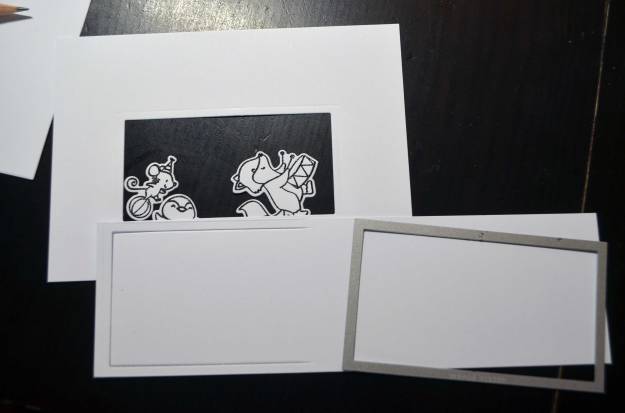
Dann habe ich den Slider entfernt und jenes Stück weißen Cardstock, das beim Ausstanzen des Fensters übrig geblieben ist, wieder eingepuzzelt – und auch dort einen Hintergrund gemacht.
I removed the slider from the panel and inserted that piece of white cardstock that was left over when I die-cut the window from the panel into said window – and created a background on it as well.

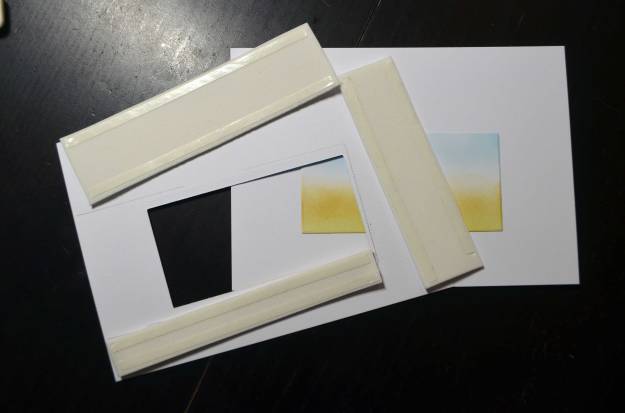
Dann habe ich Moosgummireste – mein Abstandshalter – so zurechtgeschnitten, dass sie fast die komplette Rückseite des Panels bedecken – mit Ausnahme der Lücke, die der Slider braucht. Die Bleistiftlinien zeigen an, bis wohin der Moosgummi reichen darf. Aufgeklebt habe ich das Moosgummi mit doppelseitigem Klebeband, allerdings erst später.
Next I trimmed craft foam scraps (my spacers) so that they cover almost all of the panel’s back – except that area reserved for the slider. The pencil lines indicate this area. I used double-sided tape to adhere the craft foam, but I did that later on.

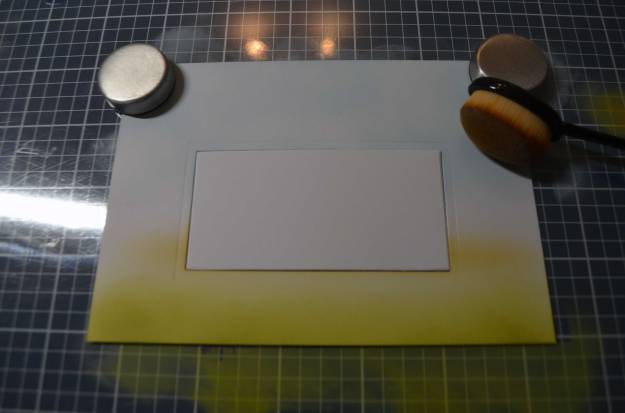
Als nächste habe ich das kleine Hintergrundrechteck auf die Vorderseite der Klappkarte geklebt – das Panel habe ich als Führungshilfe lose aufgelegt.
Next, I glued down the small background rectangle onto the front of the note card. I used the panel as a guide.
Dann habe ich den Moosgummi auf die Rückseite des Panels geklebt.
I adhered the craft foam onto the panel’s back.
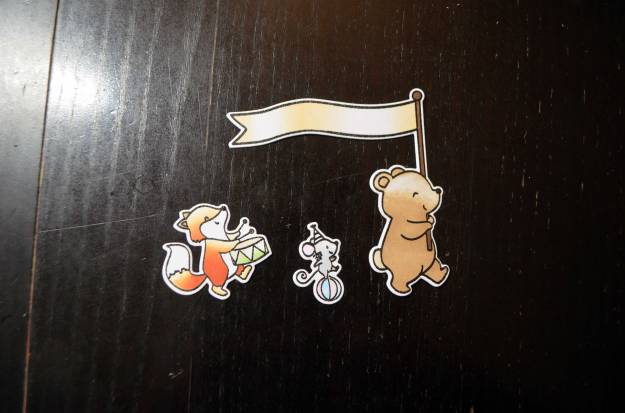
Zwischendurch habe ich die drei Tiere koloriert.
In between, I coloured the critters.
Auf die Fahne, die der Bär trägt, habe ich „Happy Birthday“ gestempelt, wieder mit VersaFine Onyx Black, und auch diesen Stempelabdruck habe ich transparent embosst.
I stamped the sentiment onto the flag the bear is carrying. Once again, I used VersaFine Onyx Black to stamp. I heat-embossed the sentiment with clear embossing powder.
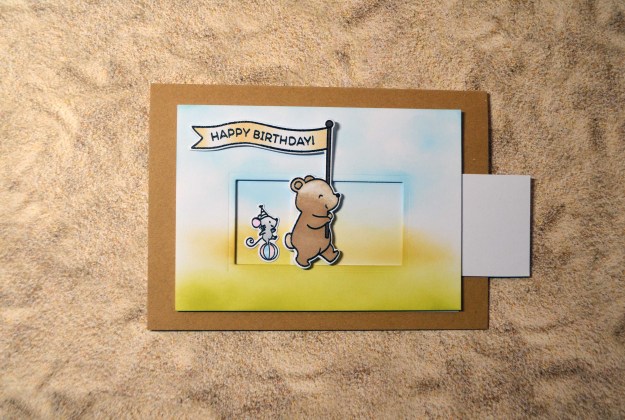
Den Bären habe ich dann mit einigen dreidimensionalen Klebepads am Rücken versehen und ihn auf den Slider geklebt. Er ist nicht nur herzig anzusehen, sondern dient auch als Stopper. Die Klebepads verhindern, dass man den Slider ganz herausziehen kann.
Natürlich muss der Slider in seinen Kanal eingelegt und das Panel darüber gegeben werden, bevor man den Bären festklebt.
I put some foam squares on the bear’s back and adhered him onto the slider. The bear isn’t just cute to look at but also has an important function: The foam squares on his back prevent a complete extraction of the slider.
Before I could stick the bear down, I had do insert the slider into its channel and put the panel on top.


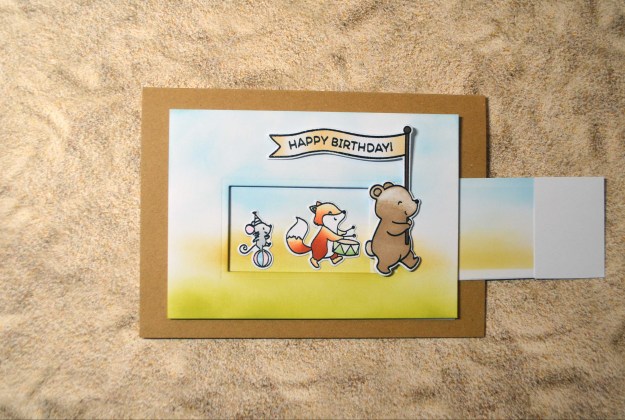
Im Anschluss habe ich die anderen zwei Tiere aufgeklebt. Zuerst habe ich den Slider so weit herausgezogen, wie es der Bär erlaubt. Fuchs und Maus kleben also direkt auf dem kleinen Hintergrundstück.
Following, I adhered the other two critters. First, I pulled out the slider as far as the bear let me. The fox and the mouse are sticking directly to the small background piece.
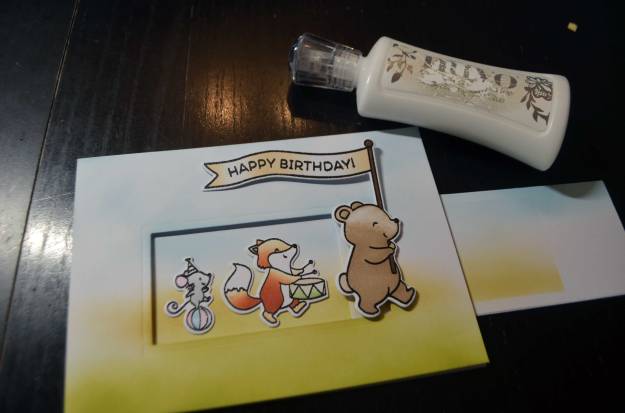
Und das war auch schon der letzte Schritt – die Ziehsliderkarte ist fertig.
And that was the last step – the pull-the-tab-slider card is done.
Benutzte Materialien / Supplies I used
Papier / Paper
- Cardstock in Weiß / cardstock in white
- Klappkarte in Kraft Braun / pre-fold card in kraft brown
- Moosgummi / craft foam
Stanzen / Dies
- Creative Cuts Animal Parade (Mama Elephant)
- Framelits Die Set Rectangles #2 (Sizzix)
Stempel / Stamps
- Animal Parade (Mama Elephant)
Stempelfarben / Inks
- Distress Oxide/Brushed Corduroy, Peeled Paint, Tumbled Glass (Ranger)
- VersaFine/Onyx Black (Tsukineko)
Embossing / Heat-Embossing
- Clear Gloss Superfine (WOW!)
Werkzeug & Klebstoffe / Tools & Adhesives
- Antistatiktool / anti-static tool
- Big Shot + Platten + magnetische Platte / Big Shot + cutting pads + magentic platform
- doppelseitiges Klebeband / double-sided tape
- dreidimensionale Klebepads (Foam Pads) / foam squares
- Heat Tool (WOW!)
- Lineal / ruler
- Make-up-Bürsten (EMax Design) / make-up brushes (EMax Design)
- Nuvo Deluxe Adhesive (Tonic Studios)
- Paper Trimmer 12,25″/31 cm Maxi Guillotine 1980ePaper Trimmer 12,25″/31 cm Maxi Guillotine 1980e (Tonic Studios)
- Stamp Shammy (Lawn Fawn)
- Tim Holtz Stamp Platform (Tonic Studios)
- Washi Tape zum Befestigen / washi tape to secure
- Wendy Vecchi MAKE ART Stay-tion (Ranger)
Farben / Paints & Pens
- Chameleon Color Tones Pens (Chameleon Art Products)
