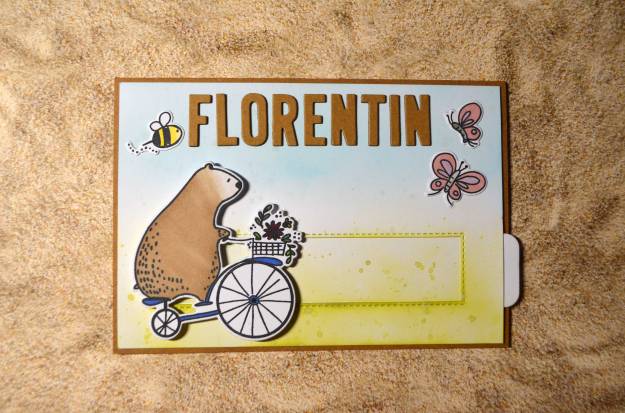
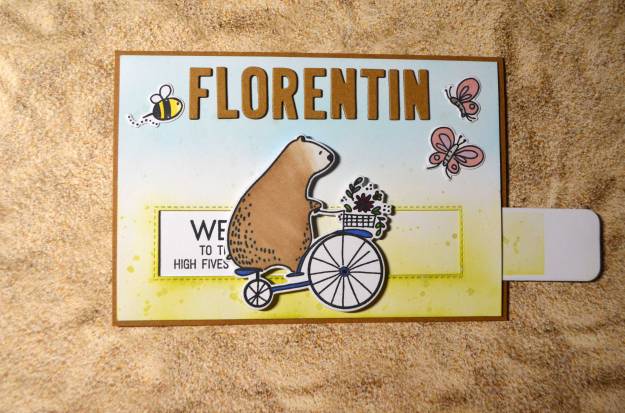
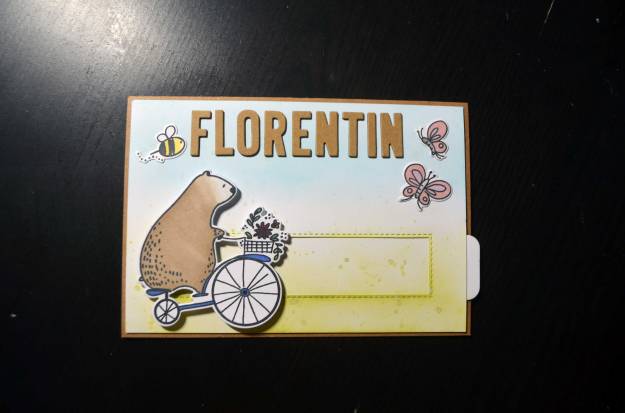
Eine personalisierte Glückwunschkarte zur Geburt des kleinen Florentins: Zieht man an der Lasche rechts, radelt der Bär von links nach rechts und eine kleine Botschaft wird enthüllt.
A personalised new baby card for little Florentin: If you pull the tab on the right, the bear moves from the left to the right and the sentiment is revealed.

How to
Zuerst habe ich die nötigen Einzelteile zurechtgeschnitten: ein Panel (ein wenig kleiner als die Klappkarte) und ein Streifen (der Slider) aus weißem Cardstock.
First, I trimmed white cardstock to a panel (a tad smaller than the note card) and a strip (the slider).

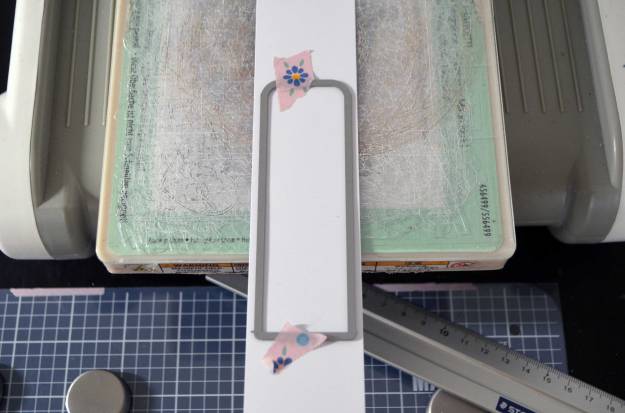
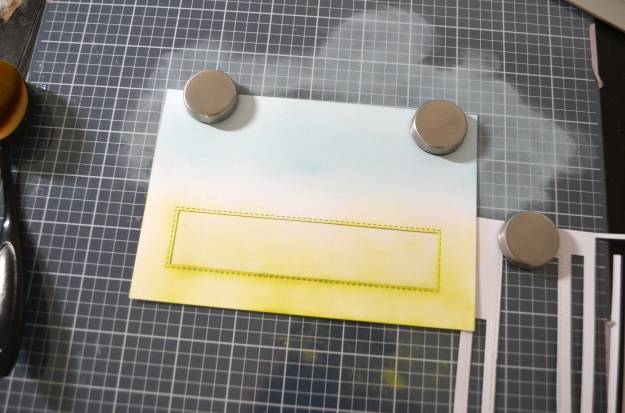
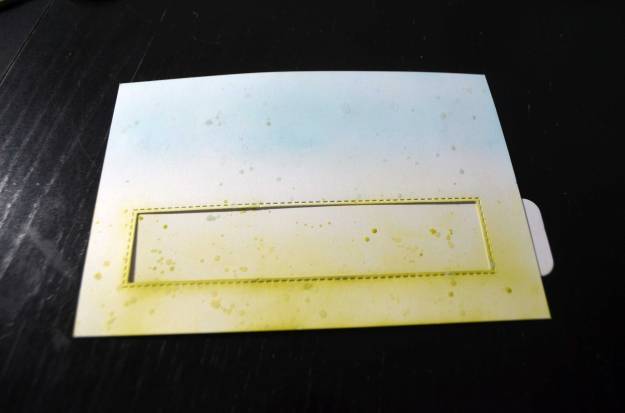
Danach habe ich ausmessen, wie groß das Fenster sein muss, damit der Spruch Platz hat. Ich habe eine entsprechende Rechteckstanze ausgewählt und in zwei Durchgängen ein Fenster gestanzt. Zwei Durchgänge deshalb, weil das Fenster länger sein muss als die Stanze selbst.
Next, I measured how long the window had to be in order to be big enough for the sentiment. I chose a rectangle die that had the right width. Obvisiouly, it’s too short, but that’s no problem: You can always use partial die-cutting and end up with a longer rectangle.

Nachdem ich das erste Mal die komplette Stanze aufgelegt und alles durch die Big Shot geschickt hatte, habe ich die Stanze erneut auf dem Panel platziert – dieses Mal allerdings so, dass sie nur teilweise ausschneidet. Dieses Technik nennt man „partial die-cutting“, also in etwa „teilweises Stanzen“
After I ran the panel and the die through my Big Shot, I placed the die on the panel once again, but this time in a way that the die would only partially cut. And that’s „partial die-cutting“.
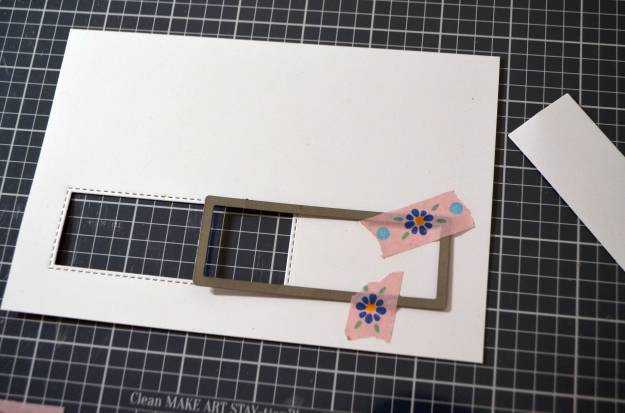
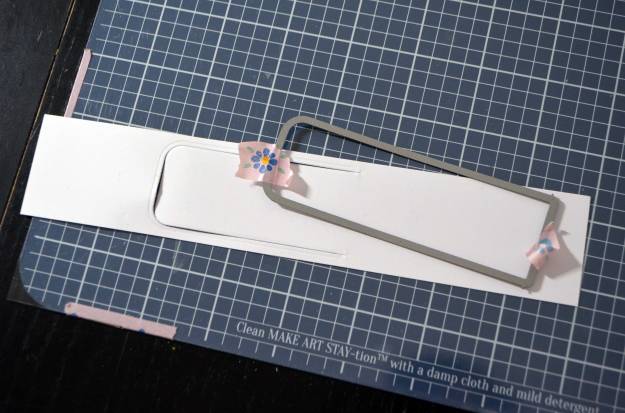
Dasselbe habe ich mit dem Slider gemacht – nur auf etwas andere Art. Dass nur teilweise gestanzt wird, liegt dieses Mal daran, dass ich alles so in meinem „Sandwich“ platziert habe, dass der Druck, den die Big Shot ausübt, nur auf einem Teil der Stanze wirksam wird. Was nicht ausgestanzt werden sollte, habe ich einfach über die Schneideplatten hinausragen lassen.
I did almost the same thing for the slider – with one difference: The way I placed everything in my „sandwich“ is the reason that the Big Shot would only cut a part – the part that is between the cutting plates. The part that is hanging off the egdes of the plates won’t be cut.
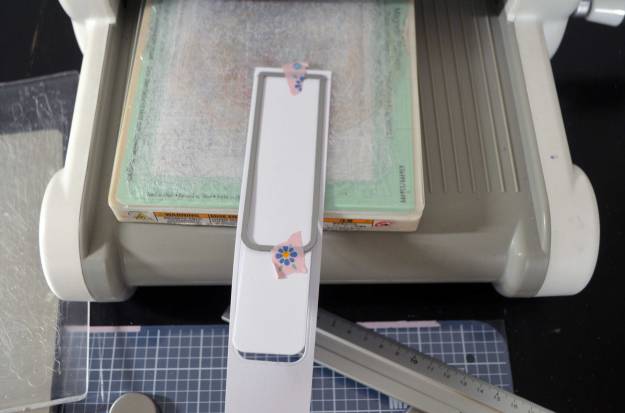


Als nächstes habe ich den Slider temporär mit Washi Tape auf der Rückseite des Panels befestigt, und zwar genau so, wie er auch später liegen sollte.
Next, I used washi tape to temporarily secure the slider on the panel’s back – on the exact same spot as it would be later on when the mechanism is ready.

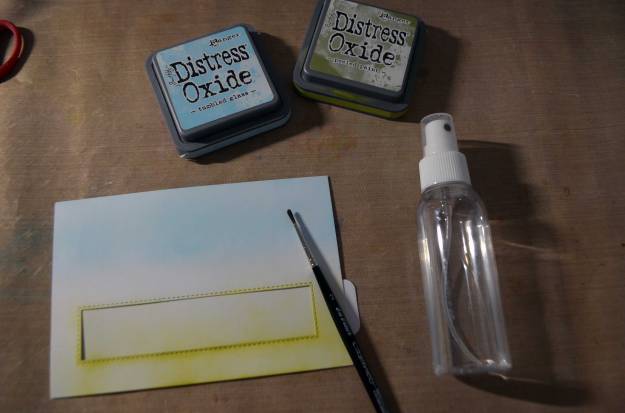
Das habe ich darum gemacht, damit ich den Hintergrund gleichzeitig sowohl auf das Panel als auch auf den Slider aufbringen konnte. Gearbeitet habe ich mit Blending Brushes und zwei Distress Oxide-Farbtönen.
I did this to be able to create the background for the panel and the slider at the same time. I used blending brushes and two Distress Oxide inks.

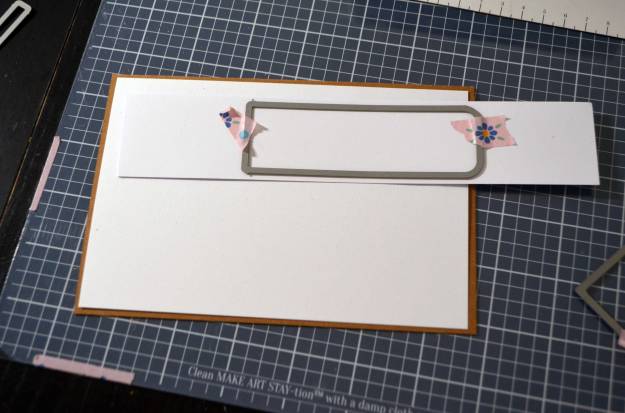
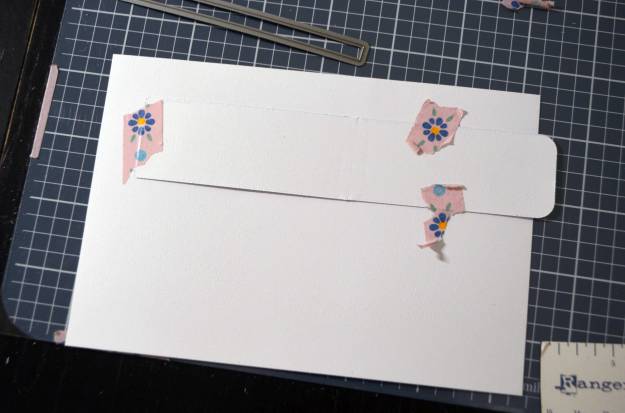
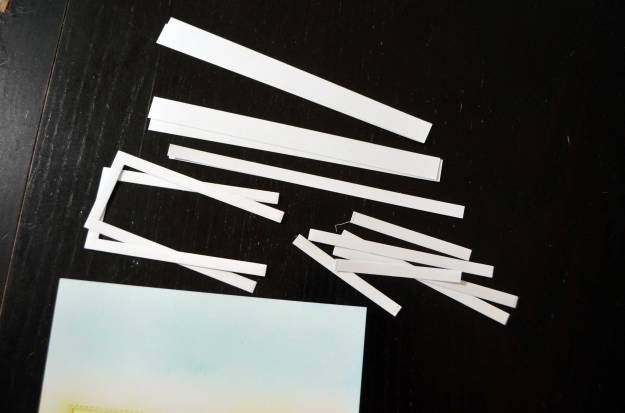
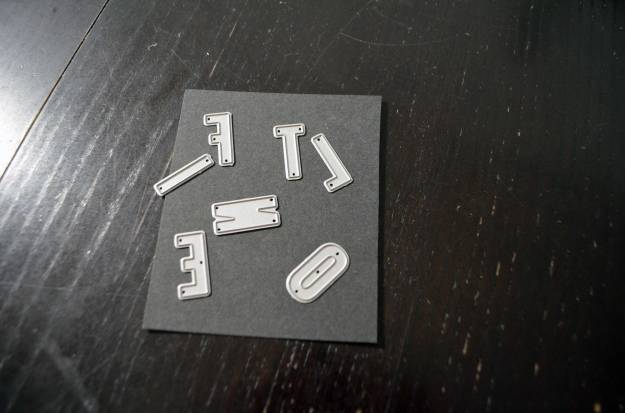
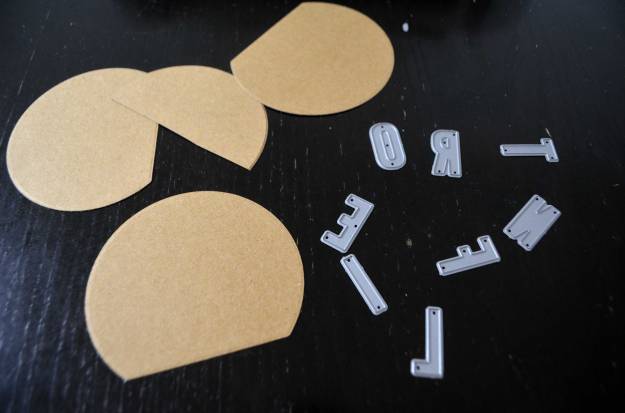
Danach habe ich aus Cardstockresten Streifen mit meinem Papierschneider geschnitten. Jeweils zwei aufeinandergeklebte Streifen liefern den für den Mechanismus nötigen Abstand. Das U-förmige Teil ist gestanzt und stammt aus einem Stanzenset von My Favorite Things, das extra für diese Art von Slider entworfen wurde.
Afterwards, I used my paper trimmer to cut strips from cardstock scraps. Two strips glued together provide the space the slider mechanism needs to work. The part shaped like a U is die-cut; the die is part of a set by My Favorite Things that is intended for this kind of slider card.
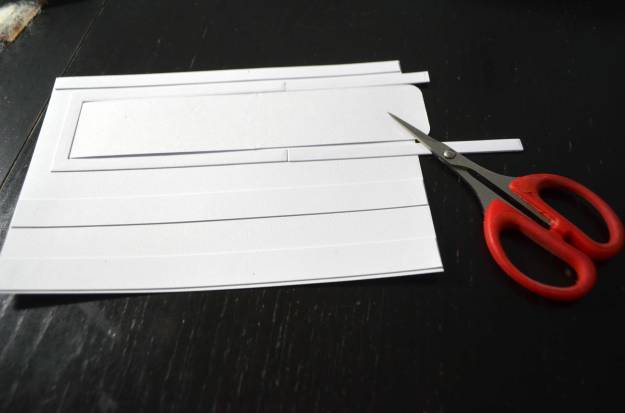
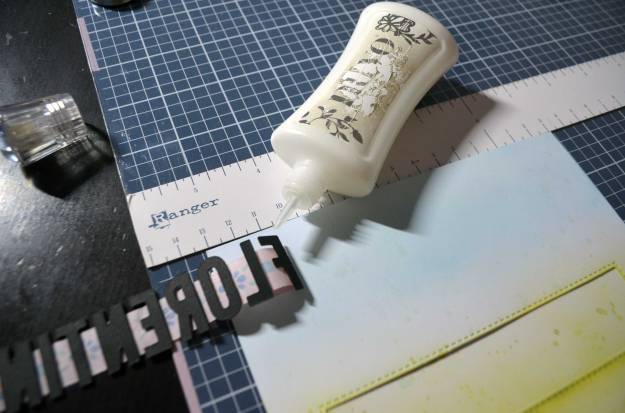
Die Streifen habe ich mit Flüssigkleber zusammen- und dann auf die Rückseite des Panels aufgeklebt.
I glued the strips together and onto the panel’s back by using liquid glue.


Überstehende Streifen habe ich mit der Schere gekürzt.
I used my scissors to trim off the excess.
Um den Hintergrund etwas interessanter zu gestalten, habe ich beide Stempelkissen auf mein Craft Sheet gedrückt und etwas Wasser über die Farben gesprüht. Mit einem feinen Pinsel habe ich dann einige farbige Spritzer auf dem Hintergrund verteilt.
To made the background a bit more interesting, I pressed the ink pads directly onto my craft sheet, sprayed the colours with water, and used a fine paint brush to add some colourful splatters to the background.

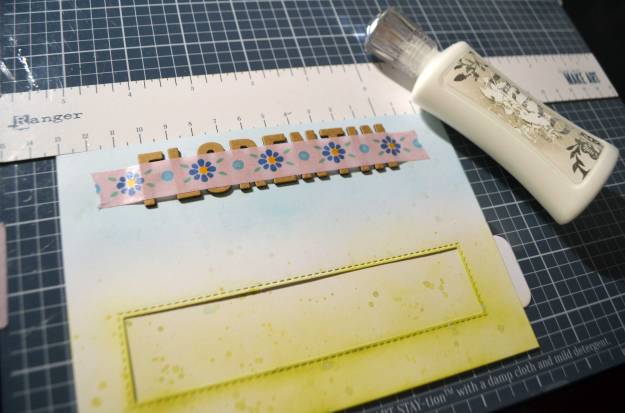
Dann habe ich die Buchstaben für den Namen des Babys zweifach aus schwarzem Cardstock gestanzt und für mehr Dimension übereinander festgeklebt.
I die-cut the letters for the baby’s name from black cardstock (twice) and stacked them for more dimension.
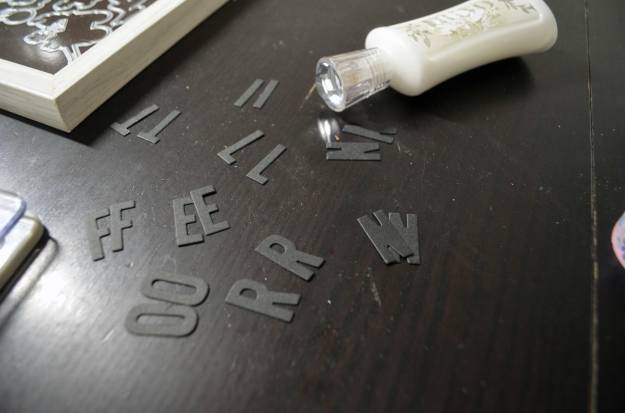
Als ich den Namen probehalber aufs Panel gelegt habe, ist mir Schwarz allerdings viel zu hart erschienen, daher habe ich alle Buchstaben noch einmal ausgestanzt, und zwar aus braunem Cardstock. Sie habe ich dann über die schwarzen Buchstaben geklebt.
Once I layed out the letters on the panel, I found the black to be too bold and decided to cut out each letter again, but this time from brown cardstock. I stacked the brown letters on top of the black ones.

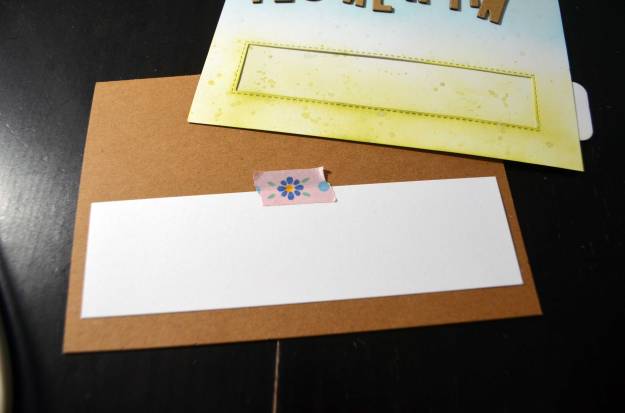
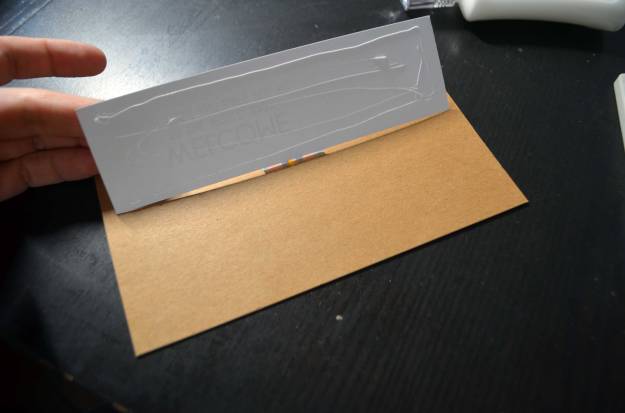
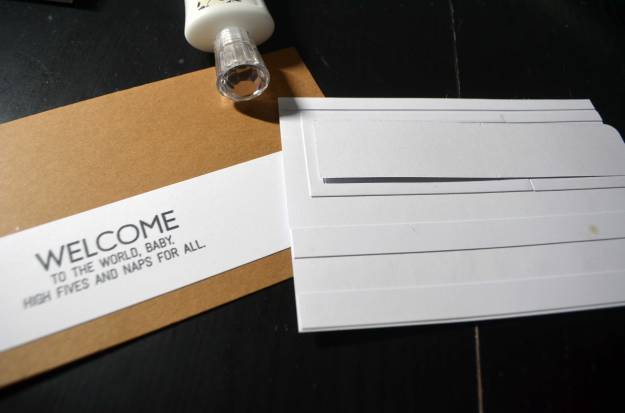
Den Spruch habe ich auf ein Stück weißen Cardstock gestempelt. Damit auch alles an Ort und Stelle ist (und bleibt), habe ich das Cardstockstück, das groß genug ist, um das komplette Fenster des Panels auszufüllen, mit Washi Tape temporär auf der Vorderseite der Klappkarte fixiert.
I stamped the sentiment onto a piece of white cardstock. To make sure everything stayed in place, I secured the piece of cardstock (which is big enough to fill out the complete window of the panel) with washi tape directly on the note card’s front.
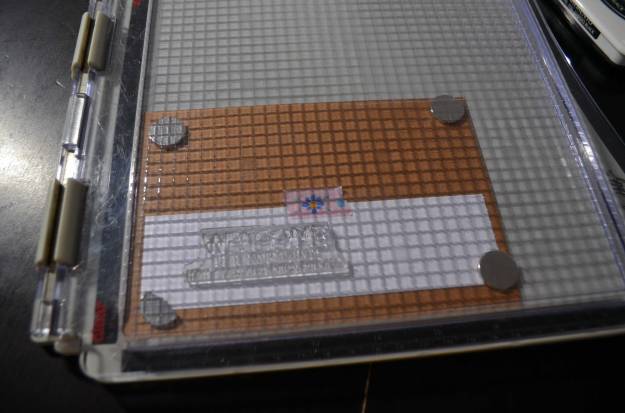
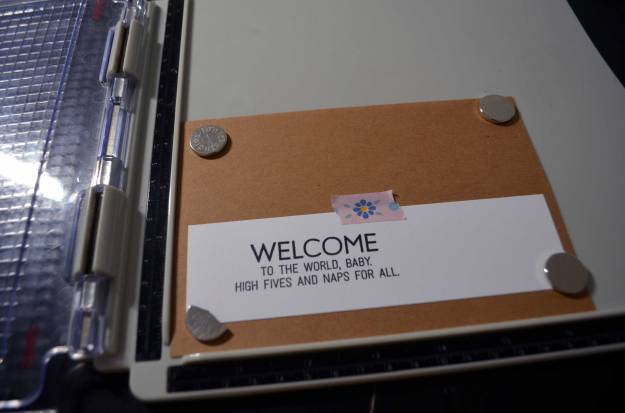
Die Klappkarte mit dem Cardstockstück habe ich in mein Stamp Tool und das Panel darüber gelegt. Alles zusammen habe ich mit Magneten fixiert und den Stempel links ausgerichtet. Dann habe ich mit Memento Tuxedo Black gestempelt.
I inserted the note card with the piece of cardstock into my stamp tool and placed the panel on top. I used magnets to keep everything in place and lined up the stamp on the left edge of the window. I stamped with Memento Tuxedo Black.


Danach habe ich das Cardstockstück mit Flüssigklebstoff angeklebt. Dazu habe ich den Cardstock entlang des Washi Tapes umgeklappt, Klebstoff aufgetragen, den Cardstock erneut wieder zurückgeklappt und festgestrichen.
Next, I adhered the cardstock with some liquid glue. I flipped it over alongside the washi tape, applied the glue, flipped it back and pressed it down.

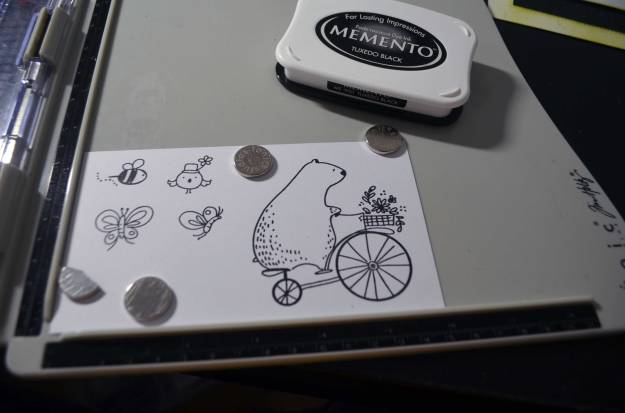
Bär, Schmetterlinge und Biene (und einen Vogel, den ich dann doch nicht verwendet habe) habe ich ebenfalls mit Memento Tuxedo Black auf weißen Cardstock gestempelt. Memento verträgt sich gut mit Alkoholmarkern, da es sich um eine wasserbasierte Dye Ink handelt. Mit Alkoholmarkern habe ich alles koloriert.
I used Memento Tuxedo Black once more to stamp the bear, the butterflies, and the bee (and a bird I didn’t use in the end) onto white cardstock. Memento works great with alcohol markers as it is a water-based dye ink. I used alcohol markers to colour the critters.

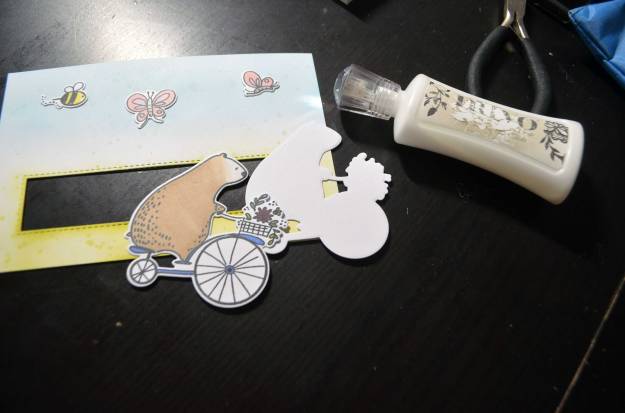
Mit den dazugehörigen Stanzen habe ich die Tiere ausgestanzt, den Bären gleich zweimal, um mehr Dimension zu gewinnen (ich habe die beiden Stanzteile mit Flüssigklebstoff aufeinandergeklebt).
I used the coordinating dies to cut out the critters. I die-cut the bear twice and stacked the die-cuts to create more dimension.
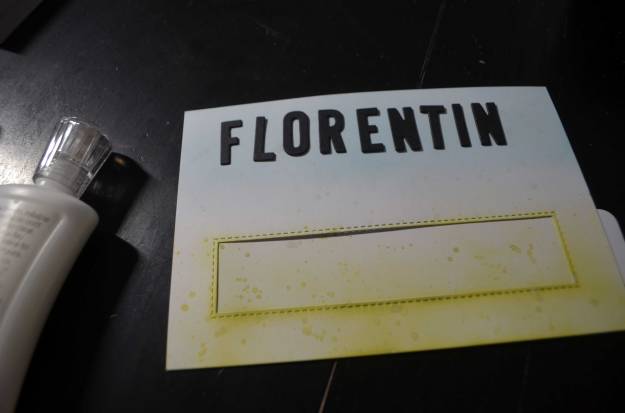
Dann habe ich den Namen aufgeklebt. Damit ich das auch gerade und mit gleichmäßigen Abständen zwischen den Buchstaben schaffe, habe ich die Buchstaben erst mithilfe eines Lineals ordentlich ausgerichtet und dann vorsichtig einen Streifen Washi Tape aufgelegt und angedrückt. So konnte ich dann das komplette Wort auf einmal anheben, umdrehen, auf der Rückseite mit Klebstoff versehen und dann auf dem Panel aufkleben.
Then I adhered the name. To make sure I get it straight and with the right spacing between the letters, I used a ruler to line them up properly. I gently layed a strip of washi tape on top and pressed it down. This way, I was able to pick up all the letters at once, turn them around, apply glue on their back, and adhere them onto the panel.

Um den Bären anzubringen, habe ich ein paar dreidimensionale Klebepads benutzt. Der Bar soll nicht nur fest kleben, er dient auch als Stopper, und die Klebepads machen das erst möglich.
To adhere the bear, I used foam squares. The bear not only needs to be glued down but should also function as a stopper – and this is only possible if you use foam squares.


Zum Schluss habe ich dann das Panel auf die Klappkarte geklebt. Dazu habe ich nur auf die Abstandshaltern Klebstoff aufgetragen.
Finally, I adhered the panel on the note card. I applied glue only on top of the spacers.

Benutzte Materialien / Supplies I Used
Papier / Paper
- Bristol in Weiß für die Tiere (Sakura Manga Paper) / bristol in white for the critters (Sakura Manga Paper)
- Cardstock in Kraftbraun (Joy!Crafts) / cardstock in kraft brown (Joy!Crafts)
- Cardstock in Schwarz (faltkarten.com) / cardstock in black (faltkarten.com)
- Cardstock in Weiß (faltkarten.com) / cardstock in white (faltkarten.com)
- Klappkarte (DIN B6) in Kraftbraun (faltkarten.com) / pre-fold card (DIN B6) in kraft brown (faltkarten.com)
Stanzen / Dies
- Die-namics Slider Channel Builder (My Favorite Things) [Wird leider nicht mehr hergestellt, daher kein Link.] / [Sadly retired, so no link this time.]
- Die-namics Slider Channel Companion Windows (My Favorite Things) [Wird leider nicht mehr hergestellt, daher kein Link.] / [Sadly retired, so no link this time.]
- Happy Day (Waffle Flower)
- Lawn Cuts Cole’s ABCs (Lawn Fawn)
Stempel / Stamps
- Happy Day (Waffle Flower)
- LLD Welcome Baby (My Favorite Things)
Stempelfarben / Inks
- Distress Oxide/Peeled Paint, Tumbled Glass (Ranger)
- Memento/Tuxedo Black (Tsukineko)
Werkzeug & Klebstoffe / Tools & Adhesives
- Big Shot + Platten + magnetische Platte / Big Shot + cutting pads + magentic platform
- Craft Sheet (Ranger)
- dreidimensionale Klebepads (Foam Pads) / foam squares
- Make-up-Bürsten (EMax Design) / make-up brushes (EMax Design)
- Nuvo Deluxe Adhesive (Tonic Studios)
- Paper Trimmer 8,5″/22 cm 160e (Tonic Studios)
- Pinsel / paintbrush
- Schere / scissors
- Sprühflasche / spray bottle
- Stamp Shammy (Lawn Fawn)
- Tim Holtz Stamp Platform (Tonic Studios)
- Washi Tape zum Befestigen / washi tape to secure
- Wendy Vecchi MAKE ART Stay-tion (Ranger)
Farben / Paints & Pens
- Chameleon Color Tones Pens (Chameleon Art Products)
