Geburtstag haben während einer Pandemie ist doof: kein Besuch, keine große Party. Aber zum Glück darf der Postbote eine lustige Karte vorbeibringen – man wird ja nicht alle Tage vier Jahre alt!
Having a birthday during a pandemic sucks: no visitors, no big party. Luckily, the mail carrier is still allowed to deliver a fun card – it’s not like you turn four years every day!
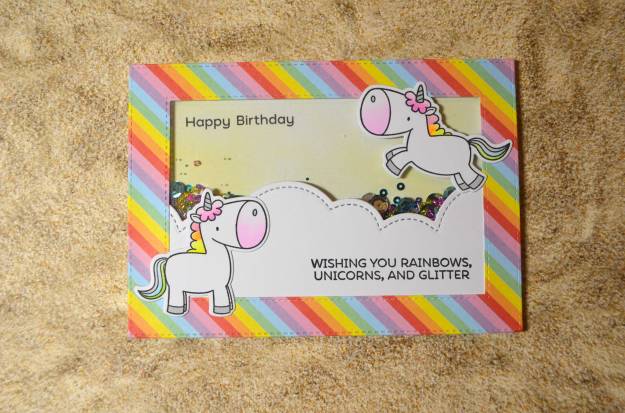
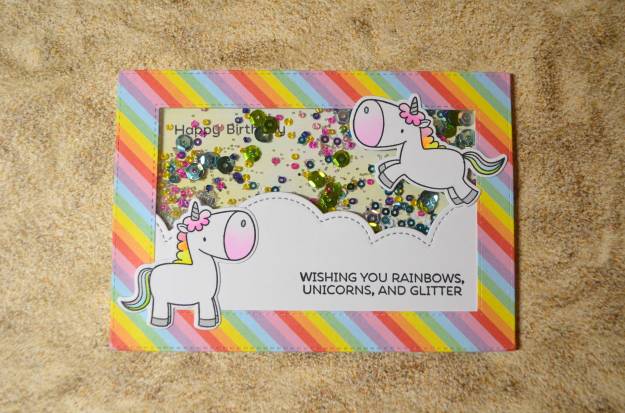
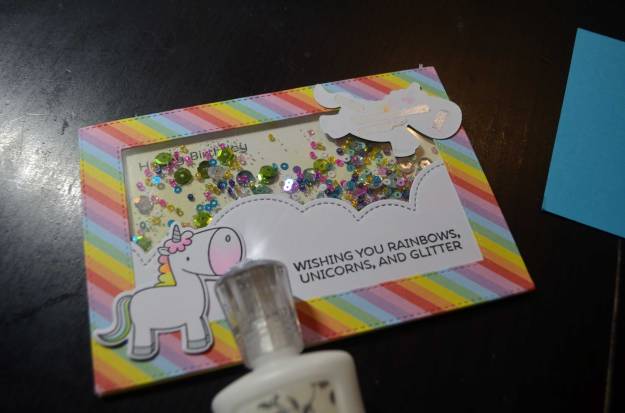
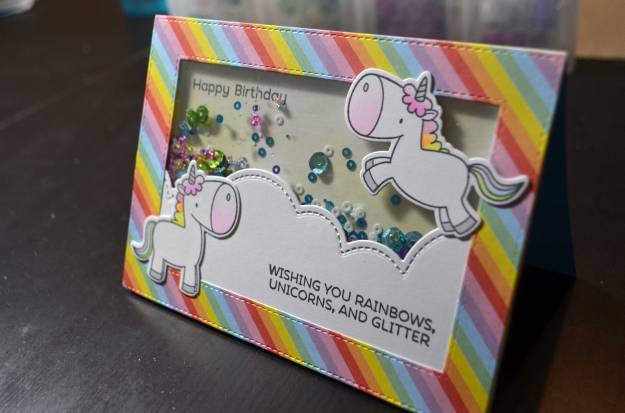
Für die kleine Tochter von guten Freunden habe ich deshalb eine farbenfrohe Shaker-Karte gebastelt, komplett mit Einhörnern, die die Kleine mag.
That’s why I made a colourful shaker card for the daughter of good friends, featuring unicorns which the little one likes.
How to
Zuerst habe ich mittelschweres Designpapier und weißen Cardstock zugeschnitten (etwas mehr als DIN A6).
First, I cut middle-weighed patterned paper and white cardstock to a slightly bigger size than DIN A6 (10,5 x 14,8 cm).
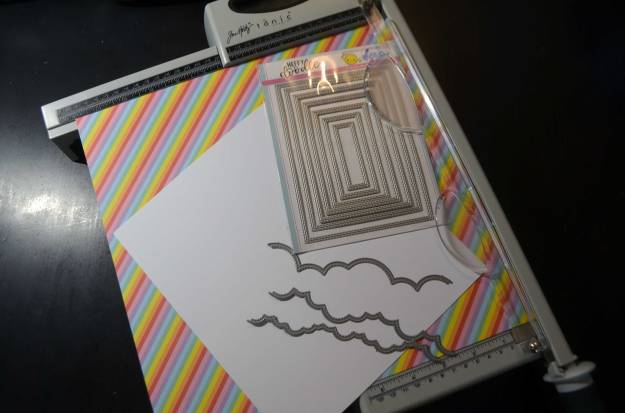
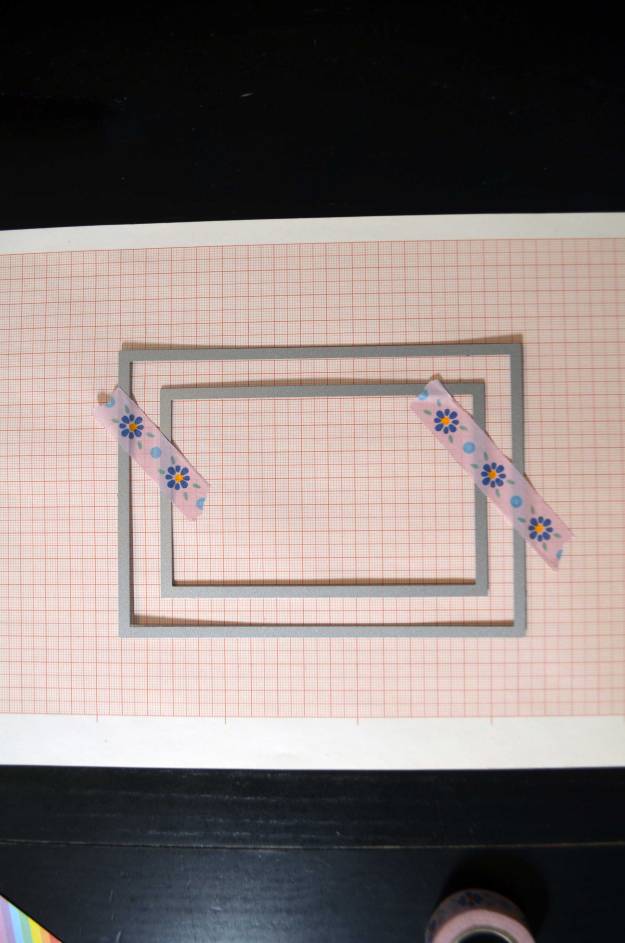
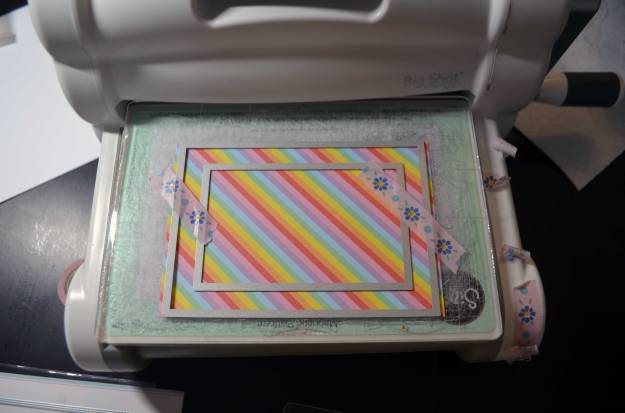
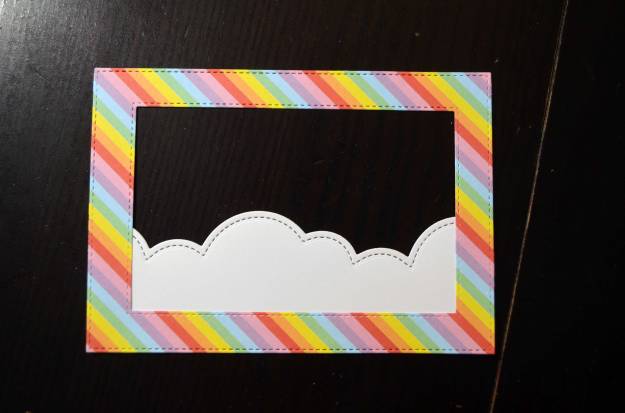
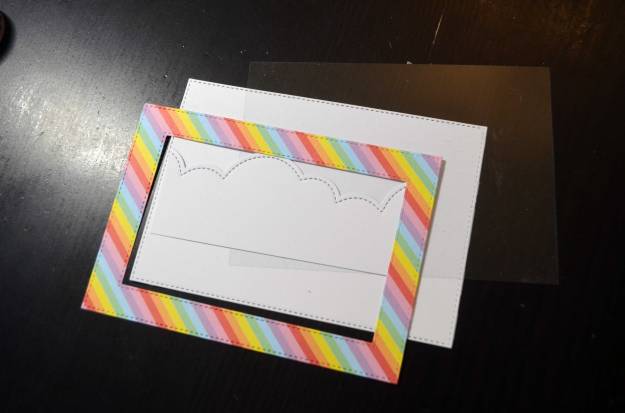
Aus dem Designpapier habe ich einen Rahmen ausgestanzt. Dafür habe ich zwei Rechteckstanzen aus einem Set auf Millimeterpapier ausgerichtet und am Rücken mit ein wenig Washi Tape fixiert.
I die-cut a frame from the patterned paper. I used two rectangle dies from a set to make the frame. A piece of scale paper helped with lining up the two dies, a piece of washi tape kept them in place.
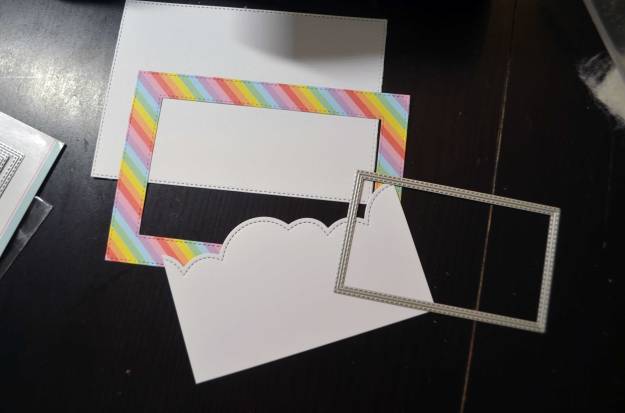
Mit der größeren der beiden Stanzen (genau DIN A6) habe ich aus dem weißen Cardstock den Rücken des Shakerelements geschnitten, und den Rest des Cardstocks habe ich zur Wolkenbank gemacht, indem ich darauf geachtet habe, dass das Stück breit genug ist, um den Rahmen auszufüllen, bevor ich es auf einer Seite mit einer Wolkenrandstanze durch die Big Shot geschickt habe.
I die-cut a rectangle from white cardstock, using the bigger of the two dies (which is exactly DIN A6). From the rest of the cardstock, I cut a cloud bank. I made sure the piece is wide enough to be completely covered by the frame before I sent it through my Big Shot, accompanied by a cloud border die.
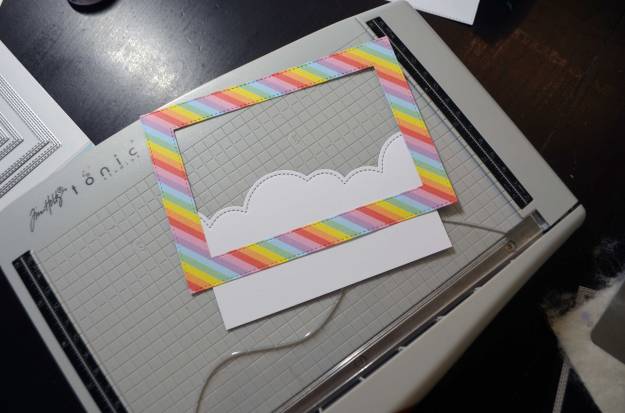
Die Höhe der Wolkenschicht habe ich per Augenmaß bestimmt und den Cardstock an der entsprechenden Stelle mit meiner Papierscheidemaschine gekürzt.
I eyeballed the height of the cloud layer and cut the cardstock to size with my paper trimmer.
Dann habe ich noch ein Stück feste Folie auf DIN A6 gebracht.
I also cut a piece of sturdy acetate to the size DIN A6.
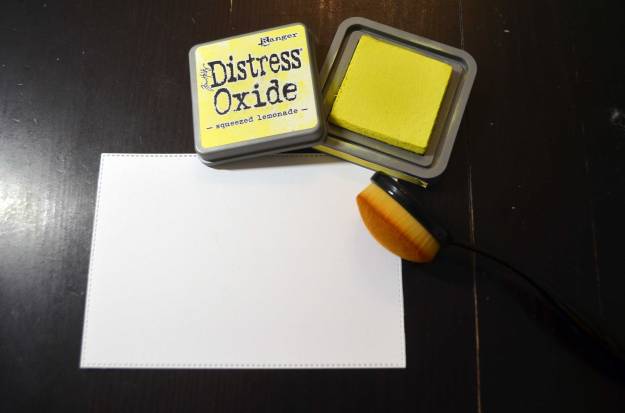
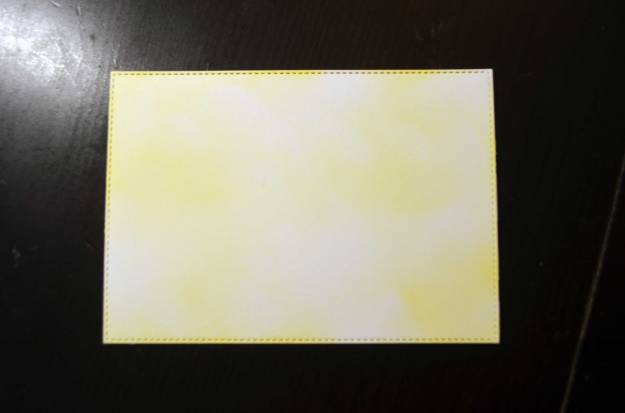
Das Hintergrundstück habe ich mit einer Blending Brush und Distress Oxide Squeezed Lemonade bearbeitet. Ich wollte eine Art wolkigen Himmel machen. Das geht ganz leicht, indem man einfach nur hie und da etwas Farbe mit wenig Druck aufträgt.
I worked with a blending brush and Distress Oxide Squeezed Lemonade on the backdrop. I wanted to create some sort of cloudy sky. That’s very easy: Just randomly apply the ink here and there, with almost no pressure on the brush.
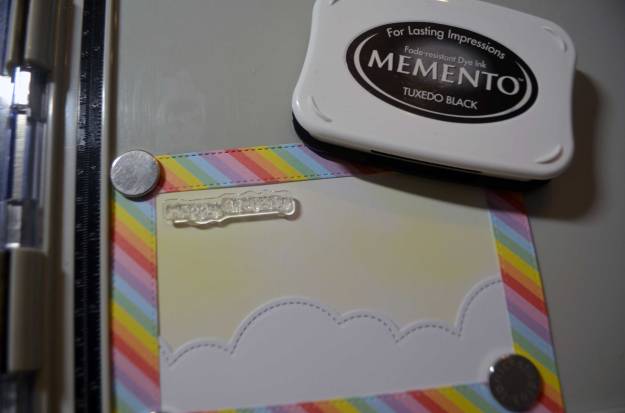
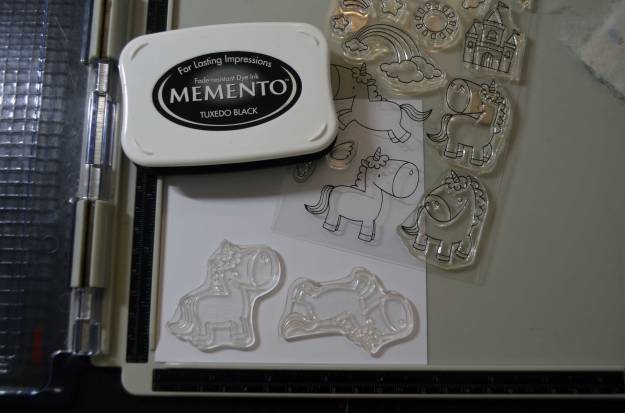
Danach ging’s an Stempeln (mit Memento Tuxedo Black und meinem Stamp Tool): Auf den Hintergrund habe ich ein kleines „Happy Birthday“ gestempelt, auf die Wolken den längeren Spruch, und auf weißen Cardstock zwei Einhörner.
Next, I tackled the stamping part (I stamped with Memento Tuxedo Black and my stamp tool): I stamped a small „Happy Birthday“ on the backdrop, the longer sentiment on the cloud bank, and onto white cardstock two unicorns.


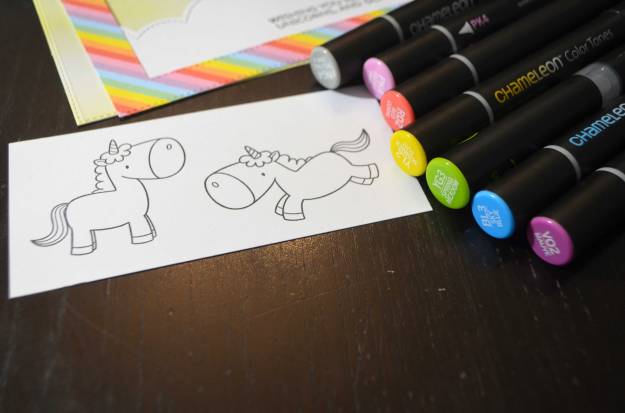
Die Einhörner habe ich mit Alkoholmarkern koloriert und mit den dazugehörigen Stanzen ausgeschnitten.
I coloured the unicorns with alcohol markers and die-cut them with the coordinating dies.

Zum Zusammenbauen des Shakers habe ich drei Arten von Klebemedien verwendet: Flüssigkleber (um den fertigen Shaker auf die Klappkarte und das untere Einhorn auf den Rahmen zu kleben), doppelseitiges Klebeband (um die Folie hinter dem Rahmen und das obere Einhorn auf der Folie zu befestigen) und Abstandsklebeband (um die „Wände“ des Shakers zwischen Folie und Hintergrundstück zu bauen).
In order to assemble the shaker element, I used three kinds of adhesive: liquid adhesive (to glue down the finished shaker onto the note card and one of the unicorns onto the frame), double-sided tape (to adhere the acetate behind the frame and the second unicorn onto the acetate), and foam tape (to build the „walls“ between the acetate and the back piece).

Die Wolkenbank habe ich einfach mit zwei Streifen Washi Tape hinterm Rahmen fixiert, runderherum doppelseitiges Klebeband verteilt und die Folie über alles geklebt.
Two strips of washi tape keep the clouds behind the frame in place. I added double-sided place all around the frame and the clouds and pressed the acetate on top.
 Vom Abstandsklebeband habe ich gleich zwei Lagen rundherum auf der Folie angebracht, um genügend Raum für das Shakermaterial zu schaffen. Damit selbiges nicht bis ganz nach unten fällt, habe ich eine Art Barriere unter den Wolken geschaffen. So braucht man wesentlich weniger Schüttelmaterial.
I added two layers of foam tape all around the acetate to make sure there is enough space for all the stuff I added later on. I also added a barrier just below the clouds. This way, you need a lot less shaking material.

Bevor ich das Schutzpapier des Abstandsklebebands abgezogen habe, bin ich mit meinem Antistatik-Tool einmal über alle Innenränder gegangen. So werden alle Stellen, die später nicht mehr kleben sollen, unklebrig – und das Schüttelmaterial bleibt nicht daran hängen.
Before I removed the backing paper from the foam tape, I used my anti-static tool on all edges inside. This removes unwanted stickiness, and the shaking material won’t get stuck later on.

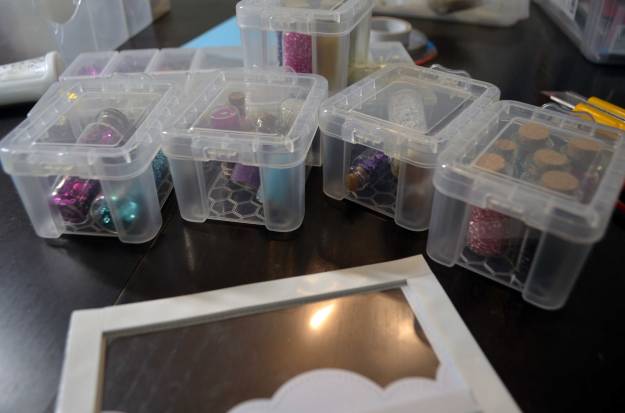
Befüllt habe ich das Shakerelement mit einer großzügigen Menge an verschiedenfarbigen Pailletten, Mini-Pailletten, kleinen und sehr kleinen Perlen. Ich benutze dafür gerne einen speziellen Löffel, der in die kleinen Öffnungen meiner Behälter passt und das Füllen leicht, da kontrolliert macht.
I filled the shaker element with lots of sequins and mini-sequins, little and very little beads. I like to use a special craft spoon for this. It fits into even small containers and it makes filling shaker elements really easy because I have much more control than I would have if I’d just poured.
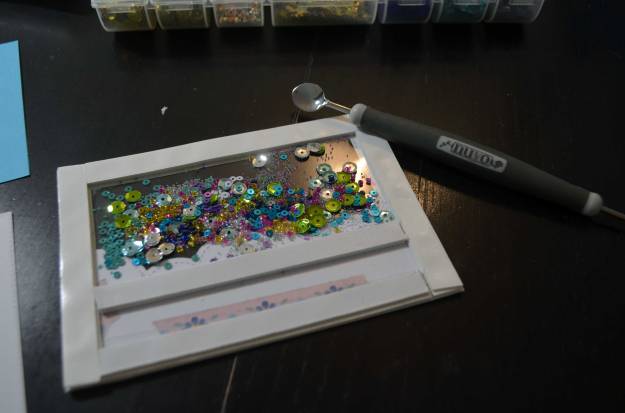
Nach dem Füllen habe ich das Schutzpapier abgezogen, den Boden bzw. den Hintergrund und die beiden Einhörner aufgeklebt.
After I filled the shaker, I removed the backing paper, adhered the back piece resp. the background and stuck down the unicorns.
Zuletzt habe ich den fertigen Shaker auf die Klappkarte geklebt.
Finally, I adhered the finished shaker on the note card.

Benutzte Materialien / Supplies I used
Papier / Paper
- Cardstock in Weiß (faltkarten.com) / cardstock in white (faltkarten.com)
- Designpapier „Back to Basics/Over the Rainbow“ (Dovecraft/Trimcraft Direct) / patterned paper „Back to Basics/Over the Rainbow“ (Dovecraft/Trimcraft Direct)
- feste Folie / sturdy acetate
- Klappkarte in Blau / pre-fold card in blue
Stanzen / Dies
- Die-namics Magical Unicorns (My Favorite Things)
- Lawn Cuts Puffy Cloud Borders (Lawn Fawn)
- Metric Stiched Rectangle Dies (Heffy Doodle)
Stempel / Stamps
- BB Bitty Bears (My Favorite Things)
- BB Magical Unicorns (My Favorite Things)
Stempelfarben / Inks
- Distress Oxide/Squeezed Lemonade (Ranger)
- Memento/Tuxedo Black (Tsukineko)
Werkzeug & Klebstoffe / Tools & Adhesives
- Abstandsklebeband / foam tape
- Antistatiktool / anti-static tool
- Big Shot + Platten + magnetische Platte / Big Shot + cutting pads + magentic platform
- doppelseitiges Klebeband / double-sided tape
- Make-up-Bürsten (EMax Design) / make-up brushes (EMax Design)
- Nuvo Craft Spoon (Tonic Studios)
- Nuvo Deluxe Adhesive (Tonic Studios)
- Paper Trimmer 8,5″/22 cm 160e (Tonic Studios)
- Paper Trimmer 12,25″/31 cm Maxi Guillotine 1980ePaper Trimmer 12,25″/31 cm Maxi Guillotine 1980e (Tonic Studios)
- Schere / scissors
- Stamp Shammy (Lawn Fawn)
- Tim Holtz Stamp Platform (Tonic Studios)
- Washi Tape zum Befestigen / washi tape to secure
Embellishments
- Mini-Pailletten / mini-sequins
- Pailletten / sequins
- Perlen / beads
Farben / Paints & Pens
- Chameleon Color Tones Pens (Chameleon Art Products)
